Most RV sewer hose leaks at the connection trace back to one of a few spots: a worn gasket, a bayonet fitting that isn’t fully seated, a loose hose-to-fitting joint, a bad elbow or adapter seal, damage to the hose wall, or a black tank gate valve that isn’t sealing behind the termination cap. Identify the exact leak point before you replace anything. A leaking gate valve can look exactly like a hose problem, even when the hose itself is fine.
You connect the sewer hose, open the valve, and liquid starts dripping around the connection instead of flowing straight through to the dump station. If your RV sewer hose is leaking at the connection, it doesn’t automatically mean the hose itself has failed. In many cases, one part of the connection is the real problem, and the fix may cost far less than replacing the entire hose.
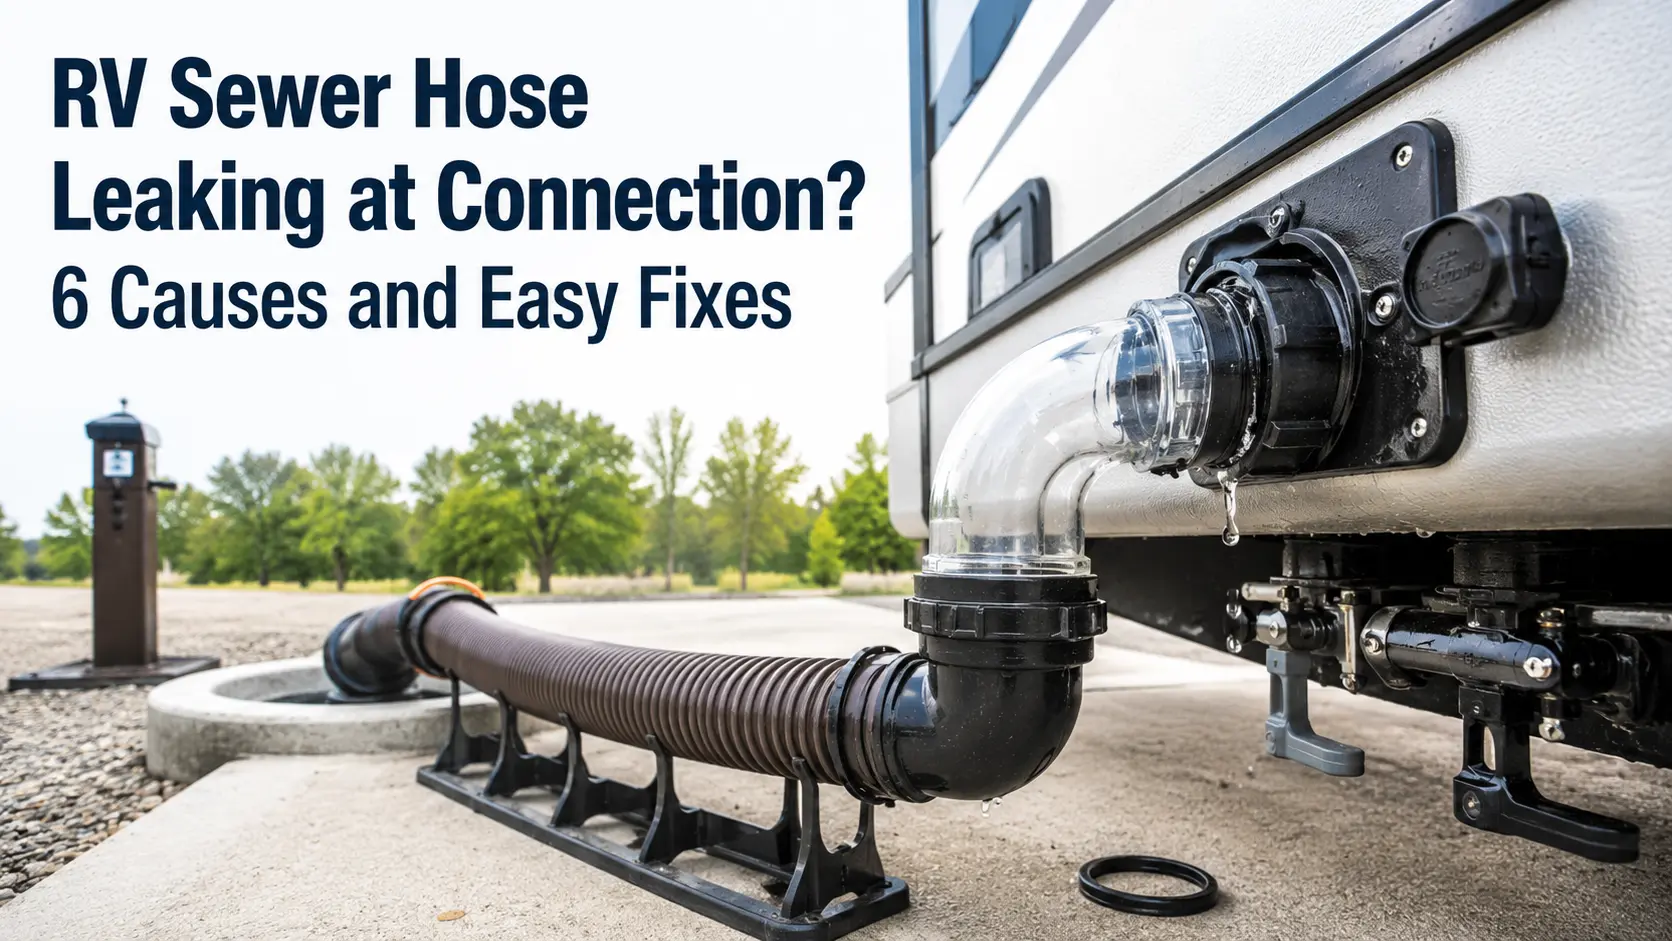
The trouble is that “the connection” isn’t really one part. It’s a chain: the RV waste outlet, a gasket or O-ring, the bayonet fitting, the joint where the fitting meets the hose, sometimes a swivel, the clear elbow, and finally the dump station adapter. A leak can start at any link in that chain, and each one has a different fix.
There’s also a possibility that has nothing to do with the hose at all. If liquid is already sitting behind your termination cap before you connect anything, the leak may be coming from the gate valve itself. This guide walks through each possible leak point so you can find yours before buying a replacement part.
Where Is Your RV Sewer Hose Actually Leaking?
Where the liquid shows up is your first clue. Leaks at the RV outlet usually point to a gasket or bayonet problem. Leaks at the elbow or dump-station end usually point to an adapter or elbow seal. Leaks along the hose body point to physical damage. Liquid that appears before the hose is even connected points to the gate valve, not the hose.
| Where You See the Leak | Most Likely Cause | First Thing to Check |
|---|---|---|
| RV outlet to hose | Missing or worn gasket, or bayonet not fully seated | Inspect the seal and reseat the fitting |
| Around the rotating fitting | Loose or damaged swivel connection | Inspect the hose-to-fitting joint |
| Clear elbow | Elbow gasket or poor seating | Reseat the elbow and check its gasket |
| Dump-station inlet | Adapter or thread issue | Inspect the adapter and connection point |
| Hose body near the fitting | Crack, pinhole, or abrasion | Inspect the hose wall directly |
| Liquid behind the cap before the hose connects | Gate valve not sealing | Inspect the valve, not the hose |
Liquid at the connection is not the same problem as a tank that won’t empty. If your tank is also draining slowly or not at all, that points to a separate set of causes worth checking on their own, covered in our guide to an RV black tank not draining.
It’s also worth ruling out an internal blockage before you assume the connection is the whole story. If waste is piling up under the toilet and barely reaching the outlet at all, you may be dealing with a pyramid clog rather than, or in addition to, a leaking fitting.
Why Is My RV Sewer Hose Leaking at Connection?
A leaking connection usually comes down to a worn or missing seal, a bayonet fitting that isn’t fully locked, a loose hose-to-fitting joint, a failing elbow or adapter gasket, physical damage near the fitting, or a gate valve that isn’t sealing behind the cap. Each cause needs a different fix, so work through the sections below in order.
If your concern actually started because your tank monitor read full even after you dumped, that’s usually not a connection leak at all. Residue on the sensor probes is the more common explanation, and our guide to a black tank sensor that reads full after dumping covers how to tell the difference.
Fix 1: Inspect the Gasket or O-Ring First
A worn, missing, or twisted gasket is a common first place to check, though it isn’t automatically the cause every time. The gasket sits inside the bayonet or elbow fitting and creates the seal when the fitting locks into place.
Look for a gasket that has fallen out entirely, one that’s dried, cracked, or flattened, one twisted out of its groove, or debris on the sealing surface. Any of these lets liquid seep past even when the fitting looks properly connected. One RV Forum member troubleshooting this symptom was told the O-ring on the female side had likely gone missing or worn out, an example of this failure, though not proof every leak has the same cause.
To reseat a gasket, pull the fitting apart, wipe the sealing surface clean, and make sure the gasket sits flat in its groove before reconnecting. If it’s damaged or missing, replace it. Camco’s fitting gasket kit is documented as compatible with RhinoFLEX, Revolution, and Easy-Slip fittings specifically. It isn’t a universal fit for every brand, so match it to your fitting type first.
Don’t reach for whatever grease is in the toolbox. A parts specialist supporting Camco’s RhinoFLEX line recommends a silicone-based lubricant for the seals and O-rings on these fittings rather than a generic petroleum-based grease. If you have a different brand of hose, check that manufacturer’s own guidance before applying anything to the seal.
Fix 2: Disconnect and Reseat the Bayonet Fitting
The bayonet fitting is the twist-on connector at the RV end of the hose. It uses small hooks that turn and lock onto matching lugs on the RV’s waste outlet, and it needs to rotate all the way into the locked position to seal properly.
A partially seated bayonet is another common issue worth checking, according to one RV parts retailer’s troubleshooting guide. If the fitting isn’t turned fully into place, or dirt is sitting in the hooks or lugs, the seal won’t close evenly around the gasket.
Disconnect the fitting, clear dirt from the hooks and lugs, and reconnect with a deliberate full twist until it stops. A properly seated bayonet feels snug and resists a light pull; it shouldn’t wiggle or spin freely. If the hooks are bent or cracked, or the outlet lugs are worn, reseating won’t fix it, and the fitting or outlet hardware needs replacing.
Fix 3: Check the Hose-to-Fitting Joint
Not every sewer hose fitting attaches to the hose the same way, and that affects whether a leak here is repairable. Three designs show up across brands: a screw-on locking-ring joint you can tighten or rebuild, a permanently glued joint with no serviceable parts, and a swivel fitting that rotates independently of the hose.
On a locking-ring design, a leak here is often just a loose collar. One forum owner troubleshooting this on a Rhino-style hose described backing off the ring, pushing the hose fully into the fitting, and retightening, which resolved the leak. That’s one owner’s repair example, not a guarantee it works on every hose.
On a glued joint, there’s no ring to loosen and no serviceable part to reseat. Owners discussing this on My Grand RV’s forum report that once a glued fitting leaks or separates, no factory replacement end is available, which limits you to a DIY repair or replacing that length of hose. Owners on a separate T@B forum thread note that Camco has sold the same hose line with either glued or locking-ring fittings under different SKUs, so confirm which type you have before deciding on a fix.
Fix 4: Inspect the Clear Elbow and Dump-Station Adapter
Treat the RV-side connection and the dump-station-side connection as two separate problems. A leak at the campground sewer inlet doesn’t mean anything is wrong at your RV’s outlet, and the reverse is also true.
At the clear elbow, check the same things as the bayonet fitting: a seated gasket, a fully locked connection, and no visible cracks. The clear body makes it easy to spot liquid pooling inside during a dump, which usually means the seal isn’t sitting flat.
At the dump-station end, check the adapter for cracked plastic, worn threads on a threaded design, or an adapter that isn’t fully seated in the inlet. A worn or damaged dump-station inlet can also cause a poor seal here, which is outside your control but worth ruling out before you blame your own gear.
Fix 5: Inspect the Hose for Damage Near the Connection
Damage to the hose wall itself, especially near the fitting, needs a different fix than a seal problem. Check the last several inches of hose closest to each end for pinholes, abrasion marks, splits, or cracks.
This area takes more stress than the rest of the hose because it bends repeatedly around the fitting every time you connect and coil it. Combined with UV exposure and dragging across gravel, that repeated bending is a common way hoses develop weak points right at the connection.
A pinhole or crack in the hose wall isn’t something a new gasket will fix. If the damage is isolated to one end and your fitting design allows it, you can cut back the damaged section and reattach a serviceable fitting. If the hose is brittle or cracked in multiple places, patching isn’t reliable for a wastewater line, and replacement is the safer call.
Fix 6: Make Sure the Gate Valve Isn’t Actually Leaking
If liquid is already present behind your termination cap before you connect the sewer hose at all, the hose cannot be the source. That points to your black or gray tank’s gate valve not sealing fully, a separate mechanical issue from anything happening at the hose connection.
RV owners troubleshooting this scenario have reported finding a small amount of waste behind the cap even with the valve confirmed closed, which they traced to the valve rather than the hose or cap. A dedicated troubleshooting guide on gate valve leaks lists debris caught in the seal and dried-out seals as the two most frequently cited causes, with a damaged gate or cracked valve body as a less common possibility.
Diagnosing and repairing the valve is a bigger job than anything covered here, since it usually means accessing it from the underbelly and possibly disassembling it. Our full guide to a stuck black tank gate valve walks through diagnosis and safe lubrication if this matches what you’re seeing.
Can You Temporarily Stop an RV Sewer Hose Connection Leak?
There isn’t a dependable temporary fix for a wastewater connection, and that’s worth accepting up front rather than improvising something that might fail mid-dump. A sewer hose connection carries raw waste, and an untested workaround at the wrong moment means a mess you don’t want to clean up.
If you’re stuck at a dump station with a leak, don’t keep the valve open and work around the drip. Close the tank valve to stop the flow, then reseat or repair the connection before opening the valve again. Go RVing’s own dumping guidance is built around this same order of operations: confirm the connection is secure first, and only then open the valve.
If you’re carrying a spare gasket or O-ring, swap it in before you try again. Don’t rely on tape or sealant on a bayonet or gasket-sealed connection unless the specific fitting manufacturer explicitly instructs it for that part, since these connections are designed to seal through the gasket and a locked fitting, not through an added wrap.
If you do attempt any fix on the road, test it with clean water first if you can, before trusting it with a full black tank. A leak that seems to stop under a light trickle doesn’t always hold under full flow.
When Should You Replace the Entire Sewer Hose?
Replacement makes more sense than repair once the hose wall itself is compromised or the fitting has failed in a way that can’t be serviced. That includes a cracked or thinned hose wall, a permanently glued fitting that has separated and has no replacement part, a bayonet fitting with damaged hooks that won’t seat regardless of cleaning, or multiple leak points showing up across the same hose.
If you’re at that point, our best RV sewer hose guide compares current kits on wall thickness, fitting type, and storage size, so you can pick a replacement that fits how often you actually dump.
How to Prevent Connection Leaks Next Time
A few habits do more to prevent connection leaks than any product. Inspect the gasket and fitting before every trip, not just when something starts dripping. Reseat the bayonet with a full, deliberate twist every time instead of a quick partial turn. Avoid forcing a fitting that won’t seat, since forcing it usually damages the hooks or lugs instead of fixing anything.
Use a hose support to keep the hose off gravel and concrete, and avoid letting the fitting bear the hose’s full weight.
Rinse the sewer hose after dumping when an approved rinse-water source is available, then let it drain and store it properly. If your RV has a built-in flush system, our guide to the RV black tank flush system covers how to use it without flooding anything.
Regular black tank maintenance is a separate topic from a mechanical connection leak, but the two often get lumped together. Keeping up with routine RV toilet treatment supports normal tank health between dumps. It won’t fix a leaking gasket or a cracked hose, but it pairs well with the inspection habits above.
Frequently Asked Questions
Why does my RV sewer hose leak where it connects to the RV?
The first places to check are a worn or missing gasket, a bayonet fitting that isn’t fully seated, or a loose hose-to-fitting joint. Work through each one in order, and don’t rule out the black tank gate valve if liquid appears even before you connect the hose.
Do RV sewer hose connections have gaskets or O-rings?
Yes. Standard 3-inch bayonet fittings and clear elbow fittings both rely on a rubber gasket or O-ring to create a seal when the fitting locks into place. A missing, worn, or twisted gasket is a common reason a properly connected fitting still leaks, though it’s worth checking the rest of the connection too if a new gasket doesn’t solve it.
Why does my RhinoFLEX leak at the connection?
There’s no verified evidence of a widespread defect across the RhinoFLEX line. Owner reports online describe a mix of causes, including missing gaskets, fittings not fully seated, and on newer glued-fitting versions, occasional leaks at the glue joint itself. Camco has sold this hose with both glued and locking-ring fittings under different SKUs, so identifying which version you have is the first step before troubleshooting further.
Can I replace an RV sewer hose gasket?
Yes. Replacement gasket kits are sold for common bayonet and elbow fittings, including options documented as compatible with RhinoFLEX, Revolution, and Easy-Slip hoses specifically. Confirm your exact fitting type before buying, since gaskets aren’t universally interchangeable across every brand.
Why does my sewer connection still leak with a new gasket?
A new gasket won’t fix a leak if the real cause is somewhere else, such as an incompletely seated bayonet, a damaged hose wall near the fitting, or a gate valve leaking behind the cap that only looks like a connection problem. Work back through the diagnosis table near the top of this guide if a fresh gasket didn’t solve it.