- Dump the black tank first, then the gray tank. Close both valves when the flow stops.
- Disconnect the RV end while keeping the sewer end securely in the approved drain.
- Use a dedicated non-potable rinse source where allowed. Never use your drinking-water hose.
- Drain the hose, rinse fittings over the inlet, and store the hose separately with compatible caps or a leak-resistant bin.
- Wash your hands afterward. Rinsing removes residue but does not disinfect the hose.
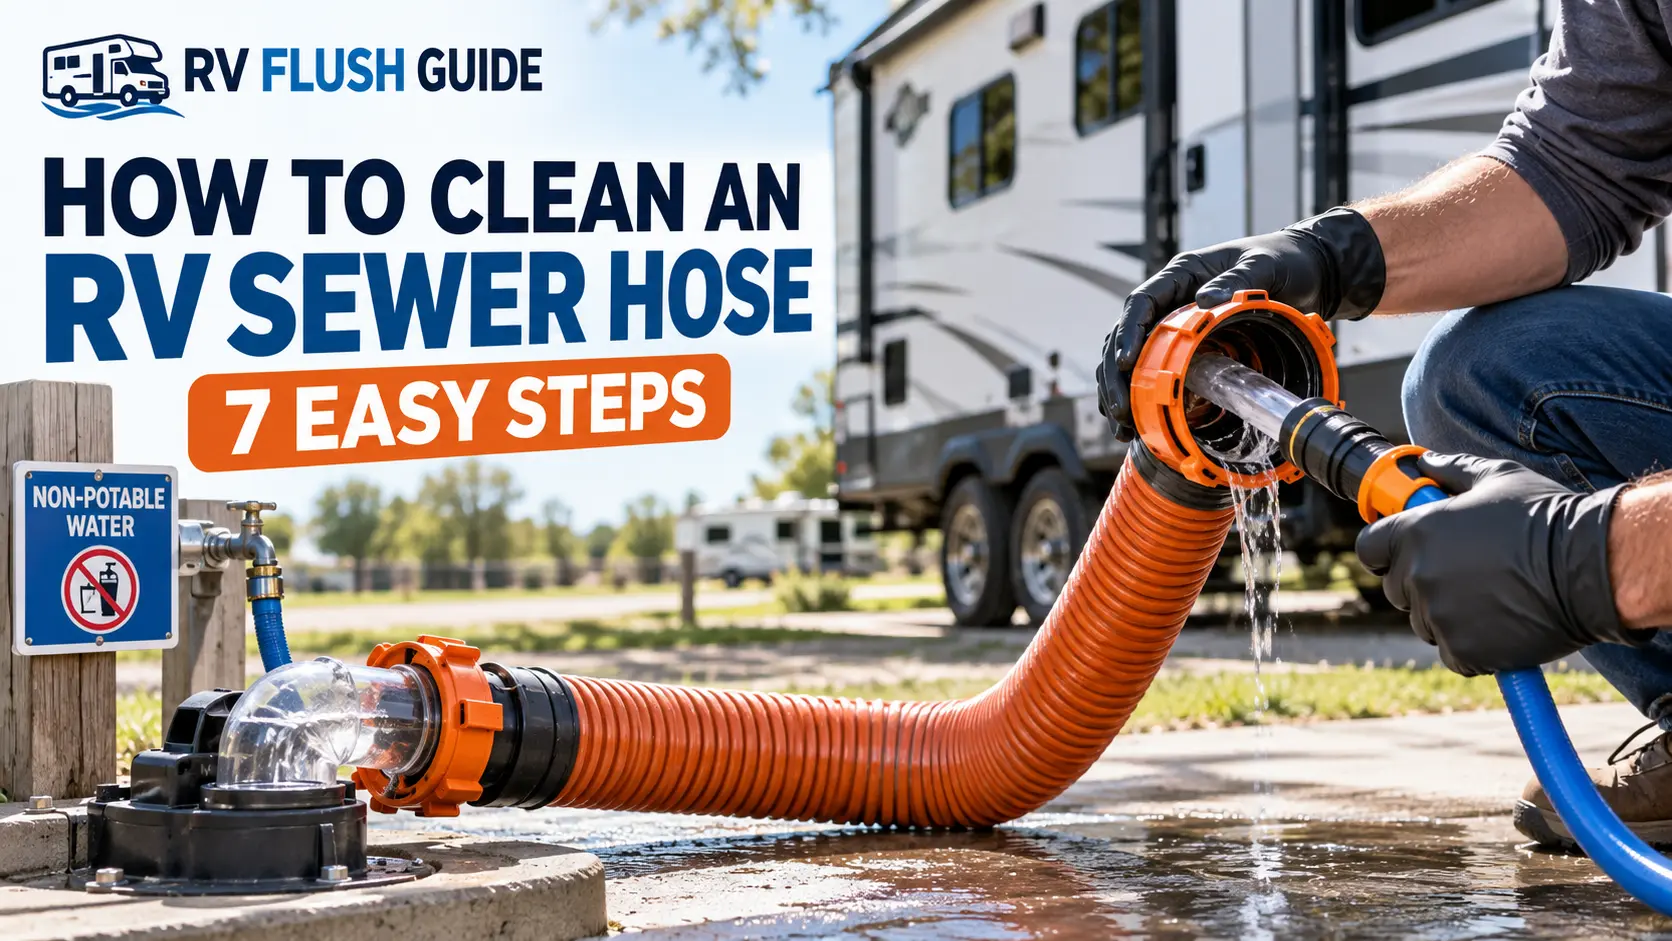
You’ve just emptied your tanks, and now you’re holding a hose with sewage residue inside it. Knowing how to clean RV sewer hose gear takes only a few extra minutes: rinse it with non-potable water while it still drains into the sewer inlet, then cap it and store it by itself. That keeps odor out of your storage bay and sewage away from your drinking-water equipment.
How to Clean RV Sewer Hose After Dumping
Follow these steps in order. The sewer end stays in the inlet until the hose is empty, so wastewater only goes into the approved drain.
1. Put On Gloves and Check Your Setup
Put on waterproof gloves before you touch the hose, valves, or fittings. The CDC’s guidance for people who handle sewage recommends waterproof gloves and avoiding touching your face, mouth, eyes, or nose while you work.
Then check what rinse water is available (see Step 4) and confirm the sewer end of the hose is still seated in the inlet.
2. Finish the Dump With Gray Water Last
When you dump both tanks, the gray tank goes last so its water helps flush black tank residue out of the hose. An Oregon RV waste disposal guide published by the City of Bend gives the same advice. That gray-water pass is your first rinse.
Our full tank-dumping sequence covers valve order and built-in flush systems, so this guide doesn’t repeat them.
3. Close Both Valves, Then Disconnect Only the RV End
Confirm both tank valves are fully closed. Lift the RV end of the hose so leftover liquid runs toward the inlet, then twist the bayonet fitting off the RV’s sewer outlet and replace the outlet cap right away.
Leave the other end in the sewer inlet. Camping World’s sewer hose care guide uses the same order, finishing the rinse before the downstream end comes out.
4. Rinse Through the Open End With Non-Potable Water
Hold the open RV end up and run water into it at a moderate flow, or attach a rinse cap, which locks onto the hose’s bayonet fitting and sprays water inside. Rinse until the water in your clear elbow looks clean, and keep your face out of the splash path.
Where the rinse water comes from: Rinse only where the dump station or campground allows it, and only from an outlet set aside for sewer cleanup. Under Indiana’s dumping station standards, for example, the station’s water outlet is meant for flushing the drain pad, must carry an "UNSAFE FOR DRINKING" sign, and must have backflow protection. The outlet is meant for station cleanup, not drinking water. Rules vary by state, so read the posted signs. If you’re unsure whether an outlet is meant for sewer use, ask. Never connect sewer equipment to a drinking-water spigot.
Use dedicated equipment: Rinse with the station’s hose or one you use only for sewer work, marked with a distinct color or label, never your drinking-water hose. That separation also protects the equipment used when you sanitize your RV’s fresh-water tank. The Oregon guide calls for a tank flushing device rather than a potable water hose, and Camping World warns against feeding a rinse cap from your fresh water hose.
Why backflow protection matters: Backflow happens when pressure drops and dirty water gets pulled backward into a clean water line, which is why Indiana requires an atmospheric vacuum breaker on the dump station’s water outlet. Some tank rinsers include their own protection, such as the anti-siphon valve Valterra lists on its Flush King and the built-in vacuum breaker Camco describes on its Rhino Blaster. Don’t assume a basic rinse cap has one, and keep any rinse nozzle out of the dirty water inside the sewer hose.
5. Drain the Hose Toward the Sewer Inlet
Turn the water off. Starting at the RV end, lift the hose section by section and walk toward the inlet so the remaining water runs out. A low spot left in the middle holds dirty water that will drip out in storage.
6. Disconnect the Sewer End and Rinse the Fittings
Once the hose is empty, release any threaded or secured adapter according to its design. Ease the elbow up out of the inlet slowly, keeping its opening over the approved drain to catch the last drips. Hold it just above the inlet and rinse the elbow and any adapter with a gentle stream from the same non-potable source, so the water runs into the drain instead of bouncing onto the pad. Then close the inlet cap.
If anything spilled, rinse it into the drain before you leave, as Indiana’s posted disposal instructions direct.
7. Cap the Ends, Stow the Hose, and Wash Your Hands
Use compatible caps on both hose ends or contain the drained hose in a dedicated leak-resistant bin, then stow it. Peel off your gloves without touching their outer surface, throw them away, and wash your hands with soap and water. The CDC says to wash right after handling sewage and immediately after removing protective gear. Gloves reduce contact, but they don’t replace handwashing.
What If the Dump Station Has No Rinse Water?
Rinse while the hose is still connected at both ends. Use saved gray water first. If the gray tank is empty, add water to it from your sinks and drain it through the hose. With no water at all, drain, cap, and seal the hose until you reach an approved station.
Tank water only reaches the hose while the hose is connected, so decide this before Step 3. Once you disconnect, adding water to a tank won’t rinse the hose.
For an empty gray tank, keep the hose connected and both valves closed, run a few gallons from a sink into the tank, then open the gray valve and close it once the flow stops. This uses your fresh water, so check your level first. Camping World’s guide to dumping RV waste alone also describes running water down the sinks and toilet with the hose connected, and our RV gray water tank guide explains how that tank fills and drains.
With no water to spare, drain and cap the hose, then seal it in its bin or a heavy trash bag until you reach a station that allows rinsing. The Oregon guide says never to drain wastewater onto the ground or into a storm drain.
What Do You Need to Clean an RV Sewer Hose?
You need disposable waterproof gloves and a dedicated rinse hose that never touches your drinking-water gear. A rinse cap, a clear elbow, and storage caps make the job cleaner, but they aren’t required.
| Item | Essential or Optional |
|---|---|
| Waterproof gloves | Essential |
| Dedicated rinse hose | Essential, unless the station supplies one |
| Storage tube or sealed bin | Essential |
| Clear elbow | Optional, shows when rinse water runs clean |
| Rinse cap | Optional, sprays inside the hose with less splash |
| Storage caps | Recommended; use compatible end closures or a leak-resistant container |
Do You Need to Sanitize an RV Sewer Hose?
We found no manufacturer or health agency guidance calling for disinfecting a sewer hose after every dump. A thorough rinse is the standard advice. Rinsing removes residue but doesn’t disinfect. If you choose to disinfect, check with your hose maker first, use one product only, follow its label, and never mix bleach with other cleaners.
Rinsing flushes residue out with water, cleaning adds soap or scrubbing, and disinfecting uses a chemical to kill germs. We found no published guidance on how bleach affects hose walls and gaskets, so this guide gives no bleach ratio or soak time.
If you do disinfect, follow the CDC’s bleach safety instructions: never mix bleach with ammonia or any other cleaner, wear gloves and eye protection, and avoid breathing the fumes. The Oregon guide also advises against using bleach in a waste disposal system because it can damage the system, so ask the campground or dump station first.
How to Clean RV Sewer Hose Fittings and Connectors
Step 6 covers the routine rinse at the dump station. If a fitting needs more than that, clean it only where the water drains into an approved sanitary sewer, never in a kitchen sink or anywhere food is prepared.
Check each gasket while you’re at it. A flattened, cracked, twisted, or missing gasket will leak on your next dump. Our guide to worn gaskets and fittings covers reseating, replacement, and which lubricant is safe for the seals. Wipe grit out of the bayonet hooks too, so the fitting locks fully next time.
How Do You Dry and Store an RV Sewer Hose?
Drain the hose as completely as you can, cap both ends, and store it in a dedicated sewer hose compartment, tube, or bin, away from fresh water hoses, water filters, and kitchen gear. Getting the inside fully dry often isn’t practical at a dump station.
We found no hose manufacturer requirement to dry the hose before storage. Camping World does recommend drying it between trips, since a wet hose closed up in storage can grow mold or mildew. A reasonable compromise is to drain and cap it at the station, then air it out when you can. Keep the elbow, adapters, and caps with the hose.
Common RV Sewer Hose Cleaning Mistakes
- Lifting the elbow before the hose is empty. Leftover water spills onto the pad. Drain first, then lift the elbow over the inlet.
- Spraying hard into the hose. High pressure splashes back toward your face and onto the pad. A moderate flow does the job.
- Dragging the hose. Gravel and concrete wear the wall thin. A sewer hose support keeps it off the ground while connected.
When Should You Replace an RV Sewer Hose Instead of Cleaning It?
Replace the hose when the wall has pinholes, cracks, splits, or brittle spots, when a glued fitting separates, or when leaks show up in more than one place. Cleaning won’t fix a damaged wall, and patching isn’t a reliable fix for a wastewater line.
There’s no fixed schedule, so inspect the hose each time you clean it, especially near the fittings. A gasket leak may only need a part. For a failing wall, our sewer hose comparison can help you choose a replacement.
Conclusion
Cleaning an RV sewer hose comes down to order and water source. Keep the sewer end in the inlet until the hose is empty, rinse only from a designated non-potable outlet with dedicated equipment, and wash your hands when you’re done.
Before your next hookup, inspect the hose and gaskets as part of connecting your camper to sewer.
Frequently Asked Questions
Can I rinse my RV sewer hose at home?
Only if the rinse water goes straight into a sanitary sewer connection you’re permitted to use. Never rinse a sewer hose onto a lawn, a driveway, or into a storm drain. Without an approved connection at home, rinse it at a dump station instead.
How often should you clean an RV sewer hose?
Rinse it after every dump, before it goes into storage. We found no manufacturer schedule for deeper cleaning or disinfecting, so check for odor, residue, and damage each time you put it away.