TL;DR: Your RV black tank flush system is a built-in rinse port that sprays pressurized water inside the tank after you dump. It clears leftover waste, keeps sensors accurate, and cuts down on odors. Not every RV has one, but aftermarket rinsers and wand attachments can do the same job. This guide covers how the rv black tank flush system works, the correct step-by-step process, and what to do when something goes wrong.
You just dumped your black tank. You followed all the steps. You drove home and everything smelled fine.
Two days later, your RV bathroom smells like something went wrong in there, and your tank sensors are still stuck reading “2/3 full.”
Sound familiar?
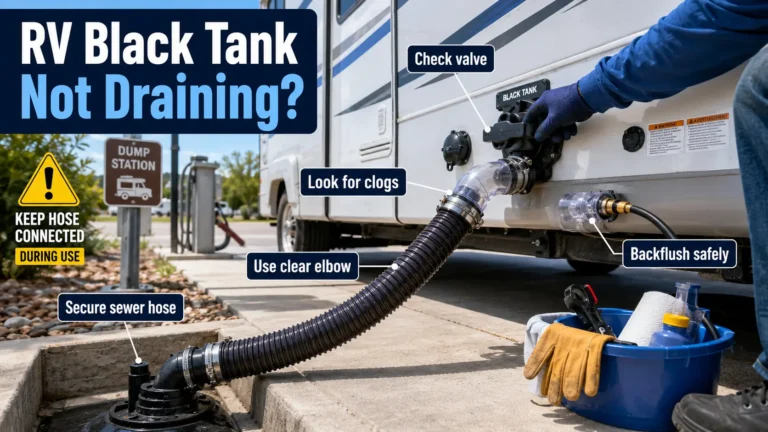
Most RV owners know there’s a separate inlet port near the sewer connection. But knowing it exists and knowing how to use the rv black tank flush system correctly are two completely different things. Use it in the wrong order and you risk an overfilled tank. Skip it entirely and you’re setting yourself up for odor problems, sticky sensors, and eventually a clog you really don’t want to deal with.
This guide covers everything: what the system actually does, the exact step-by-step process, what to do if your rig doesn’t have one, and how to troubleshoot it when it stops working
What Is an RV Black Tank Flush System?
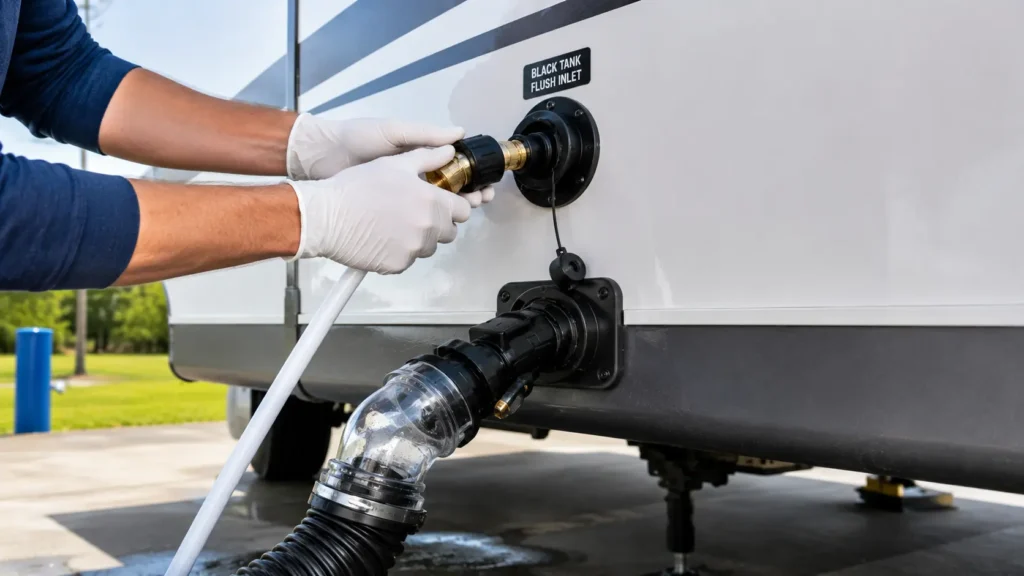
An RV black tank flush system is a built-in water inlet port that connects to a dedicated non-potable rinse hose and sprays pressurized fresh water inside your black holding tank. It rinses waste residue off the tank walls, clears buildup from sensor probes, and washes out whatever didn’t drain during the dump.
It is separate from your drinking water connection. It is separate from your toilet. And it is one of the most underused tools on an RV.
According to The RV Geeks, the system has three main components:
- The inlet valve: the exterior port where you connect your rinse hose
- The vacuum breaker (backflow preventer): a safety valve that keeps tank waste and gases from traveling back into your water supply
- The tank sprayer nozzle: a fitting mounted inside the tank, usually near the top wall, that sprays water in multiple directions
All three parts have to be working for the system to do its job. When one fails, the other two can’t compensate.
How Does a Built-In Black Tank Flush System Work?
When you connect a hose to the flush inlet and turn the water on, pressurized water travels through the vacuum breaker and into the tank sprayer nozzle. The nozzle shoots water across the inside walls of the tank, loosening stuck waste, coating sensor probes with clean water, and pushing residue toward the drain outlet.
According to RV Travel Life, the system works best with the dump valve fully open. When the valve is open, rinse water flows straight through and carries loosened waste out through the sewer hose. You run it until the outflow water runs clear, which typically takes 2 to 3 minutes.
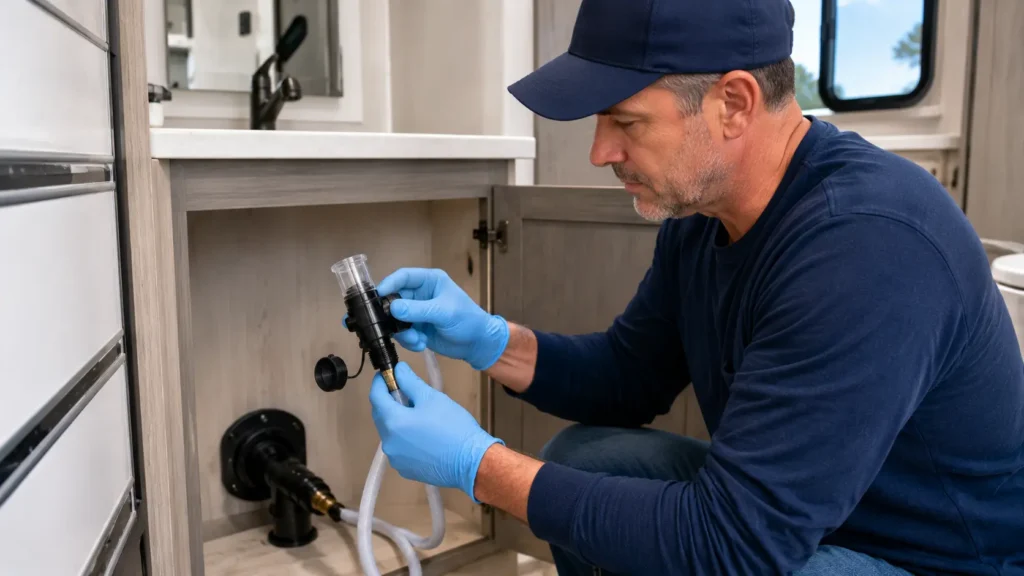
The vacuum breaker is the component most people never think about until it fails. Its job is to prevent contaminated water, tank gases, and waste from traveling backward through the hose and into your fresh water supply. It is a small part, but it is doing important work every time you flush.
Does Your RV Have a Built-In Black Tank Flush System?
Many newer RVs include a built-in black tank flush system, but not every RV has one. The easiest way to check is to look for a separate exterior inlet labeled “Black Tank Flush” or “Tank Rinse” near the sewer connection panel on the outside of your rig.
It looks like a small capped water inlet port, usually within a foot or two of the sewer outlet.
Newer RVs are more likely to have one, but plenty of budget, compact, older, or entry-level rigs may not. If your RV came with a single water hookup and nothing labeled “flush” near the sewer panel, you probably don’t have a built-in system. That’s okay. There are solid aftermarket options covered below.
How to Use Your RV Black Tank Flush System (Step-by-Step)
Most mistakes happen because of the wrong order, not the wrong technique. Follow this sequence every time without skipping steps.
Step 1: Connect your sewer hose first. Get the sewer hose connected and seated at the dump station before you do anything else.
Step 2: Open the black tank gate valve and dump the tank. Let the tank drain fully before starting the rinse. Running the flush on a full tank is a fast path to overfilling it.
Step 3: Keep the black tank gate valve open. Leave it open for the entire rinse. This is the single most important step in the whole process.
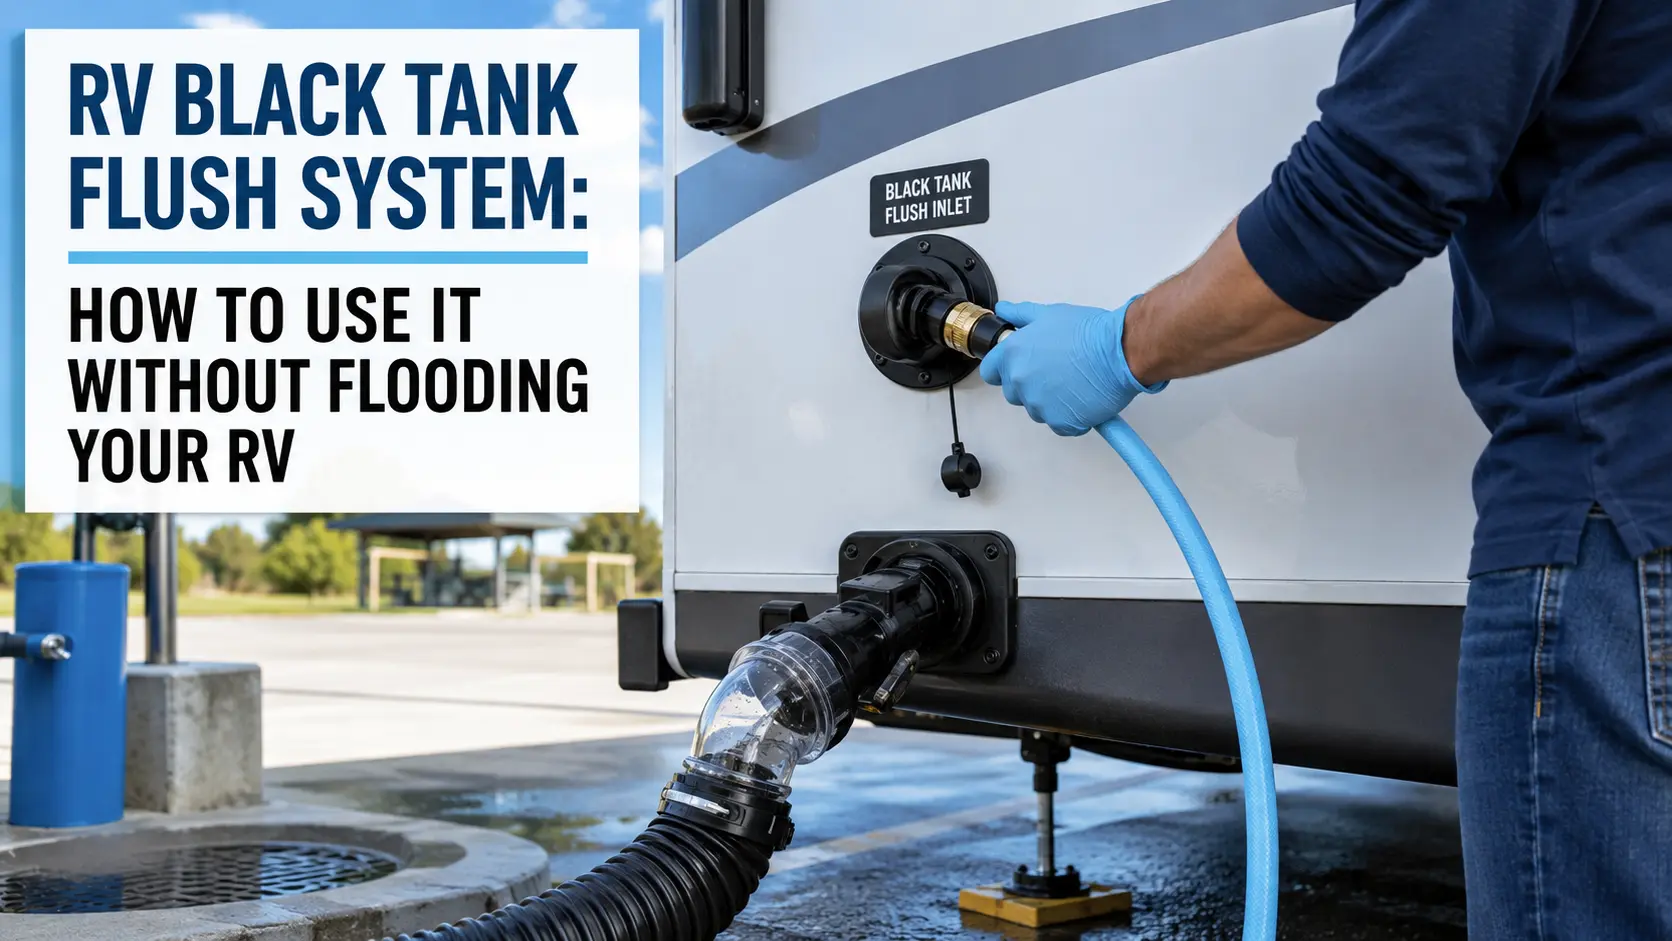
Step 4: Connect your dedicated non-potable rinse hose to the black tank flush inlet. This hose should never touch your drinking water connection. Camping World recommends using a different-colored hose to prevent any mix-up at a busy dump station.
Step 5: Turn the water on.
Step 6: Watch the outflow. Run the rinse until the water coming out through the sewer hose runs clear. This usually takes 2 to 3 minutes. Don’t rush it.
Step 7: Turn the water off before disconnecting anything.
Step 8: Let the tank finish draining. Give it 60 seconds after you cut the water off.
Step 9: Close the black tank gate valve.
Step 10: Add a few gallons of fresh water back through the toilet. This gives your tank treatment something to work with and helps prevent solid waste from drying out between trips.
⚠️ Never walk away while the black tank flush is running. If the gate valve is closed and you forget the water is on, the tank can overfill and back up through the toilet seal into the bathroom. Stay present the entire time.
A note on the “pulse method”: Some experienced RVers briefly close the gate valve during rinsing to let water build up inside the tank, then open it again to create a stronger surge. RV Troop describes this technique as effective for dislodging stubborn residue. Only try it if you are standing there watching, you know your tank capacity, and you understand the risk. If you are new to RVing, keep the valve open the entire time.
What If Your RV Doesn’t Have a Built-In Flush System?
If your RV has no built-in flush port, three aftermarket options get the job done: a rotary rinser that mounts inside the tank through a drilled hole, a flexible wand that feeds down through the toilet, and a backflush adapter that connects at the sewer outlet.
Real-world testing by The Fit RV showed that rotary rinsers (specifically the Camco Tornado) cleaned tank walls more effectively than any other method. The tradeoff is that installation requires drilling a small hole in the tank.
If you’d rather not drill, a toilet-entry wand works well when the toilet drops straight down into the tank. It becomes less effective if there are bends or elbows in the plumbing between the toilet and the tank. The GoBluTech flush kit is a popular DIY-friendly option that installs in about 10 minutes without any tank drilling.
Most aftermarket options cost between $20 and $50. That’s a small price compared to dealing with a pyramid plug in your black tank or sensors that never read accurately again.
Can an RV Black Tank Flush System Flood Your RV?

Yes, it can. But only if you make one of a small number of avoidable mistakes. The most common cause is running the flush with the dump valve closed and walking away. The water has nowhere to go. The tank fills up. The overflow path is back through the toilet seal and onto your bathroom floor.
Here’s what causes it:
- Running the flush with the gate valve closed for too long
- Walking away from an unattended running flush system, even for a few minutes
- Assuming the gate valve is open when it’s actually stuck (if yours is giving you trouble, here’s how to fix a stuck black tank gate valve)
- Filling the tank while the sewer hose is already disconnected from the dump station
The fix is straightforward: keep the valve open, stay present, and watch the outflow. If you follow the 10-step process above exactly, flooding is not a realistic risk. It only becomes one when steps get skipped or shortcuts get taken.
Why Your Black Tank Flush System Might Not Be Working
The three most common failure points are a clogged inlet nozzle, a failed vacuum breaker, and a kinked or low-pressure hose. Most are inexpensive to diagnose and fix yourself.
| Problem | Likely Cause | What to Check |
|---|---|---|
| No water enters the tank | Blocked inlet or clogged nozzle | Hose pressure, inlet screen, tank sprayer nozzle |
| Water leaking inside the RV near the bathroom cabinet or wall | Failed vacuum breaker / backflow preventer | Cabinet area directly behind or below the toilet |
| Weak rinse with low pressure | Kinked hose or low campground water pressure | Hose connections, pressure regulator setting |
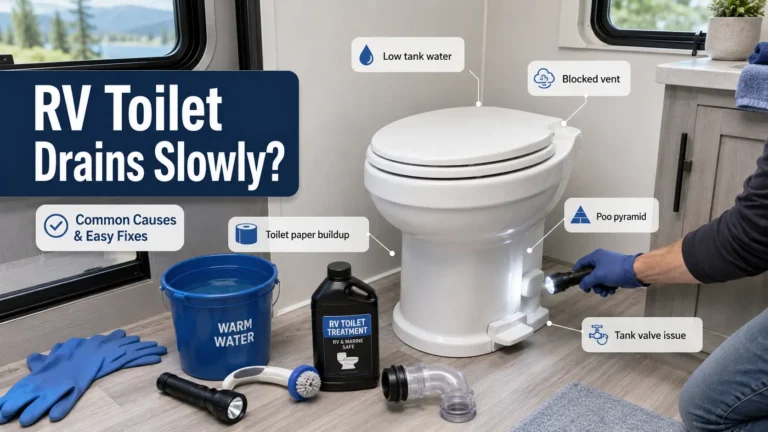
| Tank still smells after flushing | Residue buildup, insufficient rinse time | Rinse longer, add water back after closing valve |
| Sensors still reading wrong after a good rinse | Buildup coating sensor probes | Enzymatic deep clean or dedicated sensor treatment |
Spotting a failing vacuum breaker: Vacuum breakers fail more often than most people expect. Signs include water dripping from inside a cabinet near the bathroom, no water reaching the tank sprayer at all, a weak or gurgling rinse flow, or water that seems to back up rather than spray into the tank. Replacement parts are inexpensive and the swap is usually a straightforward DIY job.
Happy Campers found that stuck sensor readings after a dump are almost always caused by residue coating the sensor probes, not actual sensor failure. If your sensors still read high after a thorough rinse, an enzymatic soak left in the tank overnight usually resets them.
If you’re also dealing with why your rv toilet smells even after flushing, the cause is typically residue the sprayer can’t reach. That points toward needing a full deep clean rather than just a longer rinse cycle.
Black Tank Flush System vs. Tank Treatment vs. Deep Cleaning
These are four different things, and a lot of beginners mix them up. That confusion leads to real maintenance problems down the road.
Here’s the breakdown:
Dumping is emptying waste out of the tank. That’s all it does. Nothing gets cleaned during a dump on its own.
The flush system sprays rinse water inside the tank after you dump. It removes loose residue, coats sensor probes with clean water, and washes the walls. It’s a rinse, not a deep clean.
Tank treatment is an enzyme or chemical product you add to the tank between dumps. It breaks down waste, controls odors, and prevents buildup from hardening on the walls and sensors. According to Kleen Tank, the built-in flush system alone isn’t enough to keep your tank in good long-term health. Pairing it with the right enzyme product makes a real difference. See our guide to the best RV tank treatment for specific product picks.
Deep cleaning is what you do when regular flushing and treatment are no longer cutting it. If you have sensors that won’t reset, odors that return after every dump, or solid buildup on the tank walls, you need a stronger approach: a tank wand, a full enzyme soak, or a method like the Geo Method.
All four work together. The flush system is one piece of the routine, not the whole answer.
How Often Should You Flush Your Black Tank?
Run the flush system every single time you dump. A basic rinse takes 2 to 3 minutes, or until the outflow water runs clear. For a deeper clean, use the pulse method (keeping the valve open and watching closely, as described in the step-by-step section) every 3 to 5 dumps.
Living the RV Life recommends treating post-dump flushing as a non-negotiable habit, with more thorough cleaning sessions added as needed. Walex notes that waiting until the tank reaches about two-thirds full before dumping creates the strongest outflow, which carries more solid waste out cleanly.
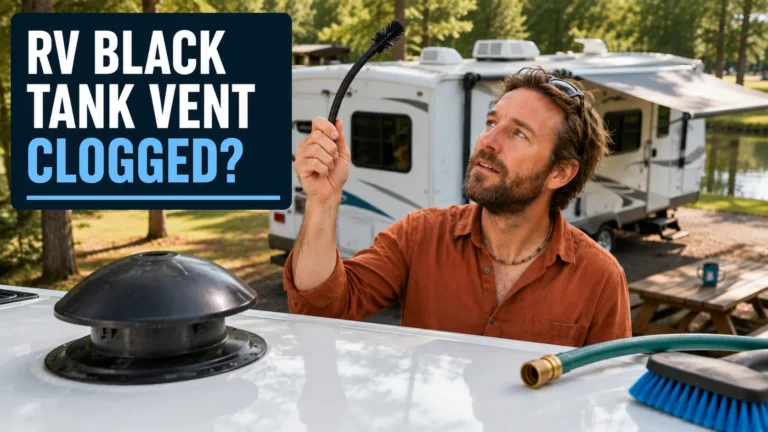
Skipping the rinse after a dump is one of the most reliable ways to end up with sensor problems and lingering rv toilet smell after dumping that won’t clear no matter what you add to the tank. It also increases the risk of solid waste building up into a pyramid plug in your black tank, which is exactly as unpleasant to fix as it sounds. Poor rinsing and waste buildup can also cause pressure problems, including RV toilet bubbles when flushed, especially when air gets trapped below a clog or near the tank inlet.
If the toilet keeps bubbling or sewer smell comes back even after a proper rinse, the problem may be airflow instead of cleaning. Check for a clogged RV black tank vent, because a blocked vent can trap tank pressure and push gas back through the toilet.
Unique Camping + Marine confirms that most false sensor readings come from residue left behind after incomplete rinses. If your sensors are misbehaving, more frequent and more thorough flushing is the first fix to try before reaching for a sensor cleaning product.
Conclusion
Your RV black tank flush system is a simple tool. But it has to be used correctly and used consistently to make a real difference.
Here are the three things to take away:
- Use it every time you dump. A 2 to 3 minute rinse after every dump prevents the buildup that causes odors, sensor failures, and clogs.
- If it stops working, check the vacuum breaker first. That small part fails more often than anything else in the system and is inexpensive to replace.
- If your RV doesn’t have one, an aftermarket rinser solves the problem for $20 to $50. You don’t need a built-in system to keep a clean tank.
Ready to build a complete black tank maintenance routine? Start with our guide to the best RV tank treatment. Pairing the right enzyme treatment with your flush system is the fastest way to keep odors out and sensors accurate, trip after trip.
Frequently Asked Questions
Can I leave my black tank flush running while the dump valve is closed?
You can, but only briefly and only if you are standing there actively watching. Some RVers close the valve for 30 to 60 seconds to let water build up inside the tank, then open it again for a stronger surge flush. If you walk away with the valve closed and the water running, the tank will overfill and back up through the toilet seal into the bathroom. Keep the valve open unless you are fully present and managing the process.
Do I need a special hose for the black tank flush inlet?
Yes. You need a dedicated non-potable hose that you never use for drinking water. Camping World recommends using a different-colored hose so you never mix up your rinse hose and your fresh water hose at a busy campsite. Many RVers use a standard white or clear hose for potable water and a colored one for the black tank flush.
Why does my black tank still smell after I flush it?
A short rinse doesn’t always clear all the residue. The sprayer nozzle covers most of the tank walls but can miss corners, low spots, and buildup that has hardened over time. If flushing alone isn’t fixing it, add an enzyme tank treatment after every dump and let it soak until your next trip. For odors that keep coming back, our guide on rv toilet smell after dumping walks through a step-by-step fix.
How do I know if my vacuum breaker is broken?
The most common signs are water dripping or spraying from inside a cabinet near the bathroom, no water reaching the tank sprayer even with solid hose pressure, a weak or gurgling rinse, or water that seems to back up instead of spray into the tank. Vacuum breakers are inexpensive parts and straightforward to replace on most RV models. If you see any of these symptoms, replacing the vacuum breaker is the first step.
Can I add a black tank flush system to an older RV that doesn’t have one?
Yes. You have two main options. A rotary rinser mounts inside the tank through a small drilled hole and provides wall-to-wall spray coverage. A toilet-entry wand requires no drilling and works well for tanks with a straight drop below the toilet. Real-world testing by The Fit RV found rotary rinsers most effective for cleaning tank walls. Both options are available under $50 and are manageable DIY installs for most RV owners.