- An RV toilet water supply line leak may come from a loose fitting, damaged seal, cracked tubing, or freeze damage.
- Disconnect city water and switch off the RV water pump, then flush to relieve pressure before disconnecting the line.
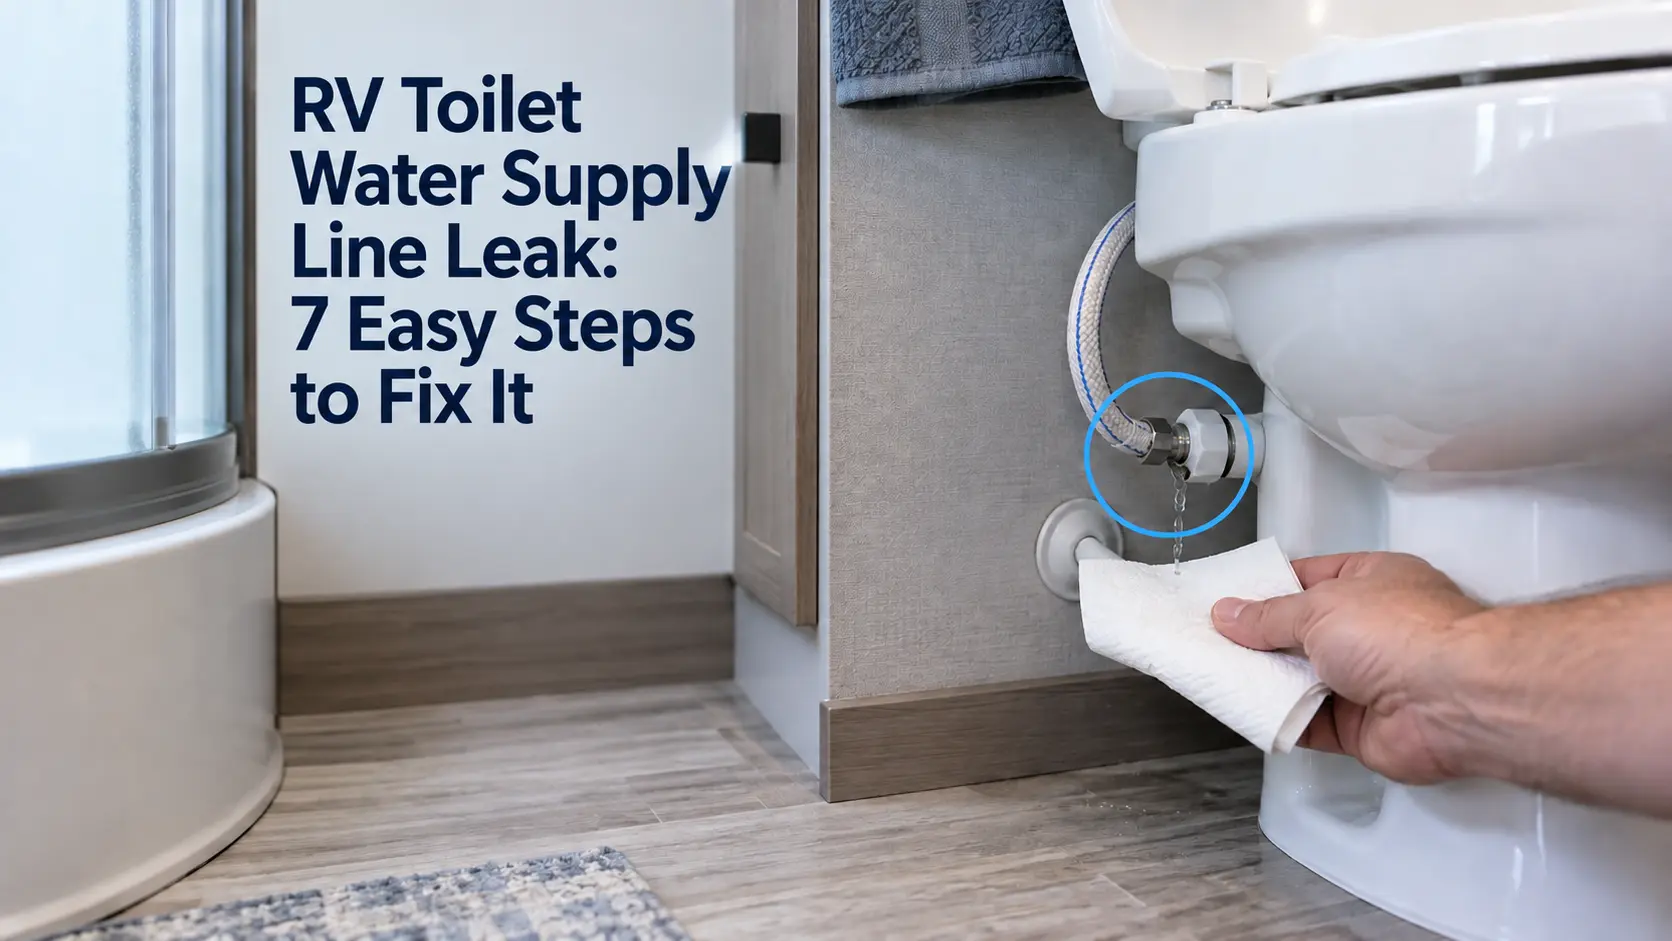
- Dry every connection completely and use paper towels to catch exactly where moisture reappears.
- A loose connection may need careful reseating; replace a damaged seal, fitting, or supply line with compatible parts.
Water pooling behind or under your RV toilet doesn’t always mean the toilet itself is broken. An RV toilet water supply line leak occurs at the fresh water hose, tubing, or fitting that feeds the toilet’s water valve, and it can look like a floor seal problem.
This guide walks through how to trace the leak to its real source before you replace anything. You’ll learn how to test the connection, when tightening or a new washer solves it, and when the tubing or fitting needs to be replaced outright. It also covers how to tell a supply line leak apart from a leaking water valve or vacuum breaker, since all three can look identical once water reaches the floor.
Why Is My RV Toilet Water Supply Line Leaking?
Possible supply line leak sources include a loose connection, a damaged washer or O-ring, cracked tubing, and damaged fittings. Freezing can also damage plumbing components. Some leaks that look like they start at the supply line actually come from the water valve or vacuum breaker just behind it.
Check these possible causes:
- Loose connections
Road vibration and repeated flexing can back a fitting nut off enough to start a slow drip, especially if it was only hand-tight to begin with.
- Damaged seals or washers
The small rubber washer inside the fitting nut hardens and cracks with age, the same way any rubber plumbing gasket does.
- Cracked tubing
Flexible supply lines can develop hairline cracks from age, sun exposure through a cabinet vent, or being kinked during installation.
- Damaged fittings
Plastic fittings crack from overtightening or from being cross-threaded during a past repair.
- Freeze-related damage
Water left in the line during a hard freeze can crack a plastic fitting or valve body. Both Dometic and Thetford treat this as a winterization issue rather than a manufacturing defect (more on that in the prevention section below).
-
A nearby component, not the line itself
Water from the valve or vacuum breaker can run down and collect near the supply connection, making it look like the line is the source when it isn’t. If you’re not sure which part is which, the RV toilet parts guide breaks down what each one does and where it sits.
How to Find an RV Toilet Water Supply Line Leak
Shut off the water, dry every connection point completely, then use dry paper towels to catch the first sign of moisture as pressure returns. Whichever towel gets wet first tells you where to focus.
- Disconnect city water at the hookup and close any toilet shutoff valve, if fitted.
- Switch off the RV water pump, even if you normally use a city-water hookup.
- Press the flush pedal to relieve pressure until water stops flowing. Catch any residual water before disconnecting a fitting.
- Dry the connection and surrounding area completely with a towel, including the cabinet floor underneath.
- Lay dry paper towels around the supply line fitting, the valve area, and the toilet base as three separate zones.
- Restore water pressure and watch each zone, then flush again and watch a second time.
- Note which paper towel gets wet first. That’s your starting point, not necessarily the final answer, since water can travel a few inches before it pools.
| Symptom | Possible Source | What to Check |
|---|---|---|
| Slow drip right at the connection, present anytime the water is on | Loose fitting or damaged seal | Turn the water off, then check the fitting and any washer or O-ring |
| Leak is present anytime the system is pressurized, flush or not | Water valve or its inlet fitting | Compare exactly where it’s wet: at the supply line nut, or at the valve body itself |
| Leak appears only while the pedal is pressed and stops right after | Vacuum breaker, flush hose, or valve outlet | Dry and test each component separately while observing the flush |
| Leak started right after a freeze or after de-winterizing | Cracked fitting or valve from freeze damage | Look for hairline cracks near the connection |
| Base is wet but the exposed supply connection and valve test dry | Floor seal or another hidden leak | Recheck for water traveling downward; investigate the floor seal if leakage occurs during flushing |
| Tubing feels damp along its length, not just at the ends | Cracked or porous tubing | Run a hand along the full length and replace if cracked |
How to Fix a Leaking RV Toilet Water Supply Connection
A loose connection or a worn washer can usually be fixed in place. Cracked tubing or a damaged fitting cannot be tightened away and needs to be replaced rather than patched.
- Confirm the water is off and flush once to release remaining pressure before you touch the fitting.
- Check that the fitting is seated squarely, then tighten it only as the fitting or toilet manufacturer specifies. If it still leaks, stop and inspect the seal and fitting rather than adding more force. Overtightening can crack plastic parts.
- Disconnect the fitting and inspect its seal, if fitted. Replace a damaged or missing washer or O-ring with one made for that connection; not every connection contains a washer.
- Check the fitting itself for hairline cracks or stripped threads. A cracked fitting won’t seal no matter how much it’s tightened, and needs to be swapped rather than reused.
- Run a hand along the full length of the tubing. Any softness, bulging, or visible cracking means the tubing has failed and should be replaced rather than patched.
- Decide your repair path. A loose nut or a bad washer can usually be fixed in place with basic hand tools. A cracked fitting or compromised tubing means replacing the supply line, covered next.
The Dometic 300/310/320 and current 400-series manuals specify a 1/2-inch NPT water supply fitting; the Thetford manual cited below calls for a 1/2-inch NPT tube fitting. Check the actual mating connector before deciding whether sealant belongs on the threads:
- Gasket-sealed connections. Common on supply lines ending in a nut with a rubber washer inside, the same style as a household toilet supply line. The washer seals by compressing against the valve’s threaded nipple, so tape on the threads doesn’t help and can even keep the nut from drawing down fully. Replace the washer if this style leaks.
- Compression and push-to-connect fittings. Compression fittings seal with a ferrule; push-to-connect fittings use an internal O-ring and retaining mechanism. Neither relies on thread tape for its seal. Use fittings compatible with your actual tubing.
- Direct tapered-thread connections. Some fittings seal on their threads rather than a washer or ferrule. Use a potable-water-rated thread sealant only if the fitting or toilet manufacturer calls for it. Do not assume PTFE tape is suitable for every plastic threaded connection.
Confirm which type of connection you have before using any sealant. The Dometic 300/310/320 installation manual and the current 400-series manual each specify 30–40 in-lb for their water supply connections. Do not apply that figure to other toilets or fitting designs; follow the instructions for your exact model.
How to Replace an RV Toilet Water Supply Line
- Identify your toilet’s brand and exact model using its identification label and manual before buying parts. The Dometic 300/310/320 and current 400-series manuals list a 1/2-inch NPT water supply fitting. Thetford’s official installation instructions call for 1/2-inch NPT tube fittings on the models covered by that manual. Confirm the connection on your specific toilet and the RV-side line.
- Check what kind of tubing you currently have, whether it’s braided flexible line, PEX, or rigid poly tube, and match the replacement to that type rather than assuming they’re interchangeable.
- Choose a replacement line rated for potable water and sized for both ends of your actual installation. Thetford’s water module kit instructions show the water supply line as not included with kit #31705, so purchase a separate compatible line if that is the failed part.
- Confirm both water sources are off and relieve pressure, then disconnect each end using the method appropriate to its fitting. Do not use a wrench to pull apart a push-to-connect fitting. Keep a towel handy for residual water.
- Install the new line without kinks, cross-threading, or strain on the valve. Seat and tighten each connection according to its instructions. Use the model-specific torque where required; overtightening can damage a plastic valve body.
- Restore water pressure gradually and check every connection for drips before opening the line up fully.
- Run several flush cycles and recheck after the toilet has sat idle for a few hours, since some slow leaks only show up once pressure has had time to work on a marginal seal.
Fittings aren’t universal across RVs even within the same toilet brand, since the water line coming up through the floor might already end in PEX, compression, or a shutoff valve installed by the RV manufacturer. Confirm what you’re connecting to before buying parts.
What If Water Is Leaking Behind the RV Toilet?
A leak here can come from three places: the supply line connection, the water valve, or the vacuum breaker. Timing helps narrow it down, but a failing valve doesn’t always wait for a flush to leak, so don’t rule it out just because the toilet is sitting idle.
The water valve (also called the inlet valve or water module) sits under full system pressure anytime the RV is pressurized, whether or not anyone flushes. A worn or cracked valve, often from freeze damage, can leak steadily under that pressure, the same timing pattern as a bad supply line connection.
Thetford’s troubleshooting for its Aqua-Magic IV, Galaxy, Starlite, and Aurora models makes this distinction directly in its leak troubleshooting section: a vacuum breaker leak while flushing means replacing the vacuum breaker, while a leak from that same area when the toilet is not being flushed points to the water valve instead. A worn valve can also trickle water into the bowl rather than leak externally; on Dometic toilets that shows up as ghost flushing, covered in the Dometic ghost flushing guide.
The vacuum breaker is an anti-siphon component near the back of the toilet. Thetford’s manual for the models it covers describes vacuum breaker leaks during flushing. A flush-only leak makes the breaker worth inspecting, but check the adjacent flush hose and valve outlet before replacing it.
If those components test dry but water still appears at the floor, check for a hidden leak or water traveling down the toilet. A failed flange (floor) seal is another possibility, especially if water escapes from the base during a flush. The Dometic base leak guide and the Thetford base leak guide cover that diagnosis in detail.
Dometic vs. Thetford RV Toilet Water Connection Issues
The two major brands connect to the fresh water system a little differently, and their own manuals describe slightly different failure patterns, which matters when you’re buying replacement parts.
Dometic lists a 1/2-inch NPT water supply fitting for its 300/310/320 series and its current 400/410/420 series. The 300-series manual lists a minimum inlet flow of 2 GPM and a recommended 3–5 GPM; the 400-series specifications list a minimum of 2 GPM and a recommended 2.5–4 GPM. Dometic lists water valve kit #385311641 in its 400-series parts selection, and an earlier 310 parts list names the same kit. Match the kit to the complete model and product number before ordering; do not assume every production revision uses identical parts.
Thetford specifies 1/2-inch NPT tube fittings, a 3/8-inch inside-diameter supply line, and a flow rate of at least 2.5 GPM for the Aqua-Magic VI, Bravura, Residence, and STYLE models covered by its installation manual. Thetford’s manual for the models covered above recommends checking the supply line connection first, then replacing the water valve if the leak persists from the valve. The water module kit for Aqua-Magic V and VI models (part #31705) includes a replacement water module, link, and floor seal; Thetford’s kit instructions list flat-blade and Phillips screwdrivers, a 1/2-inch wrench, and a cutting tool. The water supply line is not included.
Confirm your exact model before ordering. Both brands cover several toilet generations under similar model numbers, and a fitting or valve kit that works on one doesn’t always fit another.
How to Prevent Future RV Toilet Water Line Leaks
A quick visual check of the supply line connection a couple of times a season catches most problems before they become a puddle on the floor. Look for dampness at the fitting. Leave a dry, leak-free connection alone; investigate and tighten only if you find looseness, following the fitting instructions.
Winterizing correctly matters more than most owners expect. Water left in the supply line or valve during a hard freeze is one of the most common ways a fitting or valve body cracks. Dometic’s documentation for both the 300/310/320 and 400/410/420 series specifically excludes freeze damage caused by improper winterization from warranty coverage. Thetford’s manual gives two accepted winterizing methods for its Aqua-Magic line: draining the supply line completely at the water valve, or running RV-safe (propylene glycol) antifreeze through the toilet, and never automotive antifreeze. For the full walkthrough, see how to de-winterize your RV plumbing system when spring rolls around, since a rushed de-winterization is when a weakened fitting from an earlier freeze often finally lets go.
Avoid overtightening any connection along the line, even when it’s dry and you’re just doing routine maintenance. A fitting that’s snug and leak-free doesn’t need another quarter turn. No maintenance routine eliminates every future leak, since rubber washers and plastic fittings wear out over time regardless of how carefully they’re installed, but a light seasonal check keeps most problems small and cheap.
Final Leak Test and When to Call a Professional
Once you’ve made a repair, turn the water back on gradually and run the toilet through several flush cycles while watching every connection. Let the RV sit for a few hours afterward, then check again, since a slow leak under sustained pressure sometimes doesn’t show up in the first few minutes.
Most supply line repairs are within reach for a DIY owner with basic tools. It’s worth calling a professional if the leak keeps coming back after you’ve replaced the fitting and washer, if the connection is in a spot you genuinely can’t reach without pulling cabinetry, or if water has already reached the subfloor and you’re dealing with soft or discolored flooring rather than just a fresh leak. A leak involving fresh water is an inconvenience; one that’s reached the wood underneath is a repair job of its own.
Frequently Asked Questions
Why does my RV toilet leak only when I flush?
A flush-only leak can come from the vacuum breaker, flush hose, or valve outlet. A leak that occurs whenever the water system is pressurized can come from the supply connection or valve body. Dry and inspect each area separately to find the actual source before replacing parts.
Can I use Teflon tape on an RV toilet water supply line fitting?
It depends on the connection type. If your supply line ends in a nut with a rubber washer inside, similar to a household toilet supply line, that washer creates the seal and tape won’t fix a leak there; replace the washer instead. Tape or pipe dope rated for potable water only helps on a direct tapered-thread connection, where a fitting screws straight onto the valve’s threaded nipple with no washer involved.
What size is an RV toilet’s water supply line?
The Dometic 300/310/320 and current 400-series manuals specify a 1/2-inch NPT water supply fitting. Thetford’s Aqua-Magic VI/Bravura/STYLE installation manual calls for a 1/2-inch NPT tube fitting and a 3/8-inch inside-diameter line with at least 2.5 GPM flow. Check your exact model and both ends of the existing line before buying a replacement.
Is it safe to keep using my RV toilet if the supply line is leaking?
Even a slow drip can damage flooring and cabinetry. Shut off city water and the pump, dry the area, and repair the leak before continuing to use the toilet or leaving the RV unattended.
How much does it cost to fix an RV toilet water supply line leak?
A loose fitting or a worn washer costs little to fix, often just the price of a replacement washer or a short length of line. A full water valve kit costs more, and pricing varies by brand, model, and retailer, so check current listings for your exact toilet series rather than assuming one price applies across brands. Either way, it’s normally a DIY repair with basic hand tools rather than a job for a plumber.
Conclusion
Finding the exact source of an RV toilet water supply line leak saves you from replacing parts you didn’t need and from a repeat leak a few trips later. Most supply line problems come down to a loose fitting, a worn washer, or cracked tubing, all inexpensive fixes you can usually handle with basic hand tools. Freeze-damaged fittings and failing water valves can produce similar symptoms, and a dry paper towel test helps narrow down the source. If the supply line, valve, and vacuum breaker test dry but water appears at the base, check for hidden plumbing leaks and investigate the floor seal, especially if the leak occurs during a flush.