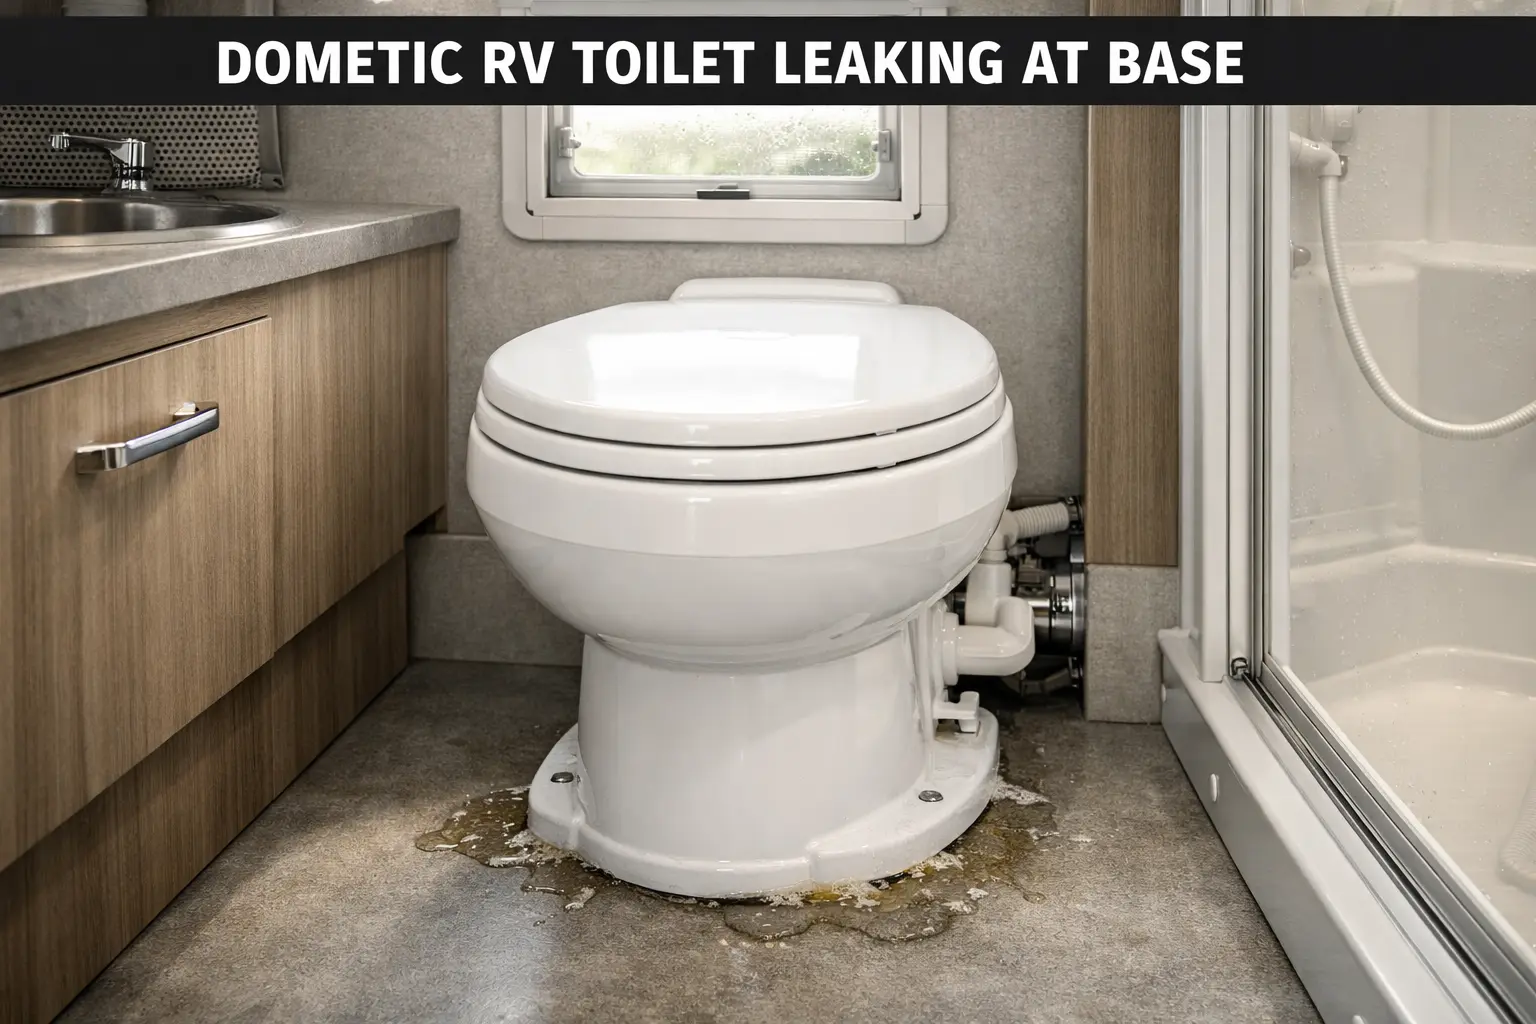
Water sitting around the base of your Dometic RV toilet is never a welcome sight — especially when you’re parked hours from the nearest RV dealer.
The good news? Most base leaks on Dometic toilets are cheap to fix. The bad news? If you assume the floor seal is always the problem and skip straight to pulling the toilet, you’ll often fix the wrong thing — and the leak comes back two trips later.
This guide walks through every real cause of a Dometic RV toilet leaking at the base, how to pinpoint exactly which one you’re dealing with, and what to replace. No guesswork, no unnecessary parts.
If you’re working through other toilet or plumbing issues on your rig, the RV Flush Guide repair section covers a full range of DIY fixes worth bookmarking.
Before You Pull the Toilet, Read This
Water pools at the lowest point it can reach. That means water from a leak higher up — the flush valve, the inlet valve, even the vacuum breaker — can travel down the outside or inside of the toilet body and appear at the base. You’d assume the floor seal failed. Often, it hasn’t.
As explained by DoItYourselfRV, finding where the water is actually coming from before reaching for tools prevents unnecessary repairs and repeat leaks. Two minutes of diagnosis can save you an hour of work.
Run through the checks below first. In a lot of cases, you’ll find the answer before the toilet ever leaves the floor.
The 5 Real Causes of a Dometic RV Toilet Leaking at the Base
1. Worn or Failed Flange Seal (Base Seal)
This is the most common cause — but not always the right diagnosis by default.
The flange seal (also called the base seal or floor seal) is a rubber gasket that sits between the bottom of the toilet and the floor flange. It creates a watertight connection between the toilet and the black tank pipe. According to The RV Geeks, road vibration and constant weight on the bowl cause this seal to compress and eventually fail over time.
If it leaks at the base specifically when you flush — and the toilet doesn’t move — a failed flange seal is a likely culprit. The part numbers to know: #385311652 (base seal) for Dometic 300, 310, and 320 series.
2. Loose Mounting Bolts
This one gets skipped more than it should. A properly installed RV toilet should feel completely solid. If it shifts even slightly when you sit down or when you’re driving, that movement breaks the seal at the base and water escapes.
According to DoItYourselfRV, snugging the mounting bolts is worth doing before anything else, just until the toilet feels firm. Don’t overtighten. Too much pressure on a plastic base toilet (like the Dometic 300) can crack it.
If tightening the bolts stops the leak, you’re done. No parts needed.
3. Failing Flush Valve or Water Inlet Valve
This one tricks a lot of people. When the flush valve or water inlet valve starts to fail, it leaks water internally. That water doesn’t go into the black tank — it runs down the inside of the toilet body and pools at the base. From the outside, it looks exactly like a floor seal problem.
The tell: if you notice the leak only when pressing the flush pedal, and it appears to come from the pedal area rather than the floor joint, the valve is the more likely suspect. Forum reports from Forest River owners confirm this pattern repeatedly — two toilets, same symptom, both traced back to the flush valve rather than the floor seal.
The paper towel test works here: dry everything around the base and valve area, wrap dry paper towels around each zone, then flush. Wherever the paper gets wet first tells you where the leak originates.
4. Cracked Vacuum Breaker
This is probably the least-known cause on the list. Behind the toilet, there’s a small white plastic anti-siphon valve called a vacuum breaker. Its job is to prevent back-siphoning of water into your fresh supply line.
When it cracks or wears out, it leaks fresh water intermittently — not every flush, which makes it hard to catch. The water runs down the back of the toilet and collects at the base. Mortons on the Move documented this exact issue on a Dometic 310 — water pouring from the back of the toilet on random days, totally fine in between. Their troubleshooting guide pointed to a failing vacuum breaker, which they replaced without removing the toilet.
It can be replaced by feel without pulling the toilet. Tedious, but doable.
5. Cracked Bowl-to-Base Connection (Known 300-Series Issue)
Dometic 300-series plastic toilets have a known design issue: the joint where the bowl meets the base can crack internally. The crack isn’t visible from outside and isn’t easy to spot even after removing the toilet unless you flip it and inspect it closely.
What happens is waste water fills the internal cavity of the base, and movement — from flushing or sitting on the toilet — forces it out through the crack and onto the floor. As noted on Heartland Owners Forum, if you remove the toilet and hear sloshing when you shake it, that’s the problem. There’s no reliable repair for this — the toilet needs to go.
Dometic addressed the design between production runs, and the 310 porcelain model doesn’t have this issue.
How to Pinpoint the Exact Source Before Buying Anything
Here’s the diagnostic sequence that covers all five causes above:
- Check if the toilet rocks. Grab the bowl and try to move it. Any movement at all means the mounting bolts need tightening. Do this first.
- Dry everything and run the paper towel test. Wipe the base, valve area, supply line connection, and back of the toilet completely dry. Wrap dry paper towels around the base and separately around the valve area. Flush once. Check which paper towel gets wet first and where the moisture starts.
- Check the supply line connection. A slow drip from the supply line at the back of the toilet can run down and pool at the base. Look closely at the fitting where the line meets the toilet. As noted by DoItYourselfRV, tightening or replacing a worn supply line is a five-minute job that sometimes solves what looks like a seal problem.
- Look for intermittent fresh water leaks. If you sometimes find water at the base when the toilet hasn’t been flushed, check the vacuum breaker at the back. Fresh, clean water (not waste) points to the supply side, not the black tank side.
- Remove and shake the toilet. If you’ve ruled out everything else and a 300-series plastic toilet is still leaking, pull it and shake it over a bucket. Sloshing means internal waste has collected in the base cavity — that’s a cracked bowl-to-base joint.
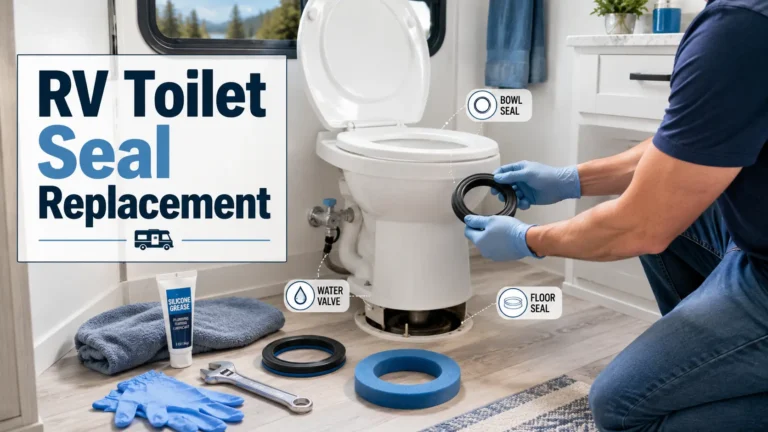
How to Replace the Dometic Flange Seal (Step-by-Step)
If your diagnosis points to the base seal, here’s how to replace it. This applies to Dometic 300, 310, and 320 series toilets.
What you’ll need: Adjustable wrench, bucket and old towels, rubber gloves, new flange seal kit (see parts section below).
- Shut off the water supply to the toilet at the wall or inline valve.
- Flush once to empty the bowl and release pressure from the supply line.
- Disconnect the water supply line from the back of the toilet. Have a small towel ready — there will be residual water.
- Remove the bolt caps at the base of the toilet. Unscrew the two mounting bolts using a wrench.
- Lift the toilet straight up off the floor flange. Set it on a protected surface nearby. Stuff a rag into the open flange to block sewer gases while you work.
- Remove the old flange seal. It will be sitting on the floor flange. Clean any residue off both the flange and the bottom of the toilet base.
- Press the new seal into place on the flange. Make sure it seats evenly all the way around.
- Remove the rag from the drain, then lower the toilet back onto the flange — centered over the drain hole.
- Sit on the toilet to help set the seal, then hand-tighten the mounting bolts. Snug them with a wrench — firm, not torqued. Overtightening on plastic bases causes cracking.
- Reconnect the water supply line, turn the water back on, and flush several times while checking for any leaks at the base.
Per Mortons on the Move, the full process takes most people under an hour from start to finish on the first attempt.
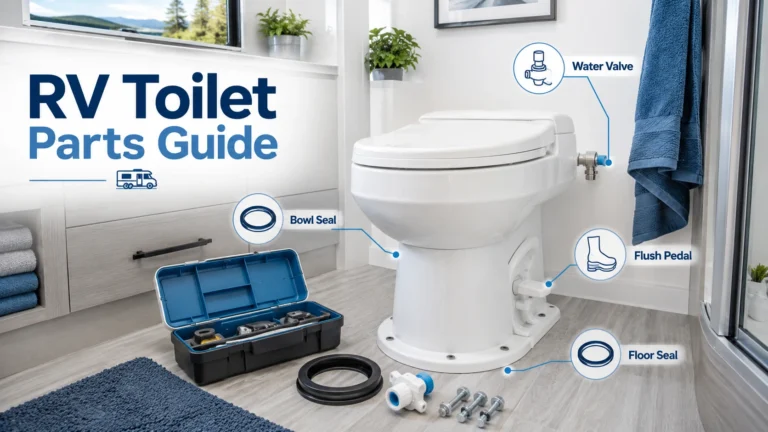
Replacement Parts That Actually Fit Dometic 300, 310, and 320 Toilets
Model compatibility matters here. The wrong seal either won’t seal properly or — worse — cracks the toilet base when you tighten down onto a seal that’s too thick. Use OEM part numbers as your reference.
Base Seal / Flange Seal (Part #385311652)
The rubber ring that seals the toilet to the floor flange. This is what most base leaks come down to. The Oyviny 385311652 RV Toilet Base Seal Kit comes with the seal, brass bolts, stainless nuts, washers, and bolt caps — everything in one package. Fits 300, 310, and 320 series. Does not fit 210 or 510.
Flush Ball Seal (Part #385311658)
The internal seal that holds water in the bowl between flushes. When this fails, water drains from the bowl and can appear at the base. Available as a 2-pack — the flush ball seal replacement for 300/310/320 (2-pack) fits without removing the toilet. No disassembly required. Outer diameter 4 inches, inner diameter 2.75 inches.
3-in-1 Repair Kit (Flange + Both Seals)
If you’re going to the trouble of pulling the toilet, replacing both seals and the floor flange at the same time makes sense. This 3-in-1 kit includes the 385345892 socket floor flange, 385311658 flush ball seal, and 385311652 base seal along with all mounting hardware. It’s the complete fix for a single purchase. Replaces part numbers 385345892, 385311658, and 385311652.
Water Inlet Valve (Part #385311641)
If the paper towel test points to the valve area rather than the base, this is what needs replacing. The Dometic 385311641 OEM Water Valve Kit fits 300, 310, 320, 400, 410, and 420 series toilets and includes the hose clamp and fasteners. Worth grabbing the OEM version here — aftermarket valve fits vary.
Note: Always confirm part compatibility with your exact Dometic model number before ordering. It’s printed on a label inside the toilet cabinet or under the seat.
When Replacing Parts Isn’t Worth It Anymore
Most Dometic base leaks are a straightforward seal swap. But there are a few situations where buying parts to keep an old toilet running stops making sense.
If you have a Dometic 300 plastic toilet and it’s cracked at the bowl-to-base joint, repair isn’t a real option. As Forest River Forum members found, adhesives and caulk don’t hold long-term. The toilet needs to be replaced.
If you’re seeing leaks from the valve and the bowl isn’t holding water reliably and the seal has been replaced more than once in a short period, you’re past the point of diminishing returns. A replacement Dometic toilet bolts right onto the existing flange in most rigs — no floor modification needed. The 310 porcelain model is a direct upgrade from the 300: same footprint, porcelain bowl instead of plastic, and a slow-close seat. It addresses the design issues that plagued older 300 units.
For a full look at repair-vs-replace decisions across common RV toilet problems, the repair guides at RV Flush Guide cover the tradeoffs in detail.
Frequently Asked Questions
Can a Dometic RV toilet leak at the base even if the flange seal looks fine?
Yes — and this happens more than most people expect. The flush valve, water inlet valve, and vacuum breaker can all leak water that runs down to the base and collects there. As confirmed by real-world troubleshooting documented on Forest River Forums, a leak that only appears when flushing and comes from the pedal area is almost always the valve, not the floor seal. Run the paper towel test to confirm the source before replacing the flange seal.
How often should you replace the flange seal on a Dometic toilet?
There’s no fixed schedule — seals fail from use, road vibration, and storage conditions rather than time alone. Mortons on the Move note that RV toilets stored for long periods can dry out and crack their seals from lack of use. A good approach is to inspect the seal whenever you remove the toilet for any reason, and replace it if it shows any flattening, cracking, or gaps.
Is it safe to keep using my RV toilet while it has a small base leak?
Not for long. A small fresh water leak at the base is inconvenient but not immediately dangerous. A leak that involves waste water from the black tank, however, is a sanitation issue and can cause subfloor rot and moisture damage in a short time. Stop using the toilet until the source is identified and fixed, particularly if the water has any discoloration or odor.
Do I need to remove the toilet to replace the flush ball seal?
No. The flush ball seal (part #385311658) can be replaced with the toilet still in place on most Dometic 300, 310, and 320 models. As stated in the product documentation for the aftermarket flush ball seal kit, you simply pop the old seal out and press the new one in with the marked side facing up. No disassembly required. The base seal (385311652), however, does require removing the toilet to access the floor flange.
What causes a Dometic toilet to only leak when flushing?
A leak that appears only during flushing and stops when the toilet is idle almost always points to the flush valve or water inlet valve rather than the base seal. Flush valve failures on Dometic toilets — including from freeze damage in insufficiently winterized rigs — are a well-documented issue, as iRV2 forum members note. Water from a failing valve runs down internally to the base during the flush cycle, then stops when water pressure drops. The inlet valve (part #385311641) is the replacement to look at in this scenario.