If you have ever opened a valve under your RV and watched only a trickle come out, you probably found the wrong one. The biggest snag when you want to drain an RV fresh water tank is that the first valve most people find drains the pipes, not the tank. Layouts vary by RV, so this guide gives you the common order of steps and shows you how to identify your own drains. Your owner’s manual has the exact spots.
We’ll cover the steps, which drain is which, the water heater, what to drain for each reason, what to do when the tank won’t empty, and where the water can go. Three terms first. The “fresh tank” is the tank that stores your drinking water. “Low point drains” are valves at the lowest points of the hot and cold supply lines. A “bypass” is a set of valves that isolates the water heater.
TL;DR
- Open the fresh tank’s own drain valve, not just the red and blue low point drains, which usually empty only the lines. First turn off the water heater, pump and city water, and let the heater cool.
- If you only want to empty the fresh tank, you usually do not need to drain the lines or water heater. For storage or winterizing, protect the whole plumbing system following your RV and appliance manuals.
How to Drain RV Fresh Water Tank?
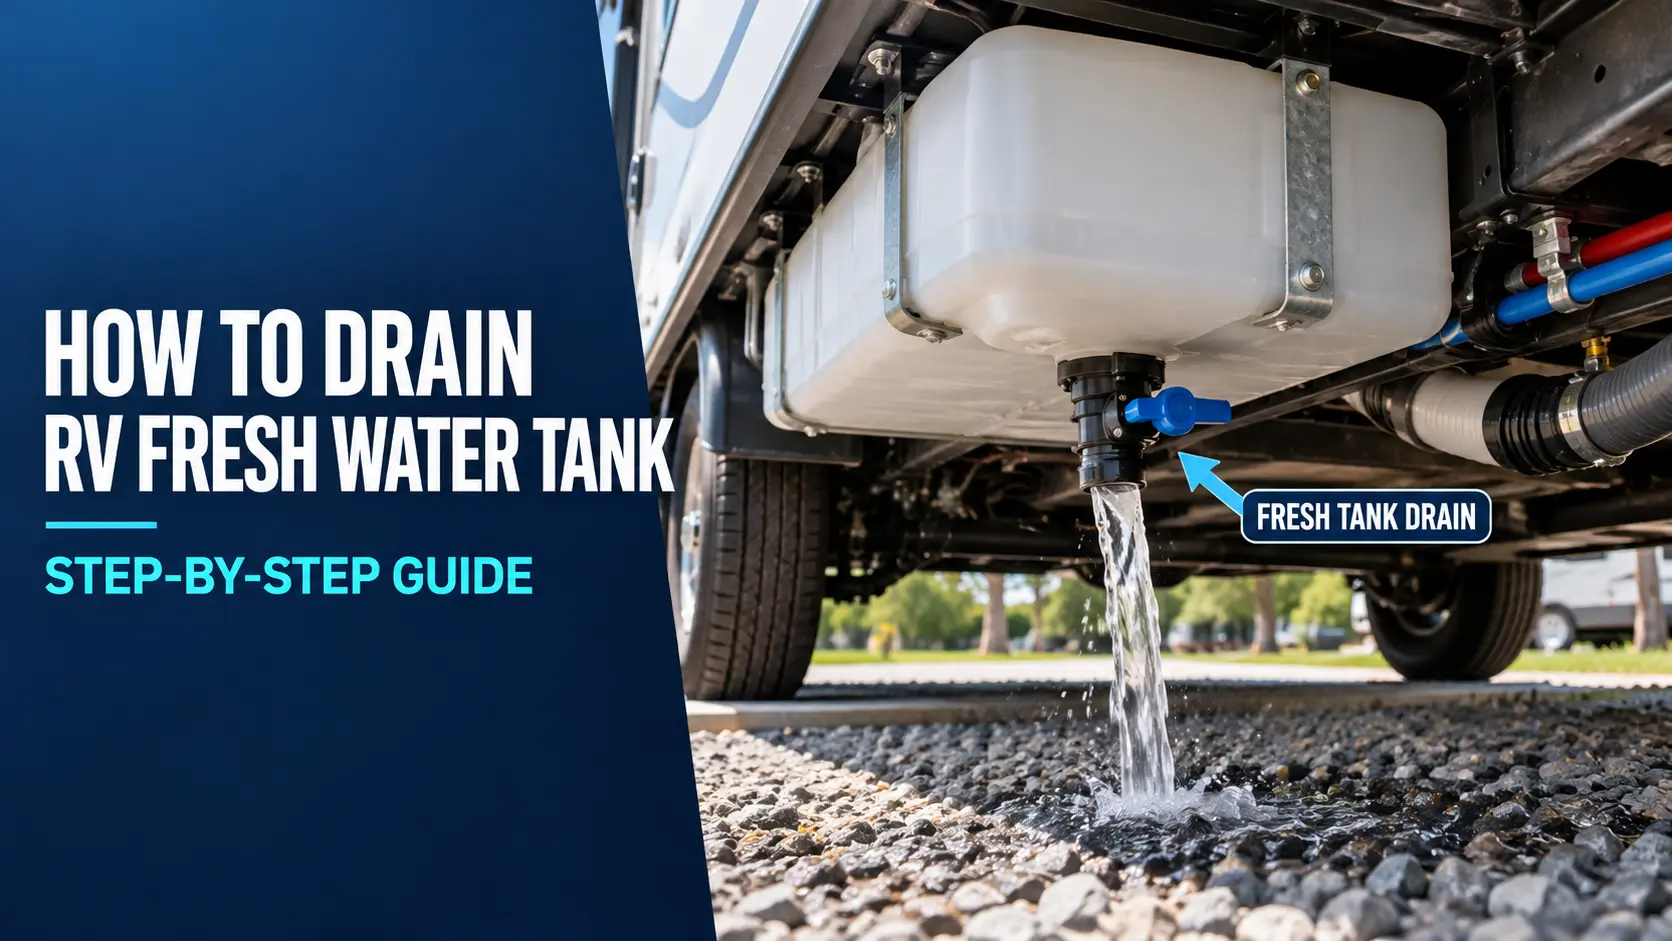
To empty only the fresh tank, switch off the water pump and heater, disconnect city water, then open the fresh tank’s dedicated drain valve. Close it when the tank has emptied. You normally do not need to drain all the lines or the water heater just to reduce travel weight. If you are storing or winterizing the RV, drain and protect the rest of the water system as your RV manual directs.
Before you start, get these ready:
- The water heater is off and has cooled, because hot water can scald. See the water heater section below.
- The water pump is off and city water is disconnected or shut off.
- You have a place for the runoff to go. See the last section.
The eight steps below describe a general full-system drain. If you only want to remove tank water for travel weight, follow the shorter tank-only option above. Your RV’s manual controls valve order and freeze protection.
- Turn off the water heater and let it cool Switch off its electric and gas. Leave it alone until the water is cool.
- Turn off the pump and city water Shut off the pump switch and disconnect or close the city water supply.
- Open every faucet Include any outside shower. If you’re winterizing, set the heater bypass according to your RV and heater manuals.
- Open the fresh tank drain Let the tank run out.
- Open the low point drains There is usually one hot and one cold.
- Clear water from the toilet only as your RV manual directs Keep the pump switched off unless the manufacturer specifies otherwise; never run it dry.
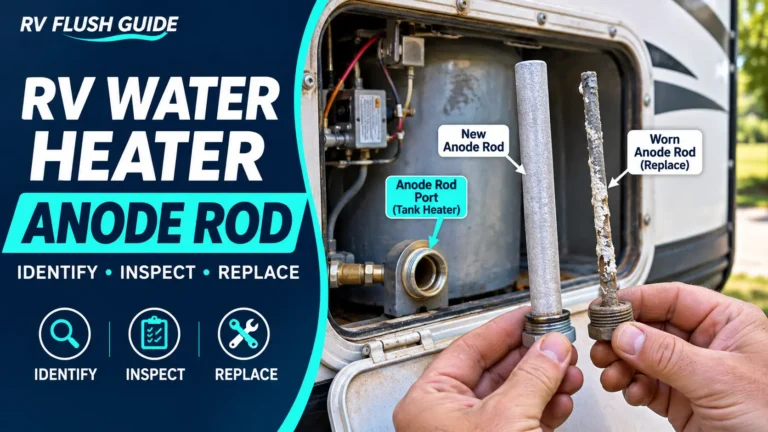
- If you’re storing or winterizing, drain the water heater only per its manual For tank-style heaters, winterization normally requires draining the heater and setting its bypass before pumping antifreeze through the lines. On compatible Suburban tank heaters, the drain fitting is also the replaceable water heater anode rod; confirm the brand and model before removing anything.
- Leave valves in their correct storage positions Follow the RV manual during storage. Before refilling, close drains and restore the normal operating valve positions.
A little water may remain in the tank after the drain stops flowing; don’t force fittings to remove the last drops. If you’re draining to reduce travel weight, 30 gallons of water weighs about 250 pounds.
Fresh Tank Only vs. Full-System Drain: Which Do You Need?
Choose the approach that matches your goal. An empty fresh tank does not mean the lines, pump or heater are empty.
Option A: Empty only the fresh tank
Best for: Lowering travel weight or replacing stale tank water.
- Turn off the water heater, pump and city water.
- Open the fresh tank’s actual drain valve.
- Let the tank empty, then close its drain.
Remember: The lines and water heater may still contain water. This is not winterizing.
Option B: Full-system drain and winterizing
Best for: Storage before freezing weather or a manufacturer-specified full drain.
- Drain the tank and appropriate low-point lines.
- Drain or protect the pump, fixtures, traps and appliances.
- Follow the water heater’s separate storage-type or tankless winterizing procedure.
- Use approved antifreeze or air-purge methods if the RV manual requires them.
Remember: Simply letting the tank drain is not enough to prevent freeze damage.
Is the Fresh Tank Drain the Same as the Low Point Drains?
Not usually. The fresh tank drain empties the storage tank. The low point drains sit at the lowest points of the hot and cold supply lines and empty the pipes. Some RVs are different, so check your manual.
| Drain | What it empties | How to spot it | When you open it |
|---|---|---|---|
| Fresh tank drain | The storage tank | Often a larger valve on a short hose or pipe under the tank | When emptying the tank |
| Hot low point drain | The hot water supply line | Often red | After the tank, to clear the lines |
| Cold low point drain | The cold water supply line | Often blue | After the tank, to clear the lines |
| Storage-type water heater drain plug or valve | The water heater tank | On the heater, per its manual | Only after the heater has cooled |
| Fresh tank overflow/vent tubes | Can release excess water from a full or sloshing tank | Unvalved tube routed from the tank, often underneath the RV | Do not open, cap or block; not a manual tank-drain valve |
Overflow tubes are not drain valves. Excess fresh water may run from an overflow when the tank is full, the RV is parked on a slope, or the water moves during travel. That does not mean it is the right outlet for intentionally emptying the tank. Do not cap, block or modify the vent/overflow tube: Grand Design’s RV owner’s manual warns that obstructing it can cause damaging pressure during filling. If water keeps flowing unexpectedly, consult your own RV manual to investigate.
On many RVs the fresh tank outlet and the low-point line drains are separate, so opening one does not necessarily empty the other. Hot and cold line drains are sometimes color coded red and blue, but neither color nor location reliably identifies a valve on every model.
Some RVs use different arrangements, and the low-point drains may also draw water from the fresh tank. Follow your specific RV’s plumbing diagram rather than assuming every system is plumbed alike.
If your low-point drains stop flowing but you suspect the tank is still full, check its tank drain and verify water flow. Tank-level gauges can be inaccurate, so don’t rely on the display alone.
Where Is the RV Fresh Water Tank Drain Valve?
It is usually on the underside of the RV, below or near the fresh water tank, often on a short hose or pipe with a valve. Some are on the side of the RV or inside a bay. Placement varies by maker and model, so check the plumbing section of your owner’s manual.
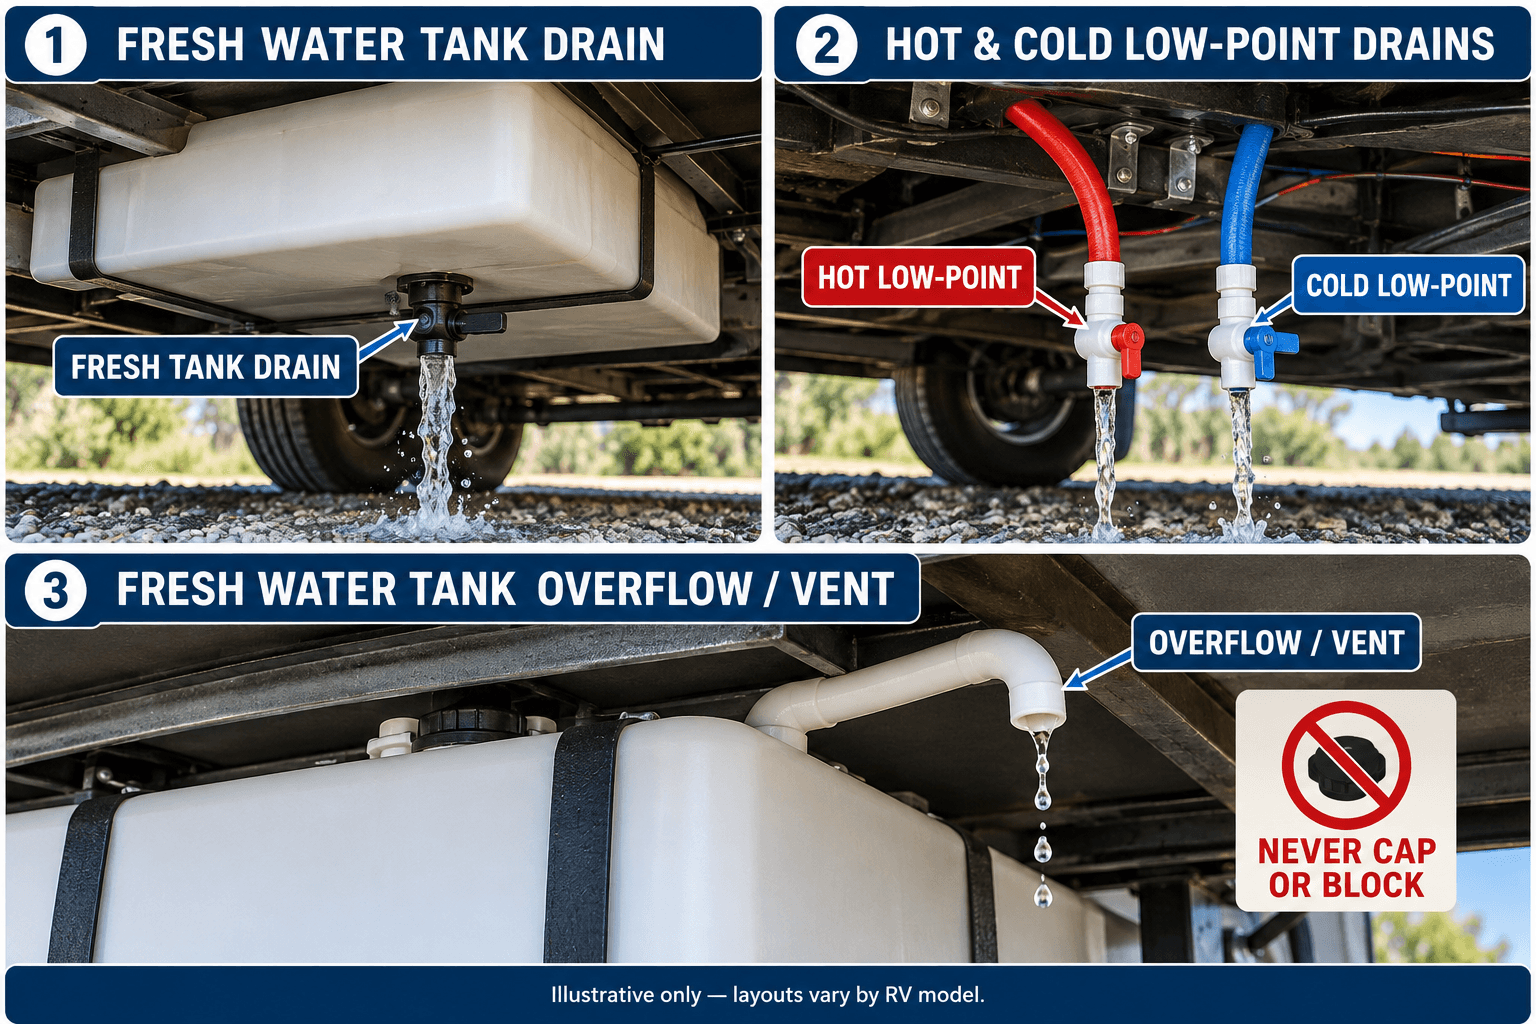
Owners describe a few common looks:
- A short hose with a valve at the end, hanging under the trailer, often toward the front of the axles.
- A white valve that looks like the slide valve on the black (toilet) tank.
- A labeled valve on the side of the RV. Some owners say the label reads “low point” even though it is the tank drain.
- A valve you reach from inside a bay or compartment.
Use the manufacturer’s drain diagram and any nearby labels to identify the valve. Tank drains are often below the tank, while line drains may appear in pairs, but valve size and color are not certain identifiers. Do not cap unvalved tubes that could be vents or overflow lines.
If you still can’t find it, check the owner’s manual, then ask the RV maker or a dealer. Keep the RV stable and chocked, and don’t crawl under it if it isn’t secured.
How Do You Drain the Water Heater Safely?
Turn off the heater’s electric power and gas, let its water cool fully, and relieve pressure as its manual instructs before opening the drain. Hot water and trapped pressure can scald. Emptying a separate heater tank is usually unnecessary just to reduce fresh-tank travel weight, but long storage and freezing weather require a model-specific heater draining or winterizing procedure.
Safety
- Water in the heater can scald you, and a pressurized tank can spray when you open it. Make sure the pump is off and the hot and cold faucets are open before you drain. Never remove, plug or modify the pressure-temperature relief valve. Some models allow operating the valve lever after power is off, water has cooled and pressure has been relieved; follow only your heater’s instructions.
What the makers say:
- Dometic (its Dometic LP gas water heater manual) covers its 4, 6 and 10 gallon heaters): turn off the heater and let the water cool before you remove the drain plug. About two quarts stay in the tank after draining. If the flow only trickles, Dometic describes opening the pressure-temperature (P&T) relief valve to admit air when drainage is slow. Only follow that procedure after the heater has been switched off, cooled and depressurized, as specified for your model.
- Suburban (see its water heater FAQ): for storage, turn off electric and gas, turn off the pump, open the hot and cold faucets, then remove the anode rod. If you plan to use antifreeze, bypass the heater. Suburban says the RV maker’s instructions cover the rest of the system, so always check your own model’s manual.
Dometic and Suburban don’t give a cool-down time, only to let the water cool. Keep the heater off and wait until the water is cool before you open the drain.
What If Your RV Has a Tankless Water Heater?
Tankless RV water heaters do not use the same large storage tank or anode-rod drain procedure as a conventional heater, but they can still hold water in internal passages. To protect the appliance against freezing, use its specific winterization procedure rather than assuming the fresh tank drain empties it.
For example, Truma’s AquaGo winterizing guide directs owners to switch off the heater, let it cool, turn off incoming water, relieve pressure, use the bypass as instructed, then release the yellow Easy Drain Lever and remove the filter cartridge so the appliance drains. Truma does not recommend high-pressure air and says antifreeze requires an installed bypass kit. Other tankless models may use different procedures, so check the manual for your exact heater before opening any fitting or using antifreeze.
Before the next use, refill a storage-type heater completely and purge air as its manual instructs before restoring electric or gas heat. Dometic and Suburban warn against heating an empty storage tank. A tankless heater has a different return-to-service procedure.
Stop and get help
- Stop if the water is still hot or steaming, the plug won’t turn, you smell gas, or you don’t know your heater model. Shut off the gas supply if you smell gas, then contact the heater maker or a qualified technician.
If you’re winterizing, see how to winterize your RV toilet for the toilet part of the job.
What Should You Drain for Each Reason?
What you drain depends on why you’re doing it. Use this as a starting point.
| Reason | What to drain | Water |
|---|---|---|
| Cut weight before travel | The tank, lines optional | Plain |
| Short storage | Tank and lines, heater per its manual | Plain |
| Winterizing | Fresh tank, plumbing lines and heater as applicable; drain AND bypass a storage-type heater, then use the RV maker’s prescribed winterizing procedure | Plain |
| Sanitizing | Tank and lines | May contain sanitizer, see the sanitize guide |
| Stale water | Tank and lines | Plain, then refill with fresh water |
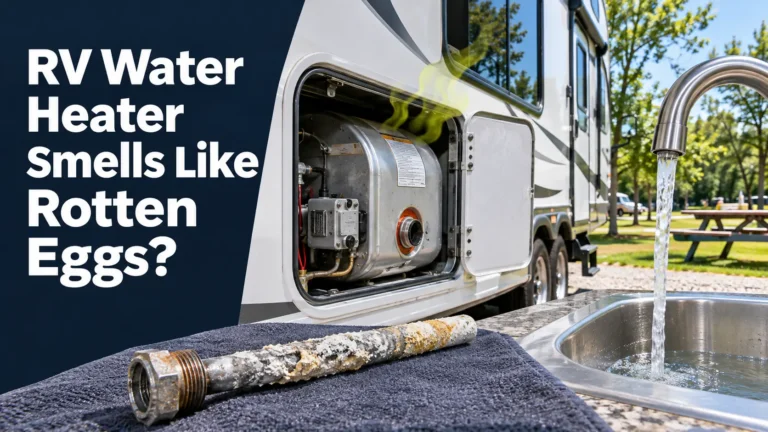
There’s no universal number of days that guarantees stored water will stay safe. Water quality, temperature and tank cleanliness all matter. If water is stale or smells unusual, drain and sanitize the system as appropriate before using it for drinking. If a rotten-egg odor affects only the hot tap, use our RV water heater smell troubleshooting guide before treating the fresh tank again.
If you’re about to treat the tank, sanitize the fresh water tank after draining. That guide covers the bleach amounts and flushing, which this page leaves out.
Draining the tank alone does not winterize the system. Water can remain in the lines, water pump, traps, appliances and heater. Before freezing weather, follow the RV manufacturer’s complete winterizing procedure. For a tank-type heater, bypassing without draining does not protect the tank against freezing.
Water from open sink and shower drains can end up in your gray tank, and flushing the toilet adds water to the black tank. Check your tank levels afterward and dump if needed. See the RV gray water tank guide, and dump the gray tank if needed.
What If the Fresh Water Tank Won’t Drain or Won’t Empty?
Verify that the fresh tank drain is open, not just the low-point line drains. If flow is slow, check the valve and the tank’s dedicated vent as your RV manual permits. Opening a faucet helps empty supply lines but may not vent the fresh tank because the water pump can contain a check valve. Never force a stuck drain fitting.
Work through these causes:
- Wrong valve. The low point drains usually empty only the pipes.
- Restricted tank vent. A blocked tank vent may slow gravity drainage; consult the RV manual before inspecting or clearing it.
- Different drain routing. Some models use low-point valves or a service panel for more than one draining function.
- Valve not found. See the location section above.
- Leftover water. Some water staying in the tank is normal.
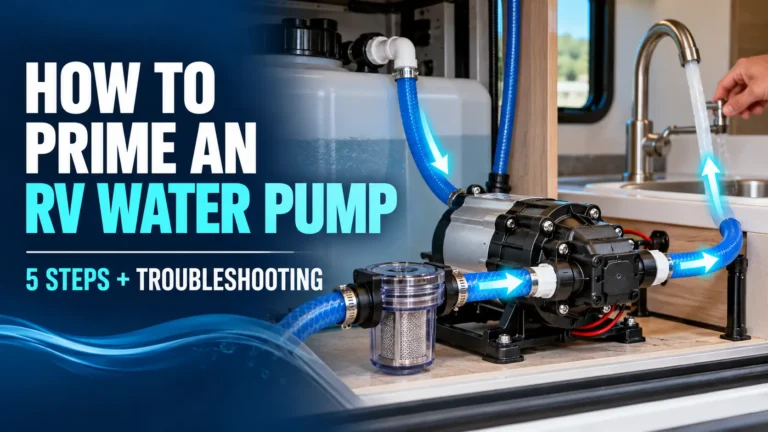
If the correct drain is open but water still won’t flow, check the manual for a hidden service valve or blocked outlet. Don’t run the pump dry to remove the last water. After refilling, prime the water pump if it loses its prime.
Stop and get help
- Stop if the valve won’t turn or breaks, water comes from an unexpected spot, or the tank or valve is frozen. Don’t heat or force a frozen valve or tank. Also stop if the tank is still full with the correct drain open. Contact the RV maker or a qualified technician.
Where Can the Drained Water Go?
Rules differ by campground and local area, so check the campground’s rules and don’t assume you can drain onto the ground.
Some practical points:
- If the valve allows it, attach a hose or pipe to the drain end and keep runoff away from the RV and your neighbors.
- If the water contains bleach or another sanitizer, follow the disposal advice in the sanitize guide.
- Water you run through the sinks goes to the gray tank, and water flushed through the toilet goes to the black tank. Either way, you empty it later at a dump station.
What to Do Before Refilling the Fresh Water Tank
When you are ready to use the RV water system again:
- Close the fresh-tank drain and the low-point drains as directed in your RV manual.
- Fill the fresh tank through the potable-water inlet with a clean drinking-water hose; sanitize first if the stored water was stale or contaminated.
- Prime the pump if necessary, open each faucet to clear air, and check the plumbing for leaks.
- If a storage-type water heater was drained, restore its valves and fill it completely before enabling heat. For tankless heaters, follow the model-specific restart instructions.
Conclusion
Three things to remember. Draining just the fresh tank is not the same as emptying and winterizing the whole plumbing system. Low-point drains and the tank drain usually serve different purposes, while overflow tubes must never be blocked. Follow your RV and water-heater manuals for valve locations, freeze protection and restarting the appliances.
If you’re returning the RV to service after storage, complete the plumbing de-winterizing process before using the water system for drinking or cooking.