- A cracked, warped, or snapped-bolt-slot floor flange needs actual replacement, not just a new seal.
- Rocking, a leak that keeps coming back after a fresh seal, or a spinning bolt that won’t tighten all point to the flange itself, not the rubber gasket.
- RV toilet flanges may use a threaded connection (male or female, often sized for 3-inch pipe) or a glued/solvent-welded connection. The connection type changes how the repair is handled.
- Threaded flange replacement can be a manageable DIY repair. A glued flange, damaged subfloor, or an unidentified black-tank connection is a good reason to stop and call an RV technician.
- Confirm the connection type before ordering a replacement. A flange that looks correct but has the wrong thread or connection style will not fit properly.
Not sure this is your problem? If your toilet leaks only at the base but the plastic ring itself looks fine, start with RV toilet leaking at base to rule out a seal, loose bolts, or a valve before you assume the flange is broken.
If you already know it’s the rubber gasket and not the structural ring underneath it, RV toilet seal replacement covers that job. If your symptom doesn’t match either of those and you’re not sure where to start, RVFlushGuide’s full RV toilet repair guide can help you narrow it down first.
This guide is specifically for the plastic (or, on some older rigs, metal-reinforced) ring that the toilet bolts into and that connects to the black tank drain pipe.
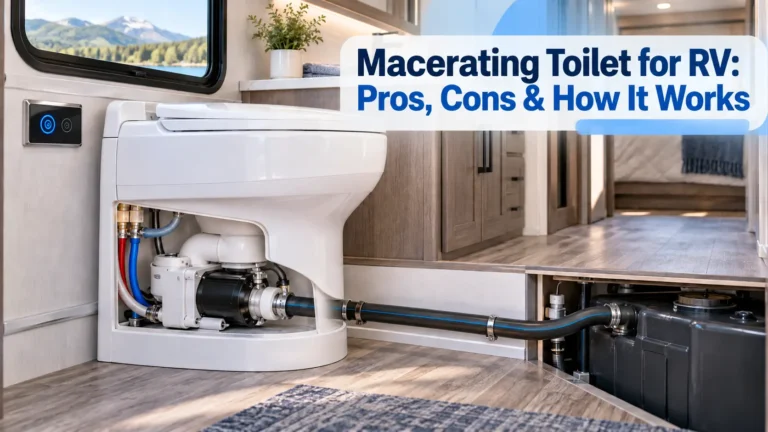
If you are remodeling the bathroom and the new toilet location cannot use a straight gravity drop into the black tank, compare that plan with a macerating toilet for RV use before rebuilding the flange and drain layout.
Your toilet rocks no matter how tight you turn the mounting bolts, or a base leak keeps coming back within weeks of a fresh seal, the problem probably isn’t the rubber gasket. RV toilet flange replacement becomes necessary when the structural ring underneath the toilet, not the seal sitting on top of it, has cracked, warped, or lost its bolt slots. That’s a different repair than swapping a seal, and ordering the wrong part is the single most common mistake RV owners make here.
This guide walks through how to tell flange damage from a seal problem, how to identify whether your flange is threaded or glued (it changes everything about the repair), how to choose the correct replacement, and how to install it without turning a $20 part into a subfloor repair. It also covers when the smarter move is to stop and call an RV technician.
RV Toilet Flange Replacement: Do You Need a New Flange?
Short answer: You need a new flange if it’s visibly cracked, if a bolt slot has broken off, if a mounting bolt spins freely instead of tightening, or if the leak keeps returning after you’ve already replaced the seal. If the flange looks solid and just needs a new gasket, you don’t need this repair.
| Symptom | Possible Cause | Recommended Next Step |
|---|---|---|
| Visible crack or split in the plastic ring | Flange damage | Replace the flange. |
| Bolt slot snapped or broken off | Flange damage | Replace the flange. |
| Mounting bolt spins and won’t tighten | Stripped or broken bolt boss on the flange | Inspect the flange closely. It may need replacement. |
| Toilet rocks even after bolts are snugged | Flange damage or badly worn seal | Remove the toilet and inspect both the flange and seal. |
| Base leak returns weeks after a fresh seal | Could be the flange, a mismatched gasket, or uneven bolt tension | Recheck the gasket and bolt tension first. If both are correct and the leak returns, inspect the flange for damage. |
| Leak only during flushing, plastic ring intact | Seal or bolt tension, not necessarily the flange | See RV toilet leaking at base . |
| Soft or spongy floor around the toilet | Long-term water damage to the subfloor | Stop and have the floor inspected before replacing the flange. |
Don’t diagnose a broken flange from rocking alone, and don’t jump to a flange diagnosis on a repeat leak either. A loose toilet can also mean the mounting bolts simply worked loose from road vibration, which RVFlushGuide’s base-leak guide covers as a free, 30-second fix.
A repeat leak after a fresh seal can also mean the wrong gasket was used the first time, or that the bolts were tightened unevenly and compressed the seal at an angle. Snug the bolts and confirm the gasket is the correct type before you conclude the flange itself has failed. If those check out and the problem persists, or the toilet still rocks with the bolts properly tightened, then pull the toilet and look at the flange itself.
What Is an RV Toilet Floor Flange?
The floor flange is the mounting ring that sits flat against the RV bathroom floor, directly above the waste pipe leading to the black tank. It has three important jobs: it connects the toilet to the waste system, provides a secure anchor point for the mounting bolts, and creates a flat surface for the floor seal or gasket to compress against.
The flange is different from the gasket and the toilet base. The gasket, also called the floor seal, is the rubber or foam seal between the toilet and the flange. Its job is to help prevent leaks and sewer odors from escaping around the base. The toilet base is the bottom section of the toilet that sits over the gasket and is secured to the flange with mounting bolts.
That distinction matters during diagnosis. A new gasket will not repair a cracked, warped, or broken flange, and replacing the flange does not eliminate the need for the correct seal. Both parts have to be in good condition for the toilet to sit securely and seal properly.
If you want to see how the flange, seal, mounting bolts, and other components fit together, see our RV toilet parts guide.
How Do You Choose the Right RV Toilet Replacement Flange?
Short answer: Pull the old flange and look at how it connects to the pipe. If it unscrews, buy the matching thread type (male or female). If it’s bonded to the pipe with no visible threads, it’s solvent-welded, and the repair looks different. Get this identification right before you order anything.
Pipe size. Nearly all RV black-water drain lines run 3″ pipe. Confirm yours matches before ordering; a mismatched diameter won’t connect regardless of thread type.
Thread configuration. This is the detail that trips people up. According to etrailer.com’s plumbing experts, who field this exact question regularly, a replacement flange is either male pipe thread (MPT), where the flange’s threads are on the outside and thread down into the pipe fitting, or female pipe thread (FPT), where the threads are on the inside and the pipe fitting threads up into the flange. Etrailer’s own Q&A is blunt about this: you have to look at your current flange to know which one you have.
Flange height and diameter. The two common Valterra replacement flanges differ in more than just thread gender. The MPT version (Valterra T05-0782) has 7/8″ of usable male threads and a roughly 3.5″ opening for the gasket. The FPT version (Valterra T05-0784) has 0.541″ of usable female threads and a 4″ gasket opening, with an overall flange diameter of about 7″ and mounting holes spaced roughly 5.5″ apart. Those numbers matter if your bathroom floor cutout or existing bolt pattern is tight.
Installation type. Solvent-welded (glued) flanges are less common in current aftermarket replacement parts but do exist on older or lower-cost builds, and on any RV where a previous repair replaced a threaded flange with a glued one. If your existing flange has no threads and doesn’t unscrew, it’s very likely glued directly to the pipe, which changes your removal method (see Step 6 below) and may point toward a hub or spigot-style flange instead of a threaded one.
Flange material. Aftermarket flanges are almost universally ABS plastic, matched to ABS drain pipe. Confirm your RV’s drain pipe material before ordering; mixing plastics at a glued joint is not a reliable repair.
Toilet manufacturer requirements. The flange itself is largely brand-agnostic between Dometic and Thetford, since both bolt onto the same two-bolt pattern in most current models. Dometic does sell its own OEM “socket floor flange” (part 385345892) as part of a bundled repair kit with its flush ball seal and base seal, which is worth considering if you’re already replacing both seals on a Dometic 300/310/320 toilet at the same time.
Threaded Flange Comparison
Technical overview of connection methods, sealants, and difficulty ratings.
| Attribute | Male Threaded (MPT) | Female Threaded (FPT) | Solvent-Welded (Glued) |
|---|---|---|---|
| How it connects | External threads screw down into the pipe fitting | Internal threads receive the pipe fitting from below | Bonded directly to the pipe with plumbing cement, no threads |
| Example part | Valterra T05-0782 | Valterra T05-0784 | LaSalle Bristol hub/spigot flanges |
| Removal | Unscrews (may be stuck; see Step 6) | Unscrews (may be stuck; see Step 6) | Cannot be unscrewed Pipe generally has to be cut (method depends on access) |
| Typical DIY difficulty | Moderate | Moderate | Advanced Setup-dependent; often worth a professional consult before cutting |
| Sealant needed at joint | Non-hardening, ABS-safe sealant | Non-hardening, ABS-safe sealant | Solvent cement rated for ABS, matched to whatever coupler or fitting your specific repair requires |
These three types are not interchangeable. Buying a threaded flange to replace a glued one, or vice versa, will not work without additional fittings and pipe modification.
Parts referenced in this section, with verification status:
- Valterra T05-0782 (3″ MPT floor flange): A male-threaded replacement flange designed for 3-inch RV waste pipe connections. Use this only if your existing setup requires a male-threaded flange.
- Valterra T05-0784 (3″ FPT floor flange): A female-threaded replacement flange for 3-inch RV waste pipe systems. Confirm that your current flange uses a female-threaded connection before ordering.
- Valterra Q23653VP (floor gasket with hold-down bolts): A replacement floor seal and mounting hardware kit commonly used with compatible RV toilet flange setups. Confirm that the gasket dimensions and toilet model match your installation before use.
Confirm your existing flange’s exact thread type and pipe size before ordering either part. A “universal” label on a flange listing means it fits standard 3″ RV drain systems generally, not that any flange will fit your specific setup.
What Tools and Materials Do You Need?
Tools
- Adjustable wrench
- Phillips and flathead screwdrivers
- Rubber gloves
- Old towels and a small bucket
- Flashlight
- Measuring tape
- Putty knife or plastic scraper (for cleaning the old gasket residue)
Parts (required)
- Replacement floor flange, correct thread type and pipe size for your RV
- Matching floor gasket (see the Valterra Q23653VP above, or the OEM-specified gasket for your toilet brand)
- Mounting hardware (screws to secure the flange to the floor; #8 x 1-1/2″ is the size referenced for the Valterra flanges, per etrailer’s plumbing support)
- Non-hardening, ABS-safe sealant for the threaded connection
Only if your flange turns out to be glued
- Rotary tool with a cutting wheel, or a hacksaw rated for plastic pipe
- A compatible rubber no-hub/sleeve coupler and clamps, or a hub/spigot-style replacement flange, sized to match your specific pipe and fitting
- Solvent cement rated for ABS pipe
Don’t buy any of this until Step 5 confirms you actually need it, and treat this list as a starting point rather than a fixed kit. Most RVs on the road today use a threaded flange, and that repair doesn’t need any of this. For a glued flange specifically, the right coupler and cutting approach depend on how much clearance you have under the floor and exactly how the existing pipe run is built, which is different enough RV to RV that this guide can’t give you one fixed parts list. If you’re not sure what you’re looking at, that’s a reasonable point to call a professional before buying anything on this list.
How to Replace an RV Toilet Flange Step by Step
Before you remove anything, make sure you know what type of flange you have. A threaded flange is usually a manageable DIY repair. A glued or solvent-welded flange can require cutting and rebuilding part of the waste pipe, so the job becomes much more involved.
Step 1: Empty the Black Tank and Shut Off the Water
Start by dumping and rinsing the black tank. You will be opening the toilet drain during this repair, so working above an empty and rinsed tank makes the job cleaner and safer.
Next, turn off the RV water pump or disconnect the city-water supply. Press the toilet flush pedal once to release any remaining pressure and drain the water left in the line.
Put on gloves before moving to the next step.
Step 2: Disconnect the Water Supply Line
Find the water supply connection behind or beside the toilet.
Place a towel underneath it, then carefully disconnect the water line from the toilet. A small amount of water may still drip from the fitting, even after the water supply has been turned off.
Do not force the fitting if it feels stuck. Plastic plumbing connections can crack if they are twisted too hard.
Step 3: Remove the Toilet
Remove the plastic caps covering the toilet mounting nuts, then loosen and remove both nuts.
If one of the bolts spins instead of loosening normally, take note of it. That can happen when the flange slot or mounting area underneath the toilet is damaged.
Once the hardware is removed, lift the toilet straight up. If the old gasket is holding it in place, gently rock the toilet from side to side rather than pulling hard in one direction.
Set the toilet on an old towel, cardboard, or another protected surface.
Cover the open waste pipe with a secure temporary cover that cannot fall into the tank. This helps keep sewer odors out of the RV while you work.
Step 4: Inspect the Flange and the Floor Around It
With the toilet out of the way, clean enough of the old gasket material away that you can see the flange clearly.
Look for:
- Cracks through the flange
- Broken or missing bolt slots
- Stripped mounting areas
- A flange that is warped or no longer sitting flat
- Damage around the pipe connection
Also press gently on the floor around the flange.
If the floor feels soft, spongy, swollen, or unstable, stop the repair. That usually means the problem extends beyond the flange itself. Installing a new flange on damaged flooring will not give the toilet a solid mounting surface.
At that point, the subfloor should be inspected and repaired before the toilet is reinstalled.
Step 5: Identify How the Flange Connects to the Pipe
Do this before trying to remove the flange.
Look closely at the point where the flange meets the waste pipe.
If you can see threads and the flange appears to screw into or over another fitting, you likely have a threaded flange.
If the flange and pipe look like one smooth, bonded connection with no visible threads, you may have a solvent-welded or glued flange.
Do not assume a flange is glued just because it will not turn. An older threaded flange can also become very tight.
If you cannot clearly identify the connection, stop before using more force. Damaging the fitting below the floor can turn a simple flange replacement into a much larger plumbing repair.
Step 6: Remove the Old Flange
If You Have a Threaded Flange
Start by trying to turn the flange counterclockwise by hand.
If it will not move, use padded pliers or another suitable tool on the stronger body of the flange. Avoid putting pressure directly on the thin bolt slots, since they can break easily.
Etrailer’s plumbing support discusses stuck threaded flanges and notes that some may require more involved removal if they cannot be unscrewed normally.
The important part is not to keep increasing force indefinitely. If the flange refuses to move, stop before you damage the pipe or fitting underneath it.
If You Have a Glued Flange
A solvent-welded flange does not simply unscrew.
Etrailer’s plumbing guidance notes that a glued flange may need to be cut away rather than twisted loose.
This is where the repair becomes more complicated.
The correct cutting point, replacement fitting, and reconnection method depend on how your RV’s drain pipe is installed and how much access you have below the floor. One RV installation may look completely different from another.
For example, one documented RV owner repair involved cutting the pipe and reconnecting the system with sleeve couplers and a replacement flange. That is useful as an example, but it should not be treated as a universal repair method.
If you are not already comfortable cutting and reconnecting ABS drain pipe, this is a good point to stop and have an RV technician inspect the setup before anything is cut.
Step 7: Install the New Flange
For a Threaded Flange
First, confirm that the replacement flange matches the thread type and pipe size you removed.
Apply the thread sealant recommended for the flange or fitting you are using.
According to Valterra guidance referenced by etrailer, a non-hardening sealant suitable for the ABS connection should be used for these threaded fittings. Avoid substituting a sealant unless the manufacturer confirms it is suitable for the connection.
Thread the replacement flange into position until it sits securely and level with the floor.
Check three things before moving on:
- The flange sits flat
- The mounting slots are positioned correctly
- The flange does not move by hand
There is no verified universal torque value for this flange-to-pipe connection, so do not keep tightening simply because the fitting will still turn. Excess force can damage plastic fittings.
Once it is positioned correctly, secure the flange to the floor through the mounting holes using the correct hardware for your installation.
For a Solvent-Welded Flange
Follow the instructions for the exact flange, coupler, pipe material, and solvent cement being used.
Do not rely on a generic installation sequence here. The correct procedure depends on the fitting arrangement in your RV.
If you are unsure about pipe alignment, bonding, or access below the floor, have the connection completed by an RV technician.
Step 8: Install the Correct Floor Gasket
The flange and the floor gasket are separate parts, and both need to be in good condition.
Do not automatically place the gasket in the same location as the old one without checking your toilet’s instructions.
Gasket placement can vary by toilet model. For example, some Dometic instructions place the floor seal on the toilet base before the toilet is lowered into position, while other installation procedures use a different sequence.
Check the installation instructions for your exact toilet model or replacement gasket kit.
If you no longer have the manual, find the toilet model number and use it to locate the correct manufacturer’s instructions.
If you still need help choosing the seal, our RV toilet seal replacement guide explains the different gasket types and installation considerations in more detail.
Step 9: Reinstall the Toilet
Before lowering the toilet back into place, remove the temporary cover from the waste opening.
Carefully lower the toilet straight down over the flange and mounting bolts.
Try to get the alignment right before the toilet fully compresses the gasket. Avoid twisting the toilet back and forth once it is sitting on the seal.
Install the mounting nuts by hand first.
Then tighten them gradually, alternating from one side to the other. This helps the toilet settle evenly against the gasket.
Do not overtighten the mounting nuts.
For example, Dometic’s installation instructions for certain 310-series toilets specify a mounting-nut torque of 30 to 40 inch-pounds. Use that number only when it applies to your exact model.
For other toilets, follow the manufacturer’s installation instructions rather than borrowing the Dometic specification.
The toilet should feel stable and should not rock once the hardware is tightened correctly.
Step 10: Reconnect the Water and Check for Leaks
Reconnect the water supply line, then turn the RV water system back on.
Before flushing, check the water connection behind the toilet for drips.
Then flush the toilet and watch the base closely.
Check for:
- Water appearing around the toilet base
- Moisture around the supply-line connection
- Movement or rocking when the toilet is used
- Water or odor returning around the flange area
Repeat the test a few times, then check the area again after the toilet has been sitting for a while.
If water appears mainly while flushing, recheck the floor seal and flange connection.
If water appears while the toilet is sitting unused, the leak is more likely coming from the fresh-water supply side.
If the toilet still rocks or leaks after the flange and gasket have been installed correctly, stop tightening the bolts. Remove the toilet and inspect the installation again rather than trying to solve the problem with more force.
Can You Repair a Broken RV Toilet Flange Instead of Replacing It?
Short answer: Minor bolt-slot damage on an otherwise sound flange can sometimes be addressed with a manufacturer-compatible repair component. Cracks through the body of the flange, a broken pipe connection, or soft flooring underneath are replacement (or professional-repair) situations, not patch jobs.
| Damage type | Repair or replace? | Notes |
|---|---|---|
| One bolt slot cracked, flange otherwise solid | Repair may be possible | Only with a component verified compatible with your exact flange; don’t improvise |
| Flange cracked through the body | Replace | A crack through the structural ring won’t hold reliably under repeated bolt tension |
| Pipe connection damaged or separated | Call a professional | This is below-floor work in most RVs |
| Rotten or soft subfloor | Call a professional | The flange can’t sit level or hold long-term on compromised flooring |
| Threads stripped from over-tightening | Replace | A stripped thread won’t reliably re-seal even with sealant |
Don’t improvise a fix here. Standard hardware-store caulk, generic epoxy, or a residential repair ring not verified to match your flange’s dimensions is a short-term patch at best and can hide a leak that’s still actively damaging your subfloor underneath it.
How Much Does RV Toilet Flange Replacement Cost?
A basic RV toilet flange replacement is usually a low-cost repair if the flange is threaded and the surrounding floor and drain pipe are still in good condition. The total cost increases quickly if you also need a new gasket, additional plumbing fittings, or repairs to the subfloor.
For a typical DIY repair, expect to budget for:
- Replacement floor flange: roughly $15 to $25
- Replacement floor gasket: roughly $10 to $20
- Mounting hardware: usually inexpensive and sometimes included with the gasket or flange kit
- Sealant or small plumbing supplies: additional cost depending on the flange type
- Pipe fittings or couplers: additional cost if the existing plumbing needs modification
That puts a straightforward threaded-flange repair at roughly $30 to $50 in parts before any tools or additional plumbing work.
These figures are general parts-cost estimates based on retailer pricing checked in September 2026. Actual prices can vary by brand, flange type, seller, and availability.
Professional repair costs are much harder to estimate because the labor depends on what the technician finds after removing the toilet. A simple flange replacement may require relatively little labor, while a damaged waste connection or soft subfloor can turn it into a much larger repair.
If the floor is soft, the black-tank connection is damaged, or the flange requires cutting and rebuilding part of the drain line, get a repair estimate before continuing.
When Should You Call an RV Technician?
Some flange repairs are straightforward. Others can quickly turn into a much bigger plumbing or flooring job. If you run into any of the problems below, it is usually better to stop and have an RV technician take a look before you remove or cut anything else.
- The floor feels soft, spongy, or looks water-damaged. A new flange needs a solid surface to hold the toilet securely. If the subfloor is weak or rotten, replacing the flange alone will not solve the problem.
- The damage extends into the black tank connection or drain pipe. If the crack or separation is below the flange itself, the repair may involve the waste plumbing rather than just the mounting ring.
- You cannot tell whether the flange is threaded or glued. Do not keep twisting or prying just to find out. A stuck threaded flange and a solvent-welded flange can look similar, and forcing the wrong one can damage the pipe underneath.
- You have a glued or solvent-welded flange and are not comfortable cutting ABS pipe. Replacing this type of flange may require cutting, reconnecting, and carefully aligning the drain line. A poor cut or bad connection can create a wastewater leak that is harder to repair than the original problem.
- The toilet still leaks after the flange and seal have been checked or replaced. A repeat leak can point to something less obvious, such as an uneven mounting surface, a misaligned drain connection, damaged flooring, or another leak source around the toilet.
The main thing is not to force the repair once the problem moves beyond the flange itself. If the fitting will not come loose, the floor is damaged, or the drain connection is unclear, getting the setup inspected before cutting anything can save you from turning a small repair into a much larger one.
If you are also wondering whether the toilet itself should be replaced, see our RV toilet replacement guide before buying more parts.
Conclusion
Before you buy anything, confirm the problem is actually the flange and not the seal, the mounting bolts, or a leak coming from somewhere else on the toilet. Once you’ve confirmed it, identify whether your flange is threaded or glued; that single detail determines whether this is a weekend DIY job or one better handed to a professional. Buy the correct thread type and pipe size, use a sealant rated for the connection you actually have, and test thoroughly with the toilet reinstalled before you consider the job done. A flange replaced correctly the first time, with the right part and the right seal, should outlast the toilet sitting on top of it.