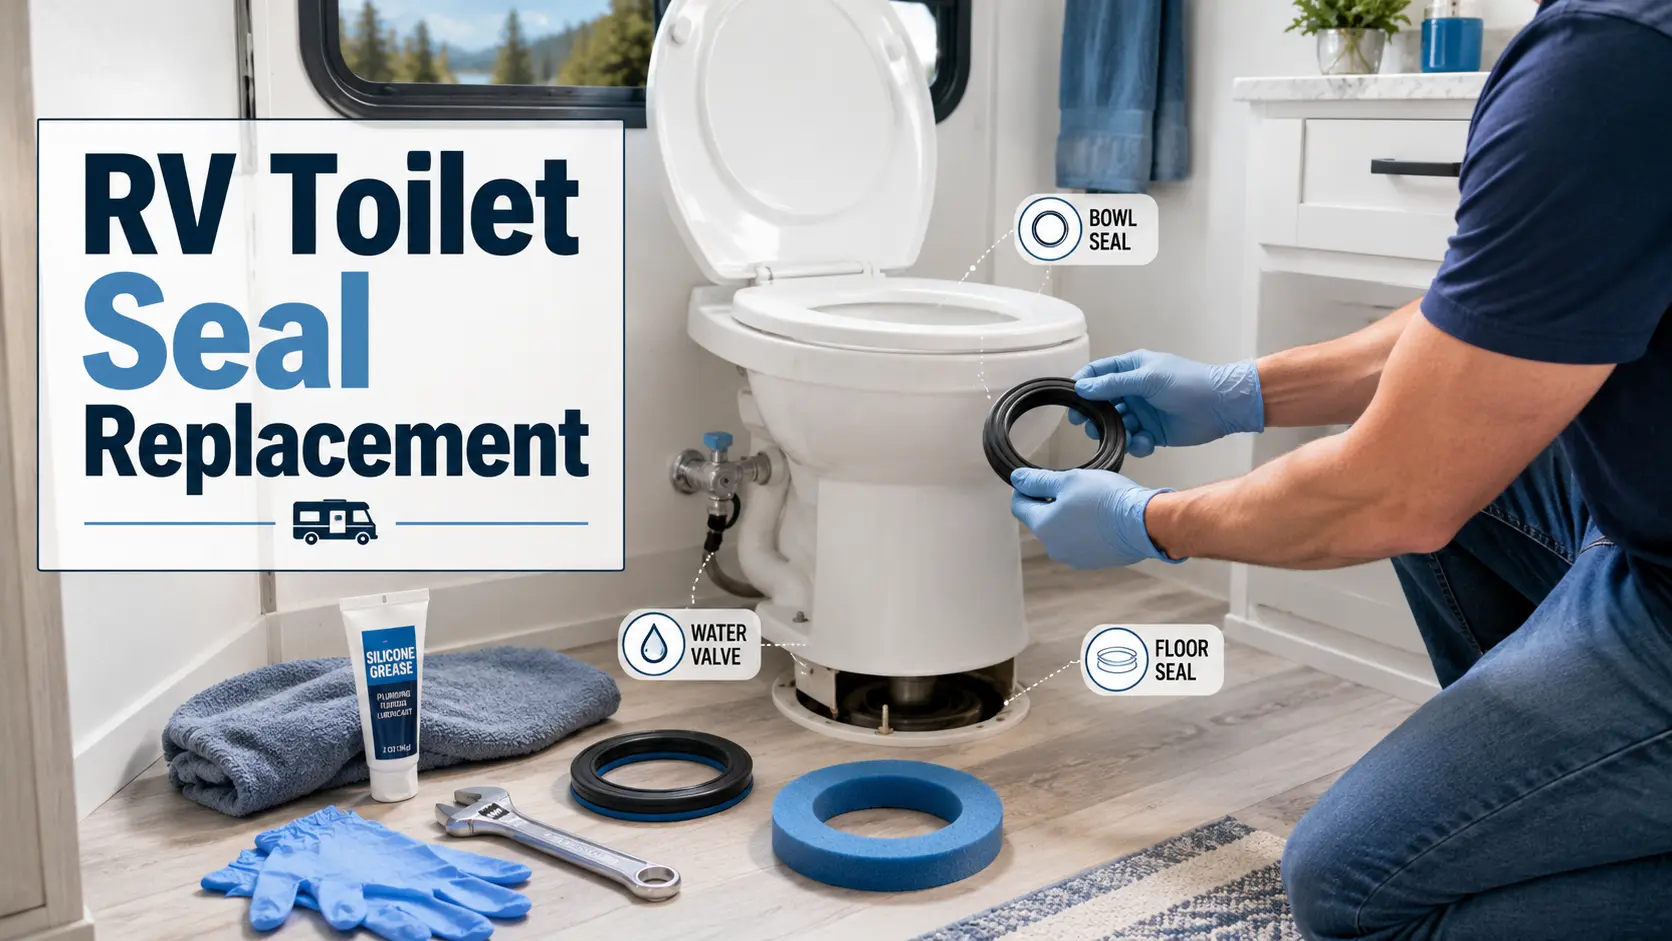
RV toilet seal replacement is a $10–25 DIY fix that most RV owners can complete in under an hour. The most common problem is a worn flush ball or waste ball seal that lets bowl water drain overnight and allows sewer smells in. This guide covers how to diagnose which seal is failing, the common part numbers for popular Dometic and Thetford toilets, and step-by-step instructions for all three common seal types.
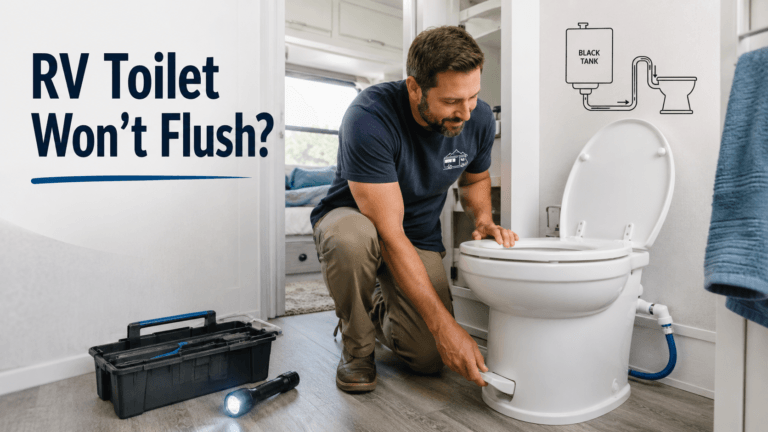
You wake up in the middle of the night, walk into your RV bathroom, and immediately know something is wrong. The toilet bowl is completely dry. Worse, there’s a faint sewer smell hanging in the air.
You didn’t leave the black tank valve open. Nothing is clogged. The problem is simpler: your RV toilet seal has failed.
RV toilet seal replacement is one of the most common repairs on the road and one of the easiest to handle yourself. Parts run between $10 and $25. The actual job takes 15 minutes to an hour, depending on which seal has gone bad. The tricky part is knowing which seal is causing the problem and which steps apply to your specific toilet brand.
This guide covers both Dometic and Thetford toilets. It walks you through how to diagnose the problem, get the right replacement part, and fix the flush ball seal, waste ball seal, and floor flange seal correctly. No guesswork. No buying the wrong part.
Which RV Toilet Seal Needs Replacing?
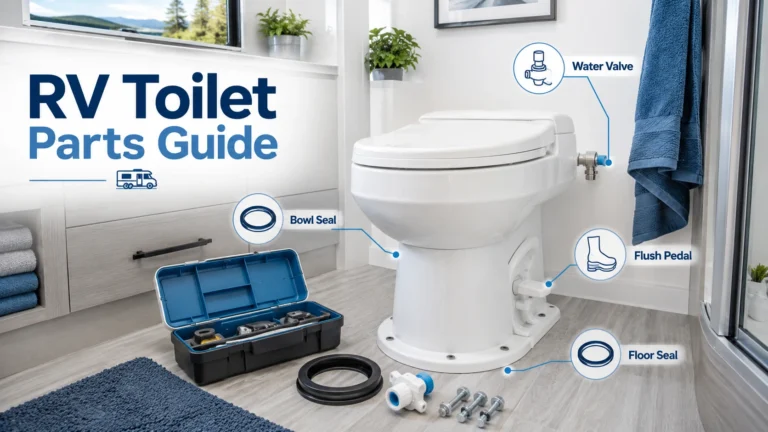
The three most common RV toilet seals are the flush ball seal (Dometic) or waste ball seal (Thetford), which holds water in the bowl; the floor flange seal, which prevents leaks at the toilet base; and the two true toilet seals most RV owners deal with are the bowl seal and the floor flange seal. Water valve leaks can look similar, but they are usually a valve problem, not a seal problem. Each one fails in a specific, recognizable way. Match your symptom to the right seal before ordering anything. Buying the wrong part is a wasted trip.
| Symptom | Likely Cause | Part to Check |
|---|---|---|
| Bowl water gone within hours or overnight | Flush ball seal (Dometic) or waste ball seal (Thetford) worn or dirty | #385311658 (Dometic) / #34120 (Thetford) |
| Water pooling at toilet base or on floor during flushing | Floor flange seal failed | OEM foam seal matched to your model |
| Dripping from back of toilet during flushing only | Water inlet valve or vacuum breaker | #385311641 (Dometic) |
| Foot pedal won’t snap back fully after flushing | Pedal linkage or flush ball alignment issue | Inspect pedal before buying any seal |
A dry bowl also lets black tank gases into your living space. That sewer smell in the morning is the seal telling you it’s done. For more help diagnosing odors that persist even after a seal replacement, check out our guide on RV toilet smells when flushed.
Should You Replace the Seal or Clean It First?
Not every bowl water problem means the seal is worn out. Before ordering a replacement, take 10 minutes to clean and recondition the existing seal. Dometic’s own installation instructions note that a bowl not holding water can result from a seal that is incorrectly positioned, temporarily distorted, dirty, or worn. Only the last one requires a new part.
Clean and recondition first if:
- The seal looks intact but has a visible coat of mineral deposits or residue
- The bowl started losing water after a long storage period (dry-out, not damage)
- The seal still feels pliable when you press it, not hard or cracked
Replace the seal if:
- The rubber is visibly cracked, torn, swollen, or misshapen
- The seal feels hard and won’t compress evenly around the flush ball
- The bowl still won’t hold water for 30 to 60 minutes after cleaning and lubricating
- The seal has a visible gap or doesn’t seat flat all the way around
How to clean the seal before replacing:
- Open the flush ball (Dometic) or remove the bowl (Thetford) to access the seal.
- Put on rubber gloves and remove the seal.
- Soak a cloth in white vinegar and scrub the seal and the seal seat to remove mineral buildup.
- Rinse clean and let dry.
- Apply a fresh coat of silicone-based RV toilet seal lubricant. Never use petroleum-based products.
- Reinstall and test. Fill the bowl and check at 30 minutes and again at 60 minutes.
If the bowl still drains after cleaning and reconditioning, the seal is worn. Order the replacement part and follow the steps below.
Parts and Tools to Get Before You Start
Ordering the right part for your specific toilet model matters. A Dometic 300 series seal won’t fit a 500. Thetford part numbers vary by model line. Check the model sticker on your toilet before you order anything. It’s usually on the back wall of the bowl or under the foot pedal housing.
For Dometic gravity-flush toilets (300, 301, 310, 311, 320, 321 and many 400-series models including 400, 401, 410, 411, 420, 421):
- Flush ball seal: Part #385311658 — the rubber gasket inside the bowl. No tools required for installation.
- Floor seal kit: Part #385311652 — the foam gasket at the toilet base.
- Water inlet valve: Part #385311641 — if flushing causes a drip from the back of the toilet.
For Thetford Aqua-Magic Style Plus, Style Lite, Style II, and Residence:
- Waste ball seal kit: Part #34120 — the rubber seal around the waste ball inside the bowl.
- Other Thetford models (Aqua-Magic V, Aria, Bravura) use model-specific kits. Check the sticker on the back of your bowl before ordering.
Tools:
⚠️ Safety check before you start: Turn off the water supply and fully release pressure before touching any toilet component. If removing the toilet from the floor, dump and rinse the black tank first. Wear rubber gloves throughout. Have old towels nearby for water spillage.
- Adjustable wrench
- Pliers
- Rubber gloves
- Old towels or rags
- Silicone-based plumber’s grease
One critical note on lubricant: Thetford specifies that toilet seal lubricant must be non-petroleum, silicone-based, and safe for RV holding tank seals. Petroleum products like Vaseline cause rubber to swell and crack. Use silicone grease only, whichever brand you choose.
How Do You Replace the Flush Ball Seal on a Dometic RV Toilet?
Replacing the Dometic flush ball seal (part #385311658) takes 10 to 15 minutes and requires no tools. Turn off the water, open the flush ball, pull out the old seal, press the new one in, apply silicone grease, and test. No toilet removal or disassembly needed.
The Dometic 300, 310, and 320 series toilets use a rubber seal inside the bowl that wraps around the flush ball opening. When that seal dries out or tears, the bowl slowly drains. Unique Camping + Marine’s repair guide for the Dometic 300 series confirms that this is a no-tools repair that most RV owners can do in under 15 minutes.
Step 1: Turn off the water supply. Shut off the pump at the control panel or disconnect from city water.
Step 2: Press the foot pedal all the way down to open the flush ball. Hold it open and let any remaining water drain into the black tank.
Step 3: With the flush ball open, reach in with gloved hands and pull the old seal straight down and out of the flush valve opening. It should release without tools.
Step 4: Clean the flush valve opening. Remove any mineral buildup or debris left behind by the old seal.
Step 5: Press the new seal into the flush valve opening. Push firmly all the way around to make sure it’s fully seated.
Step 6: Apply a thin coat of silicone grease to the surface of the flush ball where it contacts the seal.
Step 7: Close the flush ball. Turn the water back on. Add water to the bowl and leave it for at least 30 minutes to confirm the seal holds.
If your Dometic is leaking at the base rather than draining through the bowl, that’s a separate issue. Our full guide on Dometic RV toilet leaking at the base covers every cause and the correct fix for each.
How Do You Replace the Waste Ball Seal on a Thetford RV Toilet?
Replacing the Thetford Aqua-Magic waste ball seal (part #34120) requires removing the toilet bowl from the pedestal to access the seal from below. The job takes 30 to 45 minutes. Once the bowl is off, the old seal pulls out and the new one presses into place.
Thetford Aqua-Magic toilets require a bit more work than Dometic models because the seal is accessed from underneath the bowl. RV Love’s step-by-step Thetford waste ball seal guide documents the full process in detail. Before you start, dump and rinse your black tank. The tank is directly below where you’ll be working.
Step 1: Shut off the water supply. Press the foot pedal all the way down and hold it until the water flow stops completely. This drains the bowl and releases water line pressure.
Step 2: Find the hex-head screws at the base of the bowl where it meets the pedestal. Remove them.
Step 3: Twist the bowl counter-clockwise and lift it straight up. Set it on old towels nearby.
Step 4: Look at the waste ball assembly. You’ll see the rubber seal surrounding the waste ball. Pull the old seal out and dispose of it.
Step 5: Clean the area well. Remove any mineral deposits or residue around the seal seat.
Step 6: Press the new seal into place, making sure it seats evenly all the way around.
Step 7: Apply a thin coat of silicone grease to the waste ball surface where it contacts the new seal.
Step 8: Lower the bowl back onto the pedestal, align it, and twist clockwise until it locks.
Step 9: Reinstall the hex screws.
Step 10: Turn the water back on. Fill the bowl and wait 30 minutes to confirm the water level holds.
How Do You Replace the RV Toilet Floor Seal?
Replacing the RV toilet floor seal requires removing the toilet completely from the floor. The job takes 45 to 60 minutes. Always use a flexible OEM foam seal made for your toilet’s specific model. Never use a residential beeswax ring. Beeswax hardens, can’t flex with the coach’s movement, and will crack.
A base leak left unaddressed causes floor damage fast. This is one worth prioritizing.
Camping World’s flange seal replacement guide makes the beeswax warning explicit: residential wax rings aren’t designed to flex with an RV in motion. They harden, crack, and cause exactly the type of leak you’re trying to fix. Use a flexible foam OEM seal matched to your toilet’s brand and model number.
Step 1: Dump and rinse the black tank first. This is non-negotiable before lifting the toilet.
Step 2: Turn off the water supply. Shut off the pump or disconnect from city water.
Step 3: Disconnect the water supply line from the back of the toilet.
Step 4: Remove the mounting bolts or nuts. Most toilets have one on each side of the base.
Step 5: Lift the toilet straight up off the floor. Rock it gently if the old seal is sticking. Set the toilet on old towels or newspaper.
Step 6: Remove the old seal from the flange and clean the surface. Inspect the flange itself. If it’s cracked, replace it before continuing.
Step 7: Position the new foam seal on the flange.
Step 8: Lower the toilet back down over the mounting bolts, pressing firmly to compress the new seal.
Step 9: Tighten the mounting nuts alternately, left then right, until snug. Don’t overtighten or you’ll crack the toilet base.
Step 10: Reconnect the water supply line. Turn the water on and check for leaks at both the base and the water connection. Press a tissue under the water fitting. Even a small weep will show up.
One key distinction: if water only appears at the base during flushing and stops when the toilet is idle, the floor seal is probably fine. That specific pattern points to the water inlet valve instead. For Dometic toilets, see our Dometic RV toilet leaking at the base guide for how to tell the two problems apart.
How to Make Your New RV Toilet Seal Last Longer
Replacing the seal is step one. Making it last is step two. Most premature failures come from two things: dried-out rubber and mineral buildup. Both are preventable with a few simple habits.
According to rvflushguide.com, some RV parts suppliers list 4 to 6 years as a normal replacement range for Thetford waste ball seals, but real lifespan depends on water hardness, storage, cleaning habits, and how often the toilet is used. Hard water areas may shorten that to 3 years. Dometic seals follow a similar lifespan. Regular maintenance can push you toward the longer end of that range.
Apply silicone grease at the start and end of every season. A thin coat on the seal and the flush ball keeps the rubber supple and prevents cracking. Dry rubber cracks. Supple rubber seals.
Don’t let the bowl sit completely dry in storage. When the RV is parked for weeks or months, add a small amount of water or a few drops of RV toilet seal conditioner to the bowl. This prevents the seal from hardening while the rig is idle.
Let the foot pedal snap back after every flush. Don’t ease the pedal back slowly. Let it close quickly and completely. This technique ensures the seal seats properly after each flush, which is one of the easiest ways to extend seal life.
Clean the seal periodically. Mineral deposits and toilet chemical buildup prevent the seal from sitting flush. A soft brush, white vinegar, and a rinse before applying fresh silicone grease will keep it clean.
Skip petroleum-based products entirely. Vaseline, WD-40, and cooking oil all degrade rubber. Silicone grease is the correct choice.
For more on keeping your whole RV sanitation system in good shape, see our guide on the best RV toilet treatment products for odor control and waste breakdown.
When an RV Toilet Leak Is Not a Seal Problem
Not every RV toilet problem is a seal problem. Replacing the seal when the real issue is somewhere else wastes money and leaves the original fault unfixed.
Water drips from the back of the toilet during flushing. This is the water inlet valve or vacuum breaker, not the floor seal. Water that appears specifically during flushing and stops when idle almost always points to a valve failure. For Dometic toilets, our Dometic RV toilet leaking at the base guide shows the exact test that separates a valve problem from a seal problem.
Bowl won’t hold water even after a brand new seal. If you’ve replaced the flush ball seal and the bowl still drains, the flush ball itself may be scratched or worn. A scratched ball prevents even a perfect new seal from seating. Replace the flush ball and seal together.
Water at the base only when the black tank is near full. This can indicate a vent or backflow issue, not a flange seal failure. Dump the tank and see if the problem disappears. If it does, the seal is fine.
Toilet base is cracked or broken. No seal will fix a cracked toilet base. The toilet needs to come out and be replaced. See our guide on the RV Toilet Won’t Flush to find a direct fit for your rig.
Foot pedal feels spongy or won’t return fully after flushing. This is a pedal spring or flush ball linkage issue. The seal may be perfectly fine. Look into the bowl after flushing. If the flush ball doesn’t close completely, the problem is mechanical, not the rubber.
Wrapping Up
Most RV toilet seal problems come down to one worn rubber part that costs under $25 and takes less than an hour to fix. The key is diagnosing which seal is causing the problem before you order anything.
Bowl water draining overnight? Start with the flush ball or waste ball seal. Water at the base? Check the floor flange seal. Dripping during flushing? The water inlet valve is the likely cause.
Replace the right part, lubricate the new seal with silicone grease before you install it, and let the foot pedal snap shut after every flush. That combination will get years out of a new seal.
If the toilet itself is beyond another seal swap, our guide on the best RV toilet replacement options covers the top Dometic and Thetford models that actually fit most RV bathrooms.
Frequently Asked Questions
Can I replace an RV toilet seal without removing the toilet?
It depends on which seal needs replacing. The Dometic flush ball seal (part #385311658) can be replaced in 10 to 15 minutes without removing or disassembling the toilet. The Thetford waste ball seal requires removing the bowl from the pedestal, but not the toilet from the floor. The floor flange seal requires full toilet removal from the floor.
How do I know if my RV toilet seal is bad?
The clearest sign is bowl water that drains within a few hours or overnight. A working seal holds water in the bowl as a barrier against black tank gases. If the bowl runs dry, or if you’re getting a persistent sewer smell even when water is present, the seal has likely dried out or torn. Try pressing the foot pedal and watching whether the bowl holds water for 30 minutes or more.
How long does an RV toilet seal last?
Every 4 to 6 years under normal use. Hard water areas often see failures closer to 3 years due to mineral buildup on the seal surface. Seals that are kept clean and treated with silicone grease regularly tend to last toward the upper end of that range.
Can I use Vaseline on my RV toilet seal?
No. Vaseline and other petroleum-based products break down rubber seals over time, causing them to crack, swell, or harden. Use silicone-based plumber’s grease only. It’s safe for rubber, available at any hardware store, and costs a few dollars. Keystone and Forest River forum members have documented this mistake repeatedly.
What’s the difference between the flush ball seal and the floor seal on an RV toilet?
The flush ball seal (or waste ball seal on Thetford) sits inside the toilet bowl and holds the water level that blocks sewer gases. The floor seal sits between the toilet base and the RV floor and prevents liquid from reaching the floor. They’re two separate parts that fail independently, produce different symptoms, and require completely different repair steps.