If your RV toilet has a cracked base, a broken bowl, or a flush mechanism that keeps failing after repeated repairs, replacement is the right call. If the problem is a bad seal, a sticky pedal, or a clog, you can fix it without buying a new toilet. This guide covers how to make that decision, what to measure before you buy, and how to install your replacement in under an hour.
You press the pedal and nothing works right. Again. You’ve already replaced the flush ball seal once. Maybe twice. The toilet rocks when you sit on it. There’s a stain in the bowl that won’t come off no matter what you use.
At some point, the question shifts from “how do I fix this?” to “should I even bother fixing this?”
That’s exactly what this guide covers. RV toilet replacement is one of the most straightforward DIY jobs in an RV, but only if you make the right decision first: repair or replace. Getting that wrong costs you time, money, or both. Work through this in order and you’ll know the answer before you spend anything.
When Does an RV Toilet Actually Need to Be Replaced?
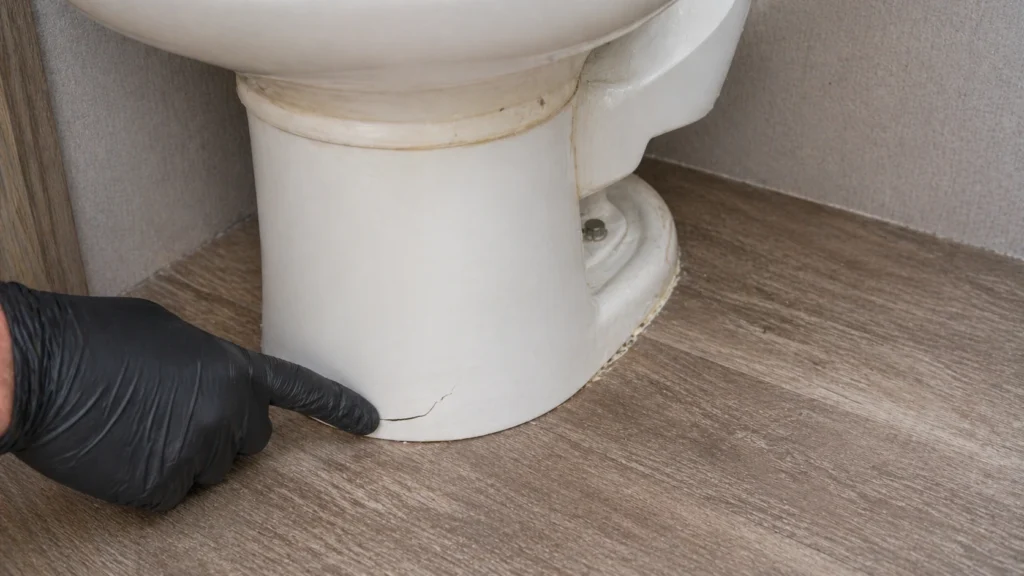
A few specific problems mean the toilet itself is done. A cracked base or a damaged bowl can’t be patched reliably. A flush mechanism that keeps breaking after you’ve already replaced it once is a sign the whole unit is worn out. And if key parts for your model are discontinued, repair stops being an option.
Here’s the short list of genuine replacement triggers:
Cracked base or bowl. A crack in the porcelain or plastic base will leak every time you flush. It won’t seal. This is a replace situation.
Flush mechanism fails repeatedly. If you’ve replaced the pedal linkage or flush valve more than once and it’s failing again, the toilet is at the end of its service life.
Persistent leak at the base that isn’t the seal. If you’ve replaced the flange seal and bolts and the leak continues, the toilet body itself may be warped or cracked.
Parts are no longer available. Older Thetford and Dometic models eventually go out of production. If you can’t source parts, replacement is your only path.
You’re upgrading for comfort. Low-profile toilets with plastic bowls are uncomfortable for many people. Replacing with a residential-height porcelain model is a legitimate choice, not just a repair situation.
You may also choose to replace an old toilet in a used RV for comfort, hygiene, or upgrade reasons, especially if the toilet is stained, loose, cracked, or parts are hard to find. That’s a personal call, not a must.
What about a damaged floor flange? A cracked or rusted floor flange doesn’t automatically mean you need a new toilet. The toilet often needs to come off so the flange can be repaired or replaced, but if the toilet itself is in good shape, the same unit can go back down once the flange is fixed. The flange is the real repair in that scenario. If the flange damage is severe, DoItYourselfRV recommends calling a service center rather than attempting a DIY flange replacement.
When Should You Repair Instead of Replace?
Three situations almost always point to repair over replacement. A bad seal, a sticky or broken pedal, or a clog are all fixable for $10 to $40 in parts. Replacing the whole toilet because of any of these is unnecessary.
Repair makes more sense when:
- The flush ball seal is failing. Water drains out of the bowl slowly, or you get black tank odor between flushes. Seal kits for Dometic 300/310/320 series run around $10 to $15 and install without removing the toilet. This is a 20-minute fix. See the full RV toilet repair guide for step-by-step instructions.
- The pedal is broken or sticky. The foot pedal linkage is a wear part. Replacement kits are cheap and model-specific. A broken pedal doesn’t mean the toilet is done.
- The toilet won’t flush. Before assuming the worst, check the water valve, the water pressure, and the blade valve. Most non-flushing issues are mechanical, not structural.
- You have a clog. A clog between the toilet and the black tank, or a pyramid plug inside the tank, has nothing to do with the toilet itself. Read the guide on how to unclog an RV toilet before even considering replacement.
The cost comparison matters. A replacement toilet runs $150 to $500 depending on the model. A seal kit runs $10 to $30. If the toilet body is intact and the problem is a worn part, repair is almost always the right call.
Before You Buy: Measure These 7 Things First

Buying the wrong toilet is the most expensive mistake in this job. It can’t go back in the box after you’ve broken the seal. Before you order anything, take a tape measure into the bathroom and get these seven numbers and checks done.
1. Rough-in distance. This is the distance from the center of the floor flange to the wall directly behind the toilet. It’s the most critical measurement. According to Camping World’s replacement guide, the new toilet’s rough-in must be equal to or less than your existing rough-in. A toilet with a larger rough-in won’t sit flush against the wall without relocating the flange.
2. Wall clearance. Measure from the flange center to each side wall. Some replacement models are wider than what they’re replacing, and a quarter inch of extra width can cause clearance issues with a cabinet or wall panel.
3. Front clearance. Measure from the flange center forward to the front wall, shower door, or any fixed obstruction. Elongated bowls need more front clearance than round bowls.
4. Door and shower swing clearance. Open the bathroom door and the shower door fully. A taller or wider toilet can block either one mid-swing, which you won’t notice until it’s already bolted down.
5. Seat lid clearance. Check vertical clearance above the toilet. Some residential-height replacements sit noticeably higher than the original, and the lid may hit a cabinet shelf or wall-mounted fixture when fully open.
6. Water line position. The water supply connection comes in from different sides depending on the model: left, right, or rear. Confirm the new toilet’s connection position works with your existing supply line. A mismatch means buying an extension or rerouting the line.
7. Floor flange condition. Before you order anything, pull the toilet and inspect the flange. Cracks, rust, or broken bolt slots need to be addressed before the new toilet goes down. If the flange looks good, note the bolt slot positions so you buy the right bolt kit.
Once you have those measurements, the next step is choosing a toilet that actually fits your RV. If you are still comparing models, comfort height, bowl material, and brand options, see our guide to the best RV toilet replacement options before you buy.
How to Choose the Right Replacement RV Toilet
Once your measurements are in hand, you’re choosing between materials, profiles, and flush types. Here’s how each decision breaks down.
Plastic vs porcelain bowl. Plastic is lighter and handles road vibration better. Porcelain is easier to clean and doesn’t hold stains or odors. United RV Parts notes that porcelain models are becoming more common as RV suspension quality has improved, making them viable in a broader range of rigs.
| Feature | Plastic Bowl | Porcelain Bowl |
|---|---|---|
| Weight | Lighter | Heavier |
| Road vibration | Handles it better | More fragile on rough roads |
| Cleaning | Stains more easily | Easier to clean, doesn’t hold odor |
| Cost | Lower | Higher |
| Feel | More “camping” | More residential |
High-profile vs low-profile. Low-profile models sit closer to the floor and work better in tight bathrooms with low ceilings or overhead obstructions. Standard and high-profile models add comfort for most adults, especially for extended trips.
Foot pedal vs electric flush. Manual foot pedals are the standard. They’re reliable and simple to fix when they fail. Electric flush models add convenience, but they introduce a component that requires more expertise to repair if it breaks. For most RVers, the pedal is the better call.
Dometic vs Thetford parts availability. Both brands are widely stocked. Dometic tends to be slightly more available at brick-and-mortar RV dealers. Thetford has a broader range of entry-level models. If you camp in remote areas and want to be able to source a seal kit at a rural RV supply store, Dometic has a slight edge. Either way, buy a spare seal kit when you buy the toilet.
Need help narrowing down the actual models? Our best RV toilet replacement guide compares practical options by fit, comfort, material, and everyday RV use.
Can You Replace a Thetford Toilet with a Dometic (or Vice Versa)?
Yes, in most cases you can swap a Thetford for a Dometic or the other way around. Both brands use the same standard floor flange system, so the mounting pattern is compatible. The important caveats: you’ll need a new seal kit specific to the replacement brand and model, and you need to check physical dimensions carefully.
As Camping World explains, cross-brand replacement works when the new toilet’s dimensions fit your bathroom. If the replacement is a different size, it may not clear the walls, doors, or cabinets even though the flange connection is compatible. Measure first, cross-shop second.
What doesn’t transfer between brands: the hold-down bolt kit and the flange seal. Each brand uses its own hardware. Buy the seal kit for the toilet you’re installing, not for the toilet you’re removing.
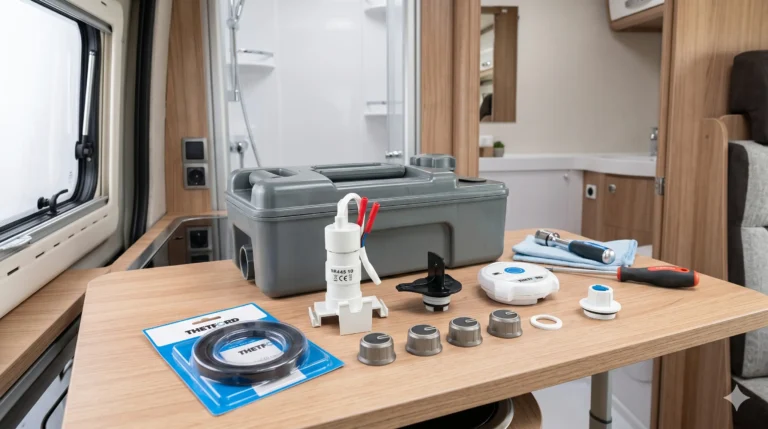
Tools and Parts You Need Before You Start

This is not a complex job, but having the right parts on hand before you disconnect anything saves a lot of frustration.
Tools:
- Adjustable wrench
- Phillips and flathead screwdrivers
- Pliers
- Tape measure
- Bucket and old towels
- Nitrile gloves
- Putty knife (for cleaning the flange)
Parts:
- Replacement toilet (correctly sized)
- RV toilet flange seal kit (brand and model-specific)
- Hold-down bolt kit (comes with most replacement toilets, or buy separately)
One important note on seals. For most travel trailers, motorhomes, and RVs that move regularly, use the foam or rubber RV toilet flange seal specified for your toilet model. Wax rings are generally a poor choice in moving RVs because heat and road vibration can deform or break down the seal over time. As noted in Kline’s RV installation guide, wax is only worth considering for stationary, climate-controlled rigs. In an RV that moves, stick with the foam seal that came with your replacement toilet or is specified by the manufacturer.
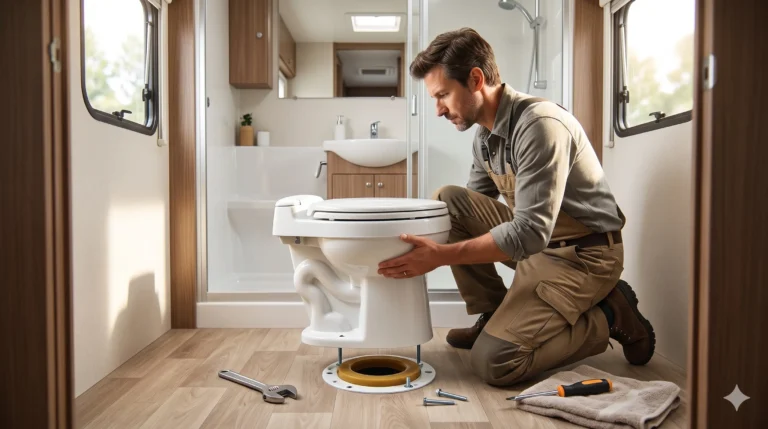
How to Replace an RV Toilet Step by Step
Before you start: Dump and rinse your black tank. You don’t want to be working above a full tank. Then confirm your RV is level and the wheels are chocked.
Step 1: Shut off the water. Turn off your water pump and your city water connection. Flush the toilet once to relieve pressure and empty the bowl.
Step 2: Disconnect the supply line. The water supply line connects to the back or side of the toilet base. Place your bucket under the fitting before you loosen it. A small amount of water will drip out. Use your wrench or pliers to disconnect it.
Step 3: Remove the hold-down bolts. Most RV toilets use two bolts at the base. They may have plastic caps covering them. Remove the caps, then unscrew the nuts. If the bolts spin freely, use pliers to hold the bolt from underneath while you turn the nut.
Step 4: Lift the old toilet. Lift straight up. Rock it gently side to side if it resists. Set it on a flattened cardboard box or old towels to protect your floor.
Step 5: Clean the flange and inspect it. Use your putty knife to remove the old seal residue. Inspect the flange ring carefully. Look for cracks, broken tabs, or rust. If the flange is damaged, address it before installing the new toilet. Minor damage to a bolt slot can sometimes be repaired with a flange repair kit. Significant damage is a job for a professional.
Step 6: Install the new seal and bolts. Set the new foam or rubber seal onto the flange. Slide the hold-down bolts into the bolt slots on the flange. Position them so they’ll line up with the holes in your new toilet’s base.
Step 7: Lower the new toilet. Line up the base holes with the bolts. Lower the toilet straight down, pressing firmly to compress the seal. Don’t twist it once it contacts the seal. Hand-tighten the nuts onto the bolts, then snug them with a wrench. Tighten until the toilet feels firm and doesn’t rock. Stop there. Overtightening cracks the base, especially on plastic models.
Step 8: Reconnect the water line and test. Reconnect the supply line. Turn the water back on. Flush three or four times and watch the base closely for any moisture. Sit on the toilet and make sure it doesn’t shift. If you see water at the base in the first 24 hours, the seal didn’t compress evenly. Take it back off and reseat it.
Common Problems After RV Toilet Replacement
Most installs go smoothly. When something does go wrong, it’s almost always one of the seven problems below. Check this table before you start pulling the toilet back off.
| Problem | Likely Cause | What to Check First |
|---|---|---|
| Toilet rocks after installation | Uneven seal compression or loose bolts | Snug the bolts evenly; confirm the flange is flat |
| Water leaks at the base | Seal not seated or compressed evenly | Remove the toilet, clean the flange, and reseat |
| Water leaks from supply line | Loose fitting or missing washer | Tighten the connection; check the rubber washer inside the fitting |
| Bowl does not hold water | Flush ball seal issue or blade not closing fully | Inspect the seal and test the blade valve position |
| Sewer smell after replacement | Dry bowl or incomplete base seal | Add water to the bowl; inspect the base seal for gaps |
| Toilet sits too close to wall | Wrong rough-in or larger replacement model | Recheck the rough-in measurement against the new toilet’s spec |
| Bolts do not line up | Wrong bolt kit or flange slot issue | Confirm the bolt kit matches your new toilet model; check the flange slots for damage |
If you’re getting sewer odor specifically after flushing and the seal looks fine, the cause is usually a dry bowl. Keep water sitting above the flush valve at all times. For persistent odor issues, the RV toilet smells when flushed guide covers every reason this happens and how to test for each one.
What Should You Do Right After Installation?
Two things get skipped most often after a new toilet goes in, and both cause problems within the first few weeks. Use more water per flush than you think is necessary, and add tank treatment before you leave the driveway.
Water volume matters immediately. The most common cause of early clogs in a new installation is not using enough water. RV toilets flush by gravity. Without enough water, waste doesn’t fully clear the pipe and can start to build up near the toilet base.
Add tank treatment right away. Don’t wait until the black tank is half full. Adding the right RV toilet treatment from the first flush gets the enzyme and bacteria colony established before any waste buildup can start.
If you smell something after installation, it’s almost always one of two things: an incompletely compressed seal at the base, or a dry bowl caused by not enough water sitting above the flush valve. Read the guide on RV toilet smell after dumping if the odor persists after your first dump.
Conclusion
The decision isn’t complicated once you know what to look for. A cracked base, a bowl you can’t seal, or a flush mechanism that keeps breaking means it’s time to replace. Everything else, seals, pedals, clogs, and flange issues, is usually repairable without touching the toilet itself.
When you do replace, measure everything before you order. Rough-in distance, wall clearance, front clearance, door swing, and lid height. A toilet that’s an inch too wide or too tall in the wrong direction won’t work no matter how good the flange seal is.
The install itself is straightforward. Most RV owners finish it in 30 to 60 minutes with basic tools. Use the right seal for a moving RV, don’t overtighten the bolts, and test thoroughly before you take the rig anywhere.
If you’re still deciding whether repair makes more sense, start with the RV toilet repair guide. It covers every common failure point and what each fix costs before you commit to a replacement.
Frequently Asked Questions
How much does RV toilet replacement cost if you do it yourself?
A replacement RV toilet runs $150 to $500 depending on the model, bowl material, and features. A basic plastic gravity-flush model starts around $150. Residential-height porcelain models with foot pedals typically cost $250 to $400. Add $10 to $25 for a seal kit and bolt hardware if it isn’t included. Professional installation at an RV service center adds $75 to $200 in labor on top of parts.
Do I need to drain my black tank before replacing the toilet?
Yes. Dump and rinse your black tank before you start. DoItYourselfRV recommends emptying and rinsing the tank first to avoid odor and to make the job cleaner and safer. You don’t need the tank to be perfectly clean, but working over a full or near-full tank creates unnecessary risk.
How long does it take to replace an RV toilet?
Most RV owners finish the job in 30 to 60 minutes once they have all the parts. The steps are simple: disconnect the water line, remove two bolts, lift the old toilet, set the seal, lower the new toilet, reconnect the supply line, and test. First-timers who need to read through instructions as they go should plan for 60 to 90 minutes.
What type of seal do I use for an RV toilet replacement?
Use the foam or rubber seal specified for your replacement toilet model. For most RVs that travel regularly, this is the correct choice. Kline’s RV specifically advises against wax rings in moving RVs because road vibration and temperature swings can deform or break down a wax seal. Check whether your toilet came with a seal kit before buying one separately, as most replacement toilets include one.
What is the rough-in measurement and how do I find mine?
The rough-in is the distance from the center of your floor flange to the finished wall directly behind the toilet. To measure it, pull the toilet or look at the base from behind. Use a tape measure from the center of the flange bolt holes to the wall surface. According to Camping World, your replacement toilet’s rough-in must be equal to or less than this number. A toilet with a larger rough-in won’t sit flush against the wall without flange relocation.