TL;DR: A permanent RV sewer hookup keeps your RV connected to a sewer or septic system for months or longer, not just a few days. Your main options are a heavy-duty flexible hose, a semi-permanent removable coupling, or rigid PVC pipe. PVC has to be sloped and supported correctly, and plumbing code minimums vary by pipe size and by which code your area has adopted. Keep the black tank valve closed between dumps no matter which setup you choose, and confirm local rules before you build anything you can’t easily undo.
If you’re parked in one spot for a season, storing an RV at a hunting or fishing property, or living in it full-time, dragging a sewer hose out for every dump gets old fast. A permanent RV sewer hookup solves that by leaving some form of connection in place: a tougher hose, a removable coupling, or a hard-plumbed PVC line running to a sewer or septic system.
“Permanent” doesn’t mean one single setup. It’s a spectrum that runs from a heavy-duty hose you leave connected to fully glued PVC pipe buried or run along the ground. Which end of that spectrum makes sense for you depends on how long you’re staying, whether the RV might move again, and what your local rules actually allow.
This guide covers the real options, how to plan a PVC or septic connection, the black tank valve question, and the mistakes that cause the most grief with a long-term setup.
What Is a Permanent RV Sewer Hookup?
A permanent RV sewer hookup connects your RV to a sewer or septic system for the long haul, weeks, a full season, or indefinitely, instead of just for the length of a single stay. It can mean a heavy-duty hose left connected, a semi-permanent coupling you can remove without cutting anything, or rigid PVC pipe glued in place. The right choice depends on how long you’ll be there and whether you might need to move the RV again.
People set these up for a lot of reasons: full-time living, a seasonal site at a campground or RV resort, an RV parked at a hunting or fishing property for months at a time, or a rig stored on someone’s own land while they’re between homes. What they all share is the same basic tradeoff. A more permanent setup means less daily hassle, but it also means more work to install correctly and more to undo if plans change.
Permanent RV Sewer Hookup vs. Regular Campground Hookup
A standard campground hookup is built around a single stay: you connect a flexible hose, dump, then disconnect and stow it before you leave. A permanent hookup assumes the connection stays in place for a long stretch, which changes what hardware makes sense and how much exposure it has to deal with.
| Aspect | Regular Campground Hookup | Permanent/Long-Term Hookup |
|---|---|---|
| Duration | Days to a couple of weeks | Months to indefinite |
| Typical hardware | Standard bayonet hose kit | Heavy-duty hose, removable coupling, or rigid PVC |
| Exposure | A few hours per stay | Continuous sun, weather, and freeze exposure |
| Reversibility | Fully reversible every time | Ranges from easy (hose) to permanent (glued PVC) |
| Main regulatory concern | The campground’s own site rules | Local plumbing code, septic capacity, zoning |
If you’re only staying a weekend or two, none of this applies. The rest of this guide is for setups meant to stay in place for a season or longer.
What Are Your Permanent Sewer Connection Options?
Three general approaches cover most permanent setups, and they trade off cost, durability, and how easy the connection is to remove later.
| Option | Pros | Cons | Best For |
|---|---|---|---|
| Heavy-duty flexible hose | Cheapest, no tools or cutting required, fully reversible | Most exposed to UV and wear over months, needs constant slope support | Seasonal stays, rented sites, or setups you might change |
| Semi-permanent (removable coupling) | Sturdier than a hose, still reversible without cutting pipe | More parts to source and fit correctly | Long seasonal stays on a site you may eventually leave |
| Rigid PVC (glued) | Most durable, can be buried or run out of sight, least day-to-day fuss | Not reversible without cutting the pipe, must be sloped and supported correctly | True long-term or full-time setups on property you own or lease long-term |
If you go the flexible-hose route, don’t reach for a standard weekend-trip hose. A durable RV sewer hose built for repeated use holds up far better under months of constant sun and weather than a hose meant for occasional trips.
The middle option, a removable coupling like a rubber Fernco-style sleeve with hose clamps on each end, lets you connect PVC pipe to your RV’s outlet without gluing anything. It’s a reasonable compromise if you want PVC’s durability but aren’t ready to commit to a permanent joint.
What You Need and How to Set Up a Permanent RV Sewer Hookup
- An RV sewer adapter that transitions from a bayonet fitting to threaded or slip-fit pipe. Camco’s 3-inch permanent plumbing adapter is a common example, connecting a standard bayonet hose fitting to 3-inch threaded pipe.
- 3-inch PVC pipe and fittings if you’re going rigid, or a rubber coupling with clamps for a removable connection.
- A cleanout fitting if your setup allows one, so you can clear a blockage without disassembling the whole line.
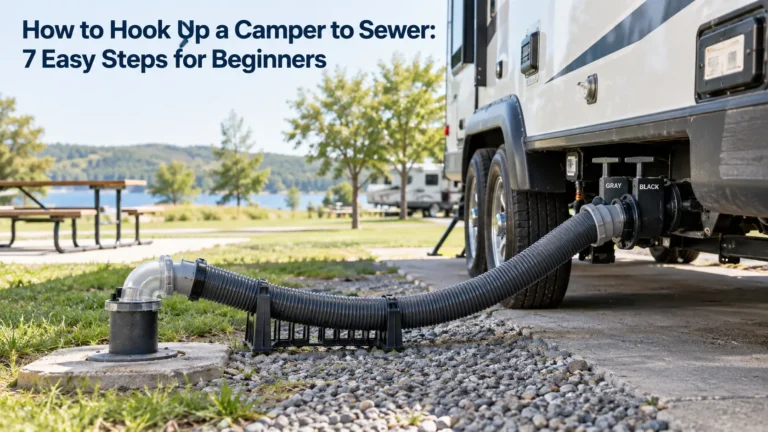
- A hose support if you’re staying with a flexible hose. A dedicated sewer hose support keeps a long-term hose run off the ground and holds a consistent slope far better than bricks or improvised props.
- Gloves and a way to test the connection with clean water before trusting it with a full black tank.
- Confirm what you’re connecting to. A campground sewer inlet, a dedicated cleanout, or a septic riser each has different requirements, and some need permission or a permit before you touch them.
- Plan the shortest reasonable route between the RV’s outlet and the connection point, avoiding sharp turns where waste can catch.
- Install the adapter at the RV end, matching the fitting type to your RV’s outlet.
- Run the hose or pipe with a continuous downhill slope the entire way. Support it so it can’t sag or settle into a low spot.
- Secure the connection at the far end, making sure it seats fully and doesn’t leak under a light water test.
- If you’re gluing PVC, use primer and cement rated for drain, waste, and vent (DWV) pipe, and don’t rush the cure time before testing.
If you’re at all unsure whether your specific setup meets local plumbing rules, a licensed plumber or your local building or health department can confirm before you commit to anything permanent.
Can You Use PVC for a Permanent RV Sewer Connection?
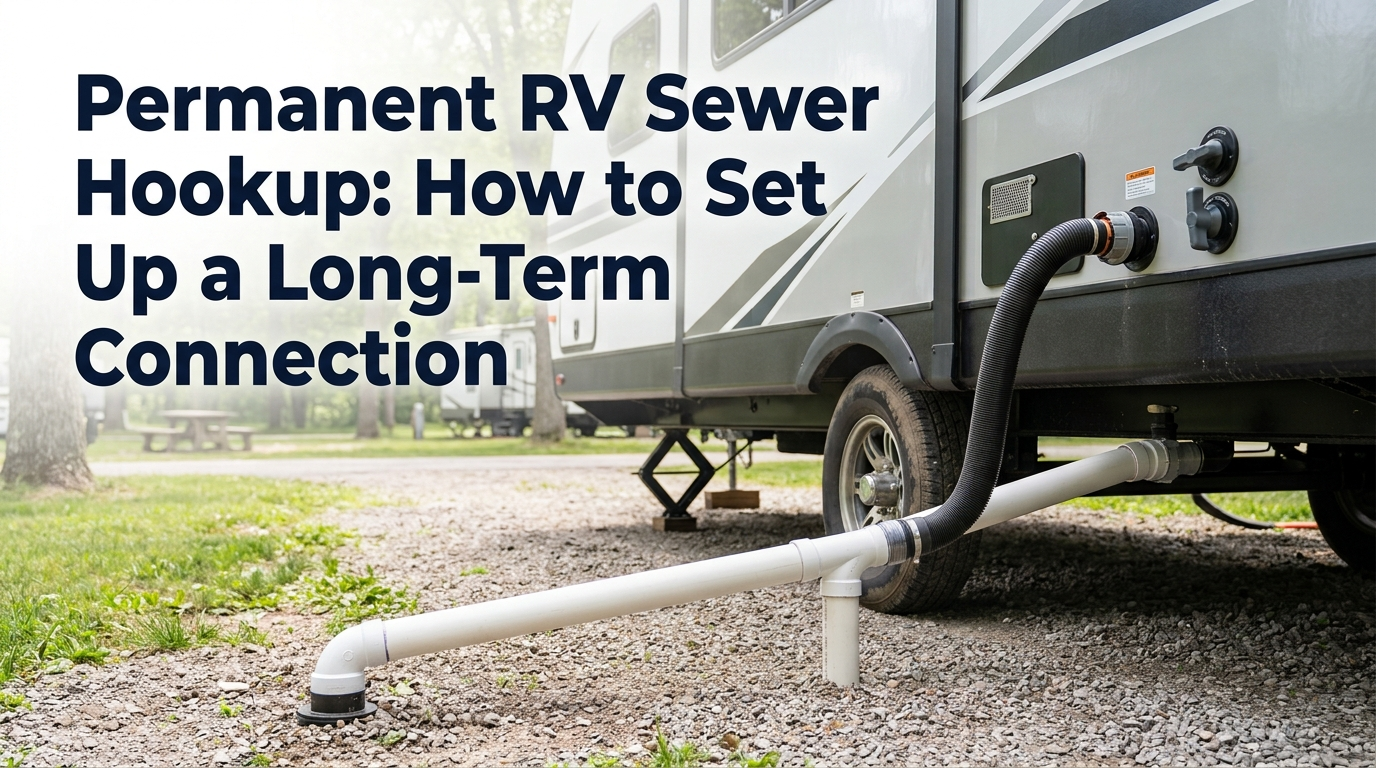
Yes. Rigid PVC is a common choice for a true permanent RV sewer hookup, but it only works well if it’s sloped and supported correctly, and the rules governing that installation vary by location.
Under the International Plumbing Code, Table 704.1, horizontal drainage pipe from 3 to 6 inches in diameter has a minimum slope of 1/8 inch per foot. That’s the code minimum for that pipe size, not a universal RV-installation standard. The IPC is a model code, and the plumbing rules that actually apply to you depend on which code your city or county has adopted, along with how they treat an RV waste line specifically. A local inspector’s interpretation matters more than the model code text.
In practice, a slope that’s too shallow lets waste sit and settle instead of moving along the pipe. Support the pipe so it can’t sag between supports or create low spots where waste or liquid can collect.
Gluing every joint gives you the most durable, leak-resistant line, but it also means cutting the pipe if you ever need to change the route or move the RV. A purpose-built connection kit like Fernco’s QwikCamp uses flexible rubber couplings and clamps instead of full gluing at the RV end, which keeps that connection removable while still using rigid PVC for the run itself.
Can You Permanently Connect an RV to a Septic System?
Yes, but treat a septic connection as a separate decision from a municipal sewer connection, since a septic tank has a fixed capacity that your RV’s waste adds to.
Septic tanks are typically sized around the number of bedrooms a home has, not around any additional hookups. As one commonly cited reference table sourced from New York State’s health code shows, minimum septic tank sizes commonly run from around 1,000 gallons for a small home up to 1,750 gallons or more for larger ones, scaled by bedroom count. Adding a permanently connected RV means more water and waste flowing into a tank that wasn’t necessarily sized with that in mind.
Before connecting to a septic system, confirm three things: that the tank has room for the added flow, that you’re using an approved access point such as a proper riser or inlet rather than any opening you find, and that local health or septic rules allow the connection at all. A septic professional or your local health department can confirm capacity. Never assume any hole in the ground near a septic tank is a safe or legal place to dump into.
Should You Leave the Black Tank Valve Open?
No. Keep the black tank valve closed between dumps, even with a permanent sewer connection. This matches guidance directly from RV manufacturers: Keystone RV’s own owner guidance states plainly that if you have full hookups, you should not leave the termination valves open, since it prevents solids from sticking to the tank and causing clogs or odor problems.
The reason is mechanical. An open valve lets liquid drain out continuously while solid waste and paper don’t have anywhere to go, so they settle and build up right at the bottom of the tank. Over time that turns into a hard, difficult clog. Closing the valve until the tank is mostly full lets a bigger volume of water carry solids out together when you do dump.
Gray tank habits are a separate question. Some full-time RVers leave the gray valve open at a permanent hookup since gray water is mostly liquid with far less solid content, then close it for a day before dumping the black tank so the resulting gray water flush helps rinse the hose. That’s a common practice among long-term RVers, not a manufacturer requirement, so if you’re unsure, closing both valves until it’s time to dump is the safer default.
To understand why gray tank capacity and water flow matter when deciding when to dump, read our complete RV gray water tank guide.
Does a Permanent Sewer Line Need a Vent or Trap?
It depends on the installation and what your local plumbing code requires, so there isn’t one universal answer. Whether you need added venting or a trap comes down to your specific setup, and a local plumber or your building department is the right source for a definite answer on your installation.
Don’t deliberately create a sag or low spot in a sewer hose just to block sewer gas. A long-term drain line should still maintain the continuous slope your setup requires so waste and liquid don’t collect in the run. Whether a permanent rigid connection needs an added trap, vent, or other plumbing feature depends on the actual installation and the local plumbing rules that apply.
Your RV’s holding tanks already have their own roof vents, which are designed to release tank gases outdoors rather than back through your fixtures. Whether that alone is sufficient for a specific permanent PVC installation, or whether your setup also needs its own trap or vent, depends on the details of that installation and what your local code requires. If you’re running rigid pipe permanently, it’s worth asking a local plumber or your local plumbing authority directly rather than assuming either way.
What If the Sewer Connection Is Uphill or Far Away?
Gravity can’t push waste uphill, so if your sewer or septic connection sits above your RV’s outlet, or the distance is more than a standard hose can bridge, a macerator pump becomes the practical option instead of rigid pipe or a longer hose.
A macerator pump grinds waste into a slurry and pushes it under power through a much narrower hose than a standard 3-inch line, which lets it move waste both uphill and over longer distances than gravity alone can manage. It adds cost, wiring, and moving parts, so it’s worth weighing a macerator against a hose on your specific situation before you buy one. If a pump does make sense for your permanent setup, our current macerator pump picks compares portable and built-in options by distance, lift, and reliability.
Permanent Sewer Hookup at Home: Cleanouts, Septic, and Legality
You may be able to hook your RV up to a house sewer cleanout or septic system, but whether it’s actually allowed depends entirely on your local rules, and treating a maintenance cleanout as a dedicated RV dump station is often where owners run into trouble.
A sewer cleanout, the capped pipe sticking up near your foundation for snaking a clogged line, exists for maintenance access, not RV dumping. Property owners in online forum discussions report mixed experiences: some jurisdictions allow occasional use of an existing cleanout without issue, while others explicitly permit the cleanout itself but prohibit labeling or plumbing it as a dedicated RV dump connection. Rules also shift depending on whether a permanent connection starts to look like the RV is being used as a second residence on the property, which can trigger separate zoning or dwelling classification questions entirely.
Because this varies so much by city, county, and even by which inspector you talk to, don’t assume what worked for someone in another state applies to you. Call your local sewer authority, building department, or septic provider and ask directly before installing anything permanent at a house.
Common Permanent RV Sewer Hookup Mistakes
Keeping a Permanent Connection Working
A permanent setup still needs periodic attention, just less often than a hose you connect and disconnect every few days.
Inspect the full run every so often for sagging sections, loose joints, or any sign of standing liquid. Rinse the connection and your tanks periodically; if your RV has a built-in flush system, using your tank’s flush system makes that routine easier without flooding anything. Check that any removable coupling is still seated tightly, since vibration and settling can loosen fittings over months.
Freezing is the other major maintenance concern for anything left connected through winter. Standing water in low spots can freeze, expand, and damage an exposed hose or pipe. Keep the entire run sloped with no low points, and insulate exposed sections in a cold climate. If you use heat tape, make sure the product is specifically rated for the pipe or hose material and for outdoor use. Many full-timers in freezing regions also keep both tank valves closed except when dumping through the winter, which limits how much liquid sits in exposed lines at any given time.
Final Thoughts
There’s no single right way to set up a permanent RV sewer hookup. A heavy-duty hose works fine for a seasonal site you might leave. Rigid PVC makes more sense if you’re settled somewhere long-term and want the least day-to-day fuss. What matters more than which option you pick is getting the basics right: correct slope, solid support, a closed black tank valve between dumps, and confirmation from your local plumbing or septic authority before anything becomes permanent enough that it’s hard to undo.
Frequently Asked Questions
Can you permanently connect an RV to sewer?
Yes. You can connect an RV to a sewer system for the long term using a heavy-duty hose, a removable coupling, or rigid PVC pipe, depending on how long you’re staying and whether you might move again. Whatever method you choose, confirm it meets your local plumbing rules before installing anything you can’t easily undo.
Can you use PVC for an RV sewer hookup?
Yes, PVC is a common choice for a permanent connection. It needs a consistent downhill slope, adequate support so it doesn’t sag, and correctly glued or coupled joints. Minimum slope requirements depend on pipe size and on which plumbing code your area has adopted, so check locally rather than assuming a single number applies everywhere.
Can I hook my RV directly to my house sewer?
Sometimes, but it depends entirely on local rules. Some jurisdictions allow occasional use of an existing sewer cleanout, while others restrict or prohibit treating it as a dedicated RV dump connection. Contact your local sewer authority or building department before connecting, since assuming it’s allowed can lead to fines or having to remove the setup.
Can an RV connect permanently to a septic tank?
Yes, but only if the tank has capacity for the added waste and you’re using an approved access point. Septic tanks are typically sized by bedroom count for the home they serve, not for extra hookups, so a permanently connected RV can push a tank past what it was designed to handle. Check with a local septic professional first.
Should I leave my RV black tank valve open when connected to sewer?
No. RV manufacturer guidance recommends keeping the black tank valve closed between dumps, even at a permanent hookup, since an open valve lets liquid drain away while solids build up and eventually clog the tank. Close it until the tank is mostly full, then dump.
Does a permanent RV sewer line need a vent?
It depends on the specific installation and your local plumbing code, so there’s no single answer that covers every setup. Don’t rely on a sagging hose as a makeshift trap, since low spots can hold waste or liquid. Ask a local plumber or your plumbing authority whether your specific installation needs an added trap or vent.
Can an RV sewer hose stay connected all year?
A heavy-duty hose can stay connected long-term if it’s properly supported and protected from freezing, but standard weekend-trip hoses aren’t built for months of continuous sun and weather exposure. In freezing climates, an exposed hose with any standing water is at real risk of cracking, so insulation, heat tape, or disconnecting during hard freezes is worth planning for.