An RV toilet that drains slowly when flushed usually points to one of a few things: not enough water in the tank, a partial clog, a blocked vent, or too much toilet paper sitting in the line. This is usually not a major repair emergency, but stop flushing if water or waste starts backing up into the bowl. Repeated flushing can overflow the toilet or push waste higher into the line.
This is different from a toilet that flushes fine but loses its bowl water overnight. That’s a seal problem, not a drainage problem, and we’ll show you how to tell the two apart in a minute.
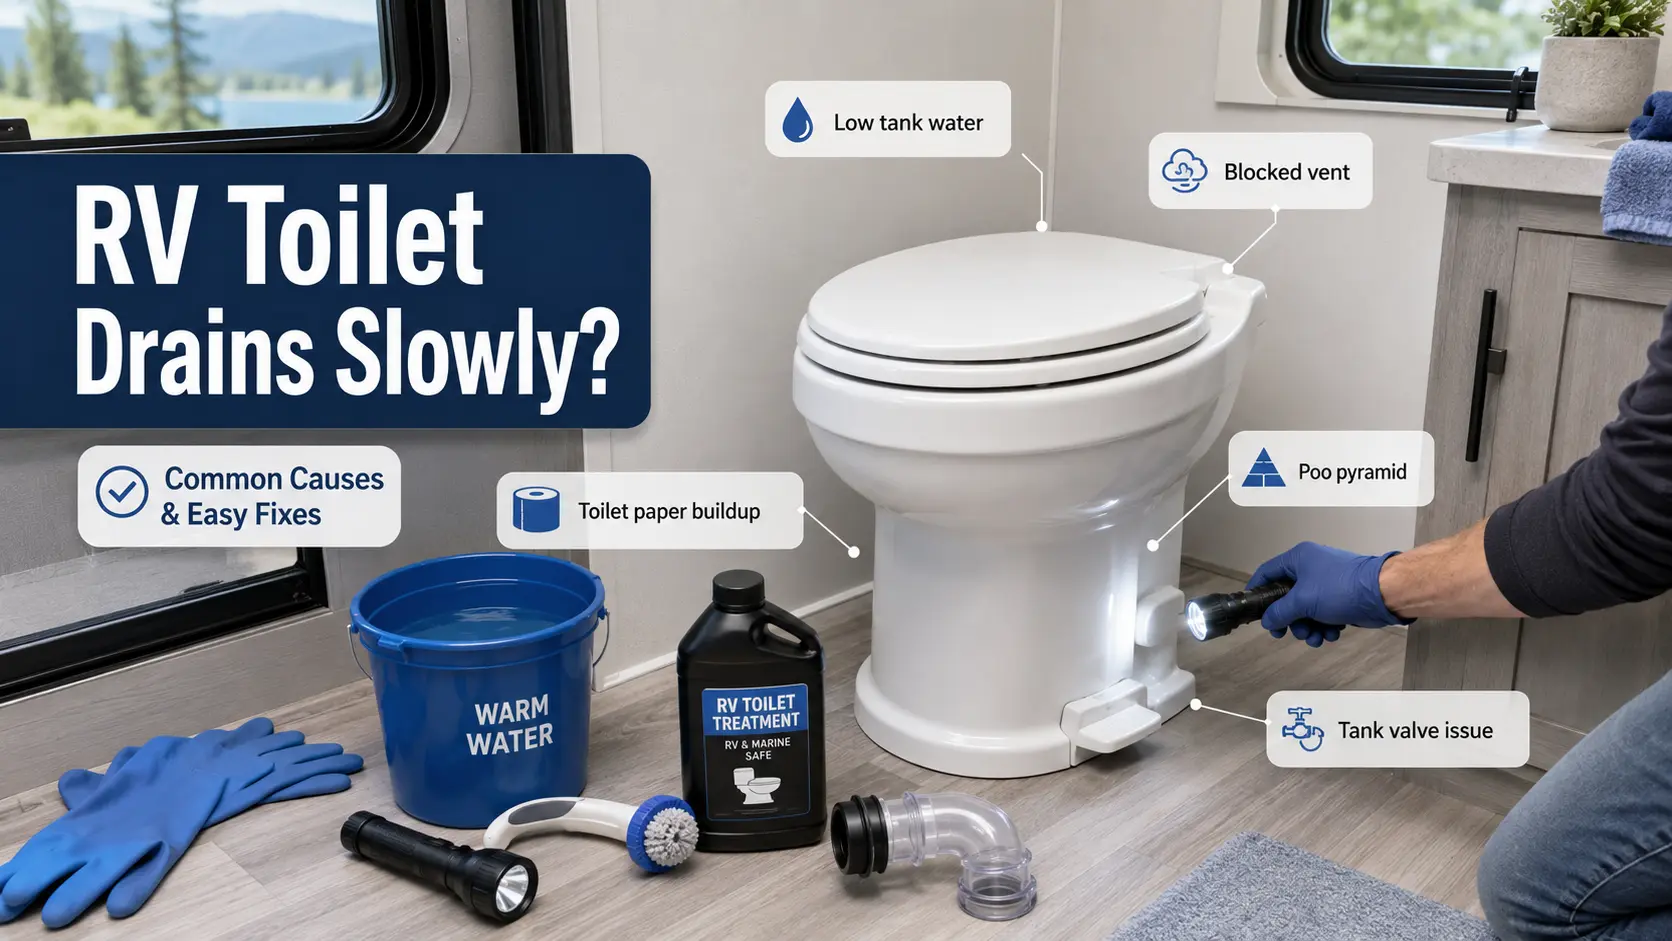
An RV toilet that drains slowly when flushed is usually caused by too little water in the black tank, too much toilet paper, a poo pyramid, a partial clog in the toilet drop pipe, a blocked vent, or a black tank valve problem. Start by adding water and checking whether the toilet backs up, bubbles, or drains slowly only after repeated use. Avoid harsh household drain cleaners. Most slow-drain problems can be fixed with water, time, safe tank treatment, or careful clog removal.
Quick Diagnosis Table
Match your symptom to the most likely cause, then try the first step before reading further.
| Symptom | Most Likely Cause | First Thing to Try |
|---|---|---|
| Water drains slowly but does not back up | Low water level or mild paper buildup | Add a gallon of water and flush again |
| Toilet backs up when flushed | Partial clog or full black tank | Stop flushing, check the tank level monitor |
| Toilet bubbles or gurgles | Blocked or restricted roof vent | Check the roof vent cap for debris or nests |
| Waste sits under the toilet opening | Poo pyramid forming below the drop pipe | Add water, avoid more flushes until it softens |
| Tank reads full but will not drain | Stuck or partially closed black tank valve | Check the valve handle and cable for resistance |
| Slow drain after dumping too often | Compacted tank from low-water dumps | Refill with several gallons before next use |
| Slow drain after camping with sewer hookup | Black tank valve was left open | Close the valve, add water, and soften the buildup before dumping again |
| Slow drain only with lots of toilet paper | Paper buildup in the drop pipe or tank | Switch to RV-safe paper, flush with more water |
| Smell comes with slow drain | Waste sitting above the waterline | Add water, check the vent; see our notes on odor after dumping the black tank |
| Bowl water disappears overnight | Blade or bowl seal issue (different problem) | See why the bowl loses water overnight |
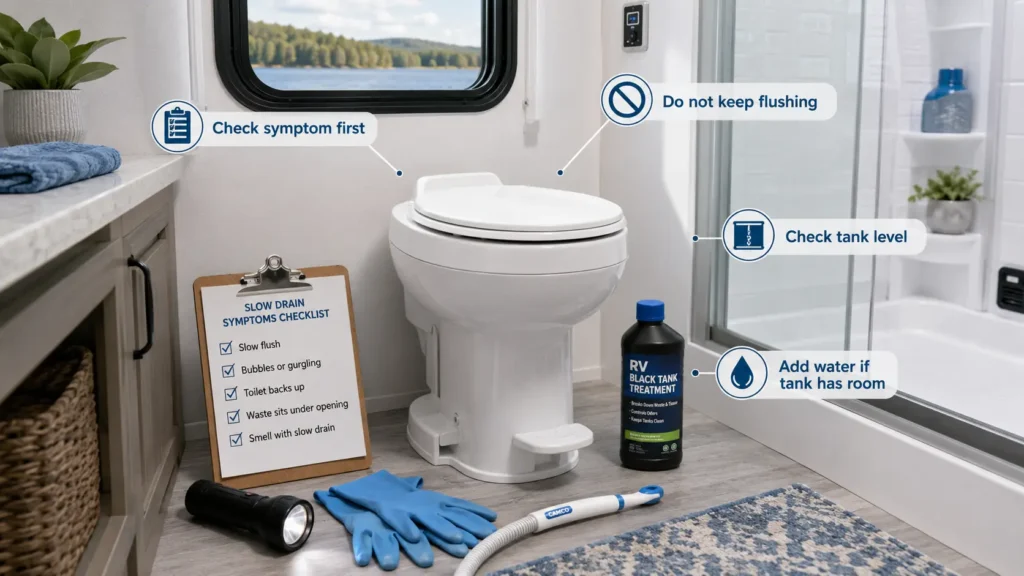
Tools and Supplies You May Need
You won’t need all of these for every slow drain, but it helps to have them ready before you start.
- Rubber gloves
- Flashlight, for looking inside the bowl or at the vent cap
- Flexible RV toilet wand
- Bucket of warm water
- RV-safe black tank treatment
- Sewer hose and clear elbow, so you can see what’s draining when you dump
- Roof-safe ladder, only if you can safely check the vent from up there
- Eye protection
First, Make Sure It’s Not a Bowl Seal Problem
These two problems get confused often, but they’re not the same.
If your bowl water slowly disappears overnight, with no flushing involved, that’s a seal problem. The blade or bowl seal at the bottom of the toilet isn’t holding water between uses. See why the bowl loses water overnight for that issue specifically.
If your toilet drains slowly only when you flush, backs up, bubbles, or fails to clear waste properly, that’s what this guide covers. The cause is a clog, a tank problem, a vent issue, or not enough flush water, not a seal.
Quick test: add water to an empty bowl and watch it for 10 minutes without touching the pedal. If it disappears on its own, you have a seal problem. If it stays put until you flush, and the flush itself is slow, keep reading.
One more distinction worth making: a toilet that drains slowly is not the same as a toilet that won’t flush at all, with no water entering the bowl or no response from the pedal. If that’s your situation instead, see what to check if it won’t flush at all.
Cause 1: Not Enough Water in the Black Tank
Not enough water in the black tank is the single most common reason an RV toilet drains slowly. Waste needs liquid to move. Without enough of it, solids sink, dry out, and pile up instead of flowing toward the tank outlet.
An RV toilet uses far less water per flush than a house toilet, often under a gallon for a 10-second flush. That’s normally fine, but only if you’re not also running the tank low on water from infrequent flushing or weak pedal presses.
Dry waste doesn’t drain. It sits. The fix is simple: add a few gallons of water to the tank through the toilet, let it sit for a bit, then try flushing again. This alone solves a large share of slow-drain complaints.
What If the Black Tank Is Actually Full?
A full black tank can’t accept more flush water, and that alone can look exactly like a clog. You might see slow draining, bubbling, or a backup, even though nothing is actually stuck.
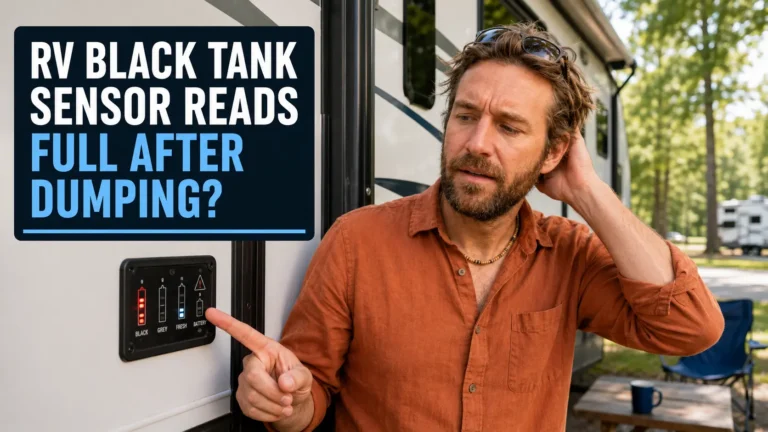
Tank sensors aren’t always reliable here either. Paper or waste residue sticking to the probes can make a tank read full when it has room, or read fine when it’s actually packed. Don’t trust the monitor alone.
If there’s any chance the tank is full, stop flushing and check it before doing anything else. Dump first, then come back to clear a clog from above. Trying to push a clog into a tank that has no room left just sends the problem back at you.
Cause 2: Too Much Toilet Paper
Too much toilet paper, or the wrong kind, builds up faster than it breaks down and slows drainage over time. This is rarely about a single flush. It’s about accumulation.
Standard household toilet paper that isn’t labeled septic-safe takes longer to break apart in a holding tank than RV-specific or septic-safe paper. Used flush after flush, it stacks up in the drop pipe and tank instead of dispersing.
The fix for an active slow drain is more water per flush, not less paper use after the fact. For the long-term fix, see which RV toilet paper actually breaks down fast enough for tank use.
Cause 3: Poo Pyramid Under the Toilet Drop Pipe
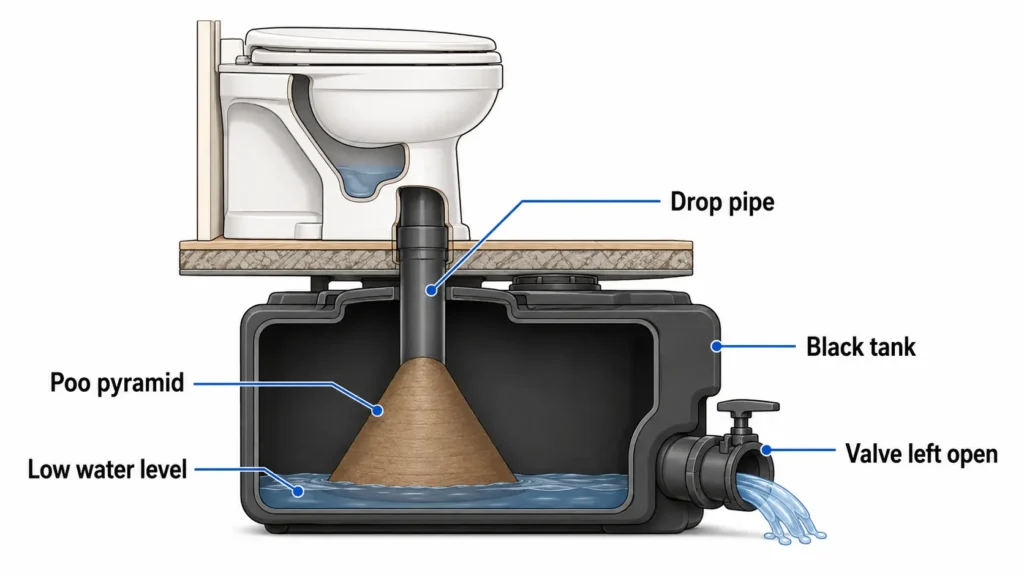
A poo pyramid is a buildup of solid waste that piles up directly under the toilet’s drop pipe instead of spreading out across the tank floor. It forms a cone shape tall enough to touch or block the opening.
This happens most often when the black tank valve is left open at a campsite instead of staying closed until the tank is mostly full, or when the tank gets dumped too often with too little water in it each time. Either habit leaves solids without enough liquid to settle flat.
If waste seems to be sitting right under the toilet opening instead of draining away, this is the likely cause. See how to fix a pyramid plug for the exact method, including the drive-and-slosh technique that uses tank water to break it apart.
Cause 4: Partial Clog in the Toilet Drop Pipe
A partial clog in the drop pipe means waste or paper has hung up on its way down, narrowing the path without fully blocking it. Water and waste still move, just slower than normal.
This short pipe connects the toilet base to the black tank. It’s a much shorter run than a home toilet’s trap and drain line, which is part of why RV toilets clog differently than house toilets do.
A gentle flexible wand or a warm water and dish soap flush, followed by a short drive to slosh the tank, clears most partial clogs without forcing anything. See safe no-snake unclogging steps for the safe methods in order, from gentlest to most aggressive.
⚠️ Use warm water, not boiling water. Boiling water can soften plastic fittings, damage rubber seals, and put unnecessary stress on older RV plumbing. Warm tap water does the job just as well without the risk.
Cause 5: Black Tank Is Compacted
A compacted black tank means old waste and paper have packed down into a dense layer across the tank floor instead of breaking down normally. Water drains around it, but slowly, and the smell often gets worse at the same time.
This builds up gradually. It’s the result of repeated dumps with too little water, infrequent tank treatment, or long stretches of dry camping without adding water back to the tank.
A deep clean is the fix, not a quick flush. Fill the tank most of the way with water, add a safe tank treatment, let it sit overnight if you can, then drive a short distance before dumping. The motion helps break up packed material that’s been sitting still.
Cause 6: Roof Vent or Vent Pipe Is Blocked
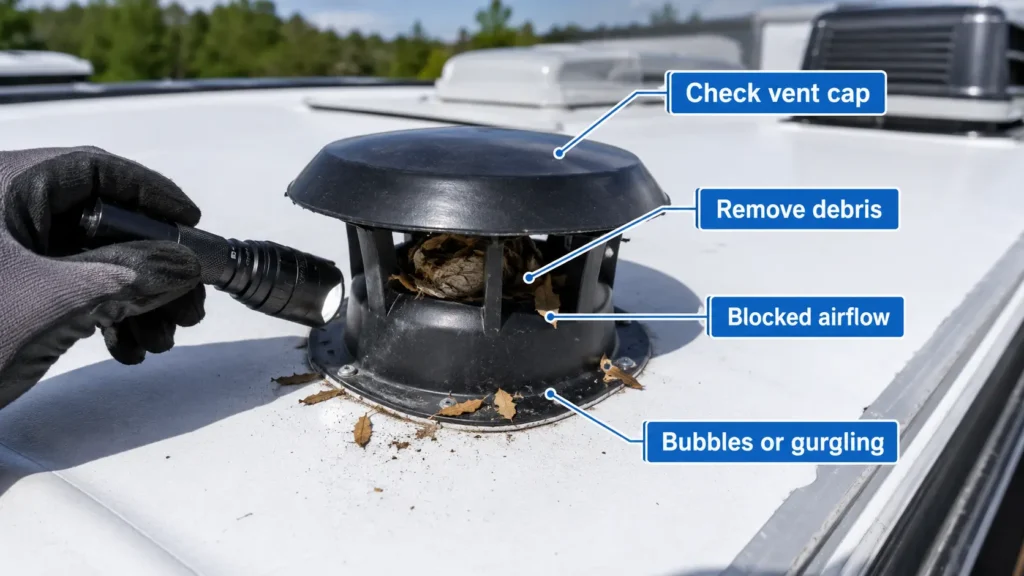
A blocked roof vent stops air from properly entering or leaving the black tank, and that causes bubbling, gurgling, slow drainage, and odor, sometimes all at once.
The vent pipe runs from the tank up through the roof. Without it working properly, flushing creates a partial vacuum instead of a clean drain, the same way a sealed water bottle glugs when you try to pour it out too fast.
Simple vent test:
- Flush once and listen for gurgling in the bowl.
- Notice if the bubbling happens even when the tank isn’t close to full. That points to the vent, not the tank level.
- Check the roof vent cap for leaves, debris, insect nests, or mud daubers. A cracked or knocked-loose cap can cause the same symptoms.
- If you can safely access the roof, take a quick look at the cap from outside. If you can’t get up there safely, skip this step and call a tech instead.
A blocked or undersized vent is a common cause of bubbling and gurgling during a flush, separate from any clog in the tank itself.
Cause 7: Black Tank Valve Is Not Opening Fully
A black tank valve that isn’t opening all the way restricts drainage even though the toilet itself is working fine. This shows up as slow draining, a tank that reads full longer than it should, or resistance when you pull the valve handle.
Cable-operated valves can stick from dried-out seals, debris buildup around the gate, or a cable that’s stretched or partially disconnected. The valve doesn’t have to be fully stuck to cause a slow drain. Partial opening is enough to restrict flow.
Pull the valve handle and feel for resistance or a handle that feels loose, like it’s pulling air instead of metal. See how to fix a stuck black tank valve for diagnosis and safe lubrication steps. If you need to identify the cable, seal, or handle by name before ordering parts, our RV toilet parts guide can help.
Cause 8: Low Flush Water Flow
Low flush water flow means the toilet isn’t getting enough water pressure or volume to move waste properly, even if everything downstream is clear. The symptom looks like a clog, but the real problem is upstream.
This can come from low water pump pressure, a kinked supply line, a clogged inlet screen, or a partially failed water valve that isn’t opening fully when you press the pedal. Each of these reduces the water available to carry waste into the tank.
Check that your water pump is on and your freshwater tank has water in it first. Then check the supply line behind the toilet for kinks. If flow still seems weak after that, the water valve itself may need cleaning or replacement, which our RV toilet repair walkthrough covers in detail.
Cause 9: Macerator Toilet Issue
Macerator toilets work differently from gravity-flush toilets. Don’t use the same clog-clearing steps from the rest of this guide on one. Wands, dish soap flushes, and tank sloshing are built around gravity systems, and they won’t fix a macerator problem.
A slow or failed flush on a macerator toilet usually points to the pump, the blade, the power supply, a fuse, the wiring, or the switch, rather than a simple clog. These toilets grind waste with a motorized impeller before pumping it to the tank, sometimes several feet away.
If toilet paper or a wipe gets caught in the impeller, the motor often hums without actually macerating anything, a clear sign of a physical blockage rather than an electrical fault. Check the fuse or breaker for the toilet circuit first. If you hear the motor running but nothing moves, the impeller is the likely culprit, and that usually means removing the toilet to clear it. If the unit doesn’t respond at all, check the wiring and control switch before assuming the pump has failed.
Step-by-Step Fix Checklist
Work through these in order. Most slow drains resolve well before step 10.
Step 1: Stop repeated flushing. Flushing again and again on a slow drain just adds more water and waste on top of the problem.
Step 2: Check your black tank level. A full or nearly full tank can’t accept more water, and that alone can look exactly like a clog.
Step 3: Add several gallons of water. Pour it through the toilet if you can. This is the single most effective first step for most slow drains.
Step 4: Let the water sit. Give it 20 to 30 minutes before trying anything else. Time alone softens a lot of buildup.
Step 5: Try a safe RV black tank treatment. Enzyme or bacteria-based treatments break down waste and paper without harming tank seals or sensors.
Step 6: Use a toilet wand or flexible RV tool carefully. A short, flexible wand made for RV use can break up a clog without the risk a rigid metal snake carries. See safe no-snake unclogging steps for the full method.
Step 7: Check roof vent airflow. Look at the vent cap from outside for blockage, if you can do so safely. A clear vent often fixes bubbling and slow drainage together.
Step 8: Check the black tank valve. Pull the handle and feel for resistance. A valve that’s not opening fully restricts drainage even with everything else clear.
Before you dump: make sure the sewer hose is connected securely on both ends and the campground sewer fitting is sealed, not just resting in place. Open the black tank valve first, then the gray valve. Dumping gray water after black helps rinse waste out of the hose.
Step 9: Dump only when enough liquid is in the tank. A tank that’s mostly full drains more completely than one dumped too early or too often.
Step 10: Flush the tank thoroughly after dumping. A built-in tank rinse system or a wand inserted through the toilet clears residue that contributes to the next slow drain.
What Not to Do
A few habits make slow drains worse instead of better.
- Do not use harsh household drain cleaner unless your toilet or tank manufacturer specifically says it’s safe. Dometic’s own installation manual warns against chlorine or caustic chemicals like drain-opening products, since they damage the seals in toilets and other plumbing valves.
- Do not force a metal snake aggressively. RV plumbing is shorter and more fragile than home plumbing, and an aggressive snake can puncture a pipe or crack a seal.
- Do not keep flushing if water is backing up. Every extra flush adds water to a system that’s already struggling to drain it.
- Do not leave the black tank valve open at a full-hookup campsite. It dries out solids and is a leading cause of poo pyramids.
- Do not dump too often with too little water. A near-empty tank doesn’t carry solids out cleanly, and it leaves residue behind for next time.
Prevention: Keep It From Happening Again
- Use more water with each flush, especially after solid waste. A quick press of the pedal rarely adds enough.
- Keep the black tank valve closed until the tank is at least two-thirds full whenever your setup allows it.
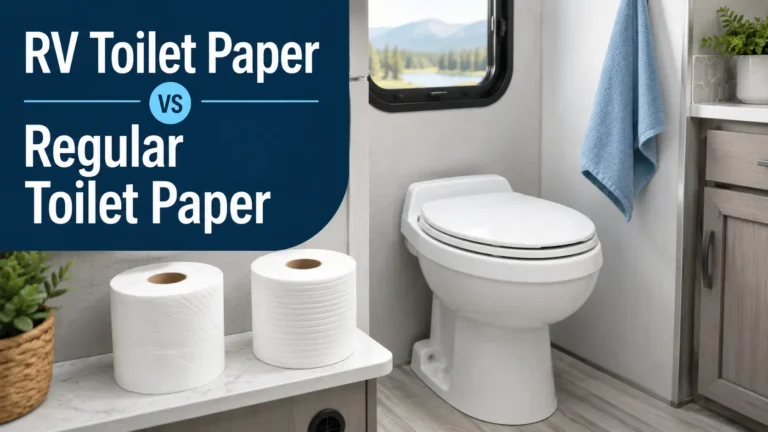
- Use RV-safe toilet paper or less of it. See how RV toilet paper compares to regular toilet paper to find a type that actually dissolves fast enough.
- Flush the tank after dumping, using a built-in flush system or a wand, rather than just closing the valve and moving on.
- Don’t let waste sit dry. Add water back to the tank after every dump, before the next use.
- Use regular water-based tank maintenance, not just chemical treatment alone. Treatments work best with enough water already in the tank.
- Check the roof vent and vent cap periodically for debris, especially after parking under trees.
- Avoid treating the toilet like a home toilet. Less water per flush, smaller pipes, and a sealed tank mean RV plumbing needs different habits than a house.
When to Call an RV Tech
Most slow drains are a DIY fix. Call a professional if you run into any of these:
- Water backs up and will not drain no matter what you try.
- The black tank valve may be broken, cracked, or stuck completely open or closed.
- The toilet must be removed to access or clear a deeper blockage.
- A macerator toilet has an electrical fault or a pump that won’t run at all.
- You notice leaking at the floor around the toilet base.
- You suspect a cracked tank or damaged plumbing beneath the rig.
If diagnosis points to a cracked toilet base or worn-out hardware rather than a clog, see our notes on choosing a replacement RV toilet before you call anyone out.
Frequently Asked Questions
Why does my RV toilet drain slowly when flushed?
The most common causes are too little water in the black tank, too much toilet paper, a poo pyramid forming under the drop pipe, a partial clog, a blocked roof vent, or a black tank valve that isn’t opening fully. Adding water and checking the tank level is the right first step for almost all of these.
Can I use Drano in an RV toilet?
No. Dometic’s own toilet manual warns against chlorine or caustic chemicals, including drain-opening products, because they damage the rubber seals in toilets and plumbing valves. Stick to RV-safe tank treatments and mechanical methods like a wand or extra water instead.
Why does my RV toilet bubble when I flush?
Bubbling and gurgling usually point to a blocked or restricted roof vent. Without proper airflow, flushing creates a partial vacuum in the tank instead of draining cleanly, and air pushes back up through the bowl as bubbles.
What is a poo pyramid in an RV black tank?
A poo pyramid is a cone-shaped buildup of solid waste that stacks up directly under the toilet’s drop pipe instead of spreading across the tank floor. It forms when the tank valve is left open too often or the tank is dumped repeatedly with too little water.
Should I leave my black tank valve open?
No, not at a full-hookup site. Leaving the valve open dries out solid waste and is one of the leading causes of poo pyramids and chronic odor. Keep it closed until the tank is mostly full, then dump and close it again.