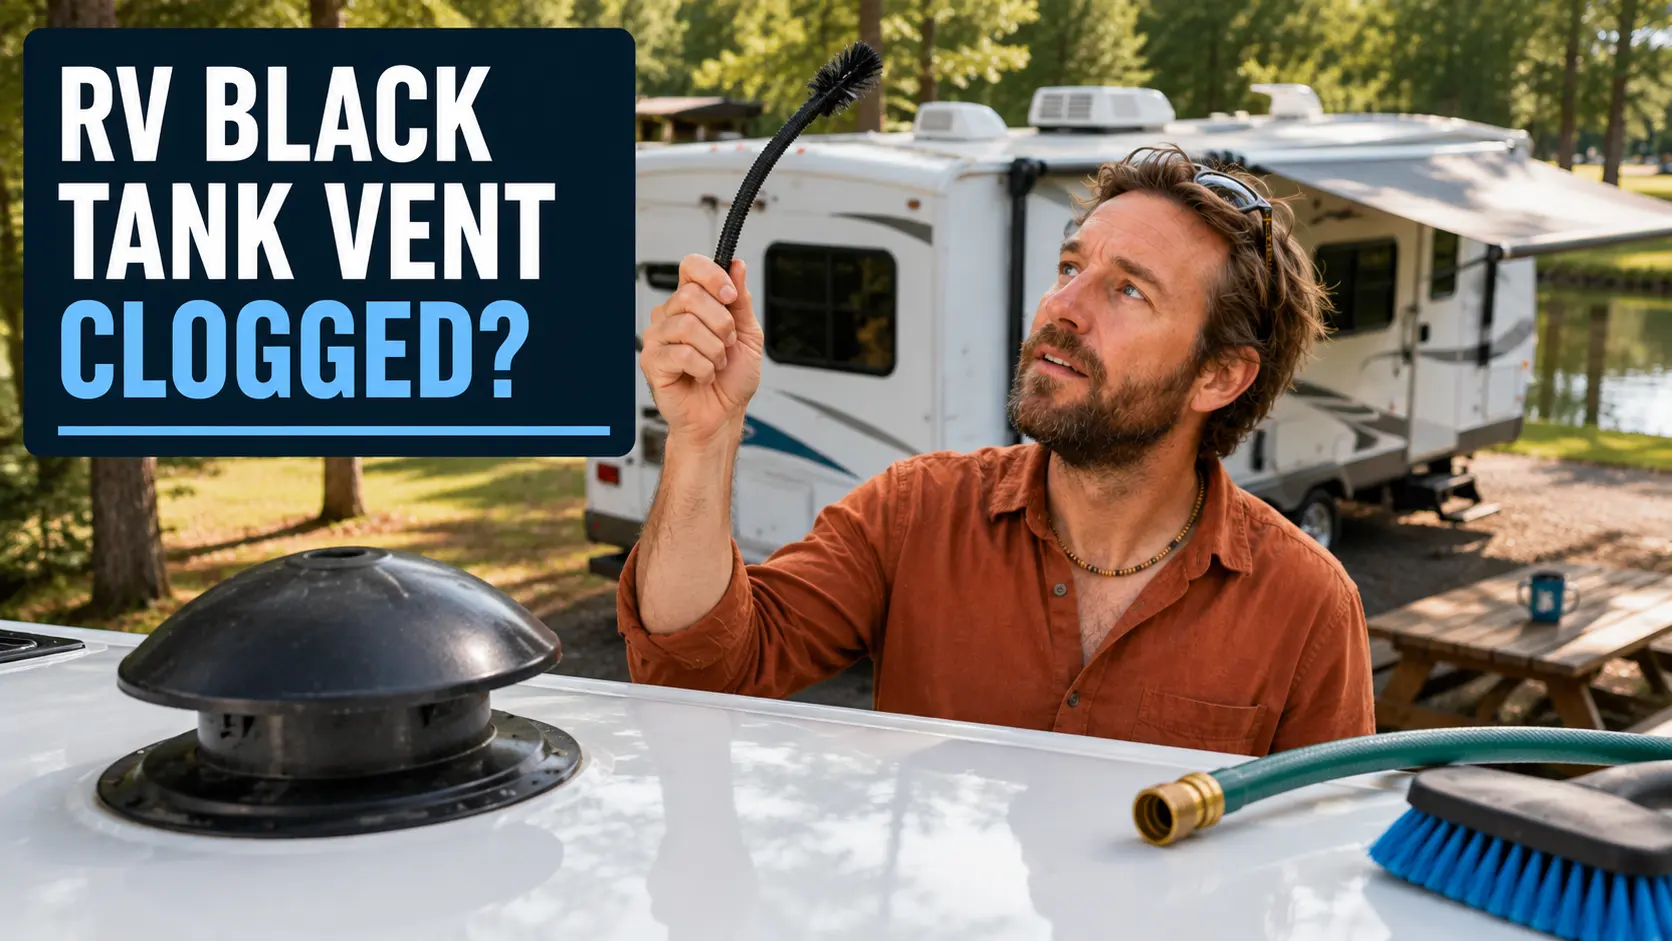
A clogged RV black tank vent stops sewer gases from escaping through the roof, so they push back through your toilet instead. The most common culprits are insect nests in the vent cap, leaves and debris at the roof opening, and waste that has dried and hardened inside the pipe. A garden hose test from the roof can confirm most roof-side blockages, though it does not rule out every type of problem. Most clogs are DIY-fixable with a garden hose and a flexible cleaning brush.
You flush the toilet and the bowl gurgles. Or there is sewer smell every time the valve opens. Or the black tank drains more slowly than it used to at the dump station. You have checked the tank level, the dump valve, and the flush ball seal. Everything looks fine.
The problem is probably on your roof.
The RV black tank vent is a small pipe most RV owners never think about — until it stops working. When it gets blocked, the whole waste system backs up in ways that are easy to misdiagnose. This guide covers how the vent works, how to confirm it is blocked, and how to clear it without damaging the tank or the pipe.
What Does the RV Black Tank Vent Actually Do?
The RV black tank vent is a vertical pipe that runs from the top of the black tank up through the roof of your RV. It does two jobs: it lets sewer gases escape outside, and it allows replacement air to enter the tank when waste drops in during a flush. Without that airflow, pressure builds inside the tank with every flush, and that pressure has nowhere to go except back through your toilet.
RV plumbing systems are built with vents because tanks and fixtures need airflow to drain properly and control odor. As Camping World explains, venting is crucial to odor control and ensures proper draining of sinks and holding tanks by maintaining adequate airflow in and out of the system. Most black tank vent pipes are ABS plastic, typically around 1.5 inches in diameter, and run from the top of the tank up through the roof where they exit under a small removable cap.
When the vent is working, sewer gases — mainly hydrogen sulfide, methane, and carbon dioxide — rise through the pipe and exit above the roofline. When the vent is blocked, those gases build up inside the tank. The moment you open the flush valve, built-up pressure finds a direct path upward through the toilet bowl and into your bathroom. The gas does not appear randomly. It appears when the valve opens because that is the only exit available.
How Do You Know If Your RV Black Tank Vent Is Clogged?
A clogged black tank vent produces a specific set of symptoms. The most common ones are: your toilet bubbles or gurgles when flushed with a tank that is not near full, sewer smell rises every time you press the flush pedal, the black tank drains sluggishly at the dump station, and odor gets noticeably worse while driving because wind can push air down the pipe instead of out.
Use the table below to match your symptom to the most likely cause.
| Symptom | More Likely Vent Clog | More Likely Something Else |
|---|---|---|
| Toilet bubbles when tank is not full | Yes | Pyramid plug or drop pipe clog |
| Sewer smell only when flushing | Yes | Dry bowl seal or worn flush ball |
| Slow drain flow at dump station | Possible | Gate valve issue or outlet clog |
| Smell gets worse while driving | Possible | Wind downdraft through a standard vent cap |
| Bowl loses water between uses | No | Flush ball or blade seal failure |
Quick note on bathroom fans: If the smell only appears when the bathroom fan, range hood, or roof vent fan is running, turn the fan off and flush again. A running exhaust fan creates negative pressure inside the bathroom that can pull odor through a weak toilet seal, a dry trap, or a small gap and make it look like a vent clog. This is a separate problem — and a faster fix. Read RV Toilet Smells When Flushed for the full breakdown of how fan-related pressure affects odor.
If your toilet bubbles when the tank is not full, that is one of the clearest signals the vent is blocked. Waste entering the tank displaces air, and a blocked vent has nowhere for that air to go except back up through the bowl. For a closer look at what toilet gurgling means and what else can cause it, read RV Toilet Bubbles When Flushed: 6 Causes and Quick Fixes.
And if the smell mainly starts after you dump the tank rather than during flushing, that is a separate problem covered in RV Toilet Smell After Dumping.
How to Find the Right Vent Pipe on Your Roof Before You Test
Before testing or clearing any pipe, you need to confirm you are working on the correct one. Many RVs have two or three pipes coming through the roof: a black tank vent, one or more gray tank vents, and sometimes a separate plumbing stack. They can look nearly identical from the outside. Testing the wrong pipe wastes time and tells you nothing about the black tank.
Here is how to identify the right one.
Start inside the RV. The black tank vent pipe usually runs directly above or near the toilet and bathroom. Look at where the bathroom sits in your floor plan, then think about which roof pipe is directly above that area.
Check your owner’s manual or manufacturer’s plumbing diagram. Many brands include a diagram showing exactly where each tank’s vent exits the roof. This is the most reliable way to confirm before you climb up.
On the roof, look for the pipe nearest the bathroom. Gray tank vents are typically above the kitchen or utility area. The black tank vent is usually positioned above the bathroom or bedroom area, depending on the floor plan.
If you are not sure, stop. Running water into the wrong vent pipe will not cause damage, but it will give you false results. If you cannot confirm which pipe is which from the manual, call the manufacturer’s customer service line with your RV’s VIN number before doing anything else.
Do not probe or run water into any pipe you have not confirmed is the black tank vent.
What Is Blocking Your RV Black Tank Vent?
Most vent blockages fall into one of six categories. The location of the blockage matters because it affects how you clear it.
1. Insect nests, especially mud daubers
One of the most common real-world blockers is insect nesting, particularly from mud daubers, spiders, and other insects during storage periods. As documented across multiple RV owner forums including the Heartland Owners Forum, mud daubers are drawn to the warm, sheltered environment inside a vent pipe. They pack the tube with dense mud cells that can partially or completely block airflow. Many basic factory-style vent caps have limited insect protection, and some leave enough open space for insects or debris to enter during storage.
2. Leaves, debris, and seasonal buildup
Leaves, insect debris, and general outdoor material collect inside and around the vent cap, especially during fall storage. As Unique Camping + Marine notes, ice and snow can also create temporary blockages in cold climates that prevent proper airflow from the tank.
3. Waste hardened at the tank-side pipe opening
This happens when the black tank is overfilled and liquid or waste enters the vent pipe from below. When the tank empties, that material is left behind and can dry and harden inside the pipe near where it connects to the tank. Keystone Forums document a real case where this pattern caused persistent burping even after a tank rinse, because the dried clog stayed at the pipe’s lower end inside the tank. A hose test from the roof may still show water flowing past the clog and into the tank, giving you a false clear result. This situation is closely related to pyramid plug formation, where waste builds up and hardens near the toilet opening.
4. Vent pipe shifted or disconnected from the tank
The vent pipe connects to the black tank through a rubber grommet or fitting. If the pipe slides too far into the tank, the lower end can become submerged in waste or liquid, which effectively seals the vent. If the pipe separates from the fitting entirely, the vent has no working path to the tank at all. MyCamperFriend documents this issue and recommends gently wiggling the pipe from the roof to check for unusual movement. A properly seated pipe should feel firm. Excessive movement or rotation indicates a loose or disconnected connection at the tank.
5. Damaged or deteriorated vent cap
A cracked or degraded vent cap can collapse partially and restrict airflow even when nothing is packed inside the pipe. Older plastic caps can also warp and seal against the pipe opening over time. If the cap looks brittle, cracked, or heavily discolored, it may be restricting airflow from the outside even when the pipe itself is completely clear.
6. Vent pipe not properly clearing the roofline
In some cases, especially on factory installations, the vent pipe may not extend far enough above the roof surface to allow proper airflow. Unique Camping + Marine notes that if holes are not properly aligned during manufacturing, the vent tube can end up partially blocked by the roof structure itself. This is uncommon, but worth knowing because no amount of pipe clearing will fix a structural installation problem.
How to Test If Your RV Black Tank Vent Is Clogged
Test the vent when the black tank is not near full. A nearly full tank can cause bubbling, splashback, and odor even when the vent is not clogged, because there is very little air space left inside the tank. As Unique Camping + Marine explains, a high liquid level inside the tank means gas has less room to build before it finds a path out through the toilet. Dump the tank first, then run your test.
A garden hose test from the roof can confirm most roof-side blockages. First, confirm you have identified the correct pipe using the steps above. Then remove the vent cap and look for any visible obstruction: nests, leaves, or packed debris just inside the opening.
Next, insert a garden hose gently into the vent pipe. Run water at low pressure and watch what happens. If water flows down freely, the roof-side section is probably open. But this does not prove the lower end of the vent pipe is correctly positioned inside the tank. A pipe that has slid too far down can still allow water to flow past it while failing to vent properly under normal conditions. If your symptoms continue after a clear hose test, the pipe’s position inside the tank may need to be checked by a technician.
If water backs up and overflows the opening, there is a blockage between the roof and the tank.
Safety first. Only access the roof when conditions are safe. Do not climb a wet, sloped, or unstable roof without proper footing and support. If roof access is not safe for you, an RV service technician can perform this test for you.
While you are on the roof, gently wiggle the vent pipe. It should feel firm. If it moves easily or rotates freely, the connection at the tank end may be loose or fully detached. That is a separate problem from a standard clog and will need to be addressed accordingly.
How to Clear a Clogged RV Black Tank Vent
Start with water and work up from there. Most external blockages like insect nests, leaves, and debris clear quickly. Hardened internal blockages take more time but are still fixable for most RVers.
Step 1: Remove the vent cap and flush with a garden hose. Insert the hose gently into the confirmed black tank vent pipe and run water at low pressure. Many nests and debris packs flush straight down into the tank with a steady flow.
Before running significant water into the pipe, check your tank level. If the tank is full or nearly full, connect to a proper dump station sewer hookup first and make sure the black tank dump valve is open. Do not add water to a closed or near-full black tank.
Step 2: Use a flexible cleaning brush if water alone does not clear it. Use a flexible duct-cleaning brush or soft plumbing brush sized for a 1.5-inch vent pipe. Push it in gently with a slow rotating motion. Do not force it. A flexible rod and brush system is safer than a rigid metal tool, which risks damaging the pipe or punching through the tank fitting.
Step 3: For hardened waste at the tank-side opening, use enzyme treatment inside the tank. If your vent is clear but the monitor panel still reads full after dumping, the problem may be dirty sensor probes instead of airflow. Use our guide to RV black tank sensor reads full after dumping to separate a false full reading from a real tank problem.
Step 4: Inspect and replace the vent cap if it is cracked or degraded. If the cap itself is the problem, clearing the pipe will not help. Remove the old cap, clean the roof surface around it, and install a replacement. A basic replacement cap is inexpensive and available at most RV supply stores.
Step 5: If the pipe has shifted or disconnected, contact a technician. A dropped or disconnected vent pipe is not a standard DIY repair. It can require opening an interior wall or ceiling panel to access and reseat the connection at the tank. If your hose test came back clear but symptoms continued, and the pipe showed excessive movement when wiggled from the roof, have a technician inspect the pipe-to-tank connection.
What Not to Do When Clearing a Clogged Vent
Getting this wrong will make things worse, not better.
- Do not push sharp metal rods or hard tools down the vent pipe. The pipe ends near the top of the black tank, and a sharp object can punch through the plastic tank body — a far more serious repair than a clogged vent.
- Do not use a pressure washer directly into the vent pipe. Normal garden hose pressure is enough. High pressure risks damaging the pipe-to-tank connection or fittings.
- Do not pour harsh drain chemicals such as bleach, Drano, or similar products into the black tank to try to clear the vent. These damage rubber seals and gaskets and kill the beneficial bacteria that help break down waste.
- Do not run a tank rinser or backflush tool for extended periods while the vent is still blocked. Adding pressure to a restricted system can stress seals and fittings throughout the waste system.
- Do not climb a wet or steep roof without proper safety equipment and a stable base.
How to Prevent Your RV Black Tank Vent from Clogging Again
The most effective prevention is a routine inspection before and after each storage period. Mud daubers and spiders nest during storage, when the vent sits idle and undisturbed for weeks at a time.
Install a vent cap with better insect protection. Many basic factory-style caps leave enough open space for insects to enter during storage. Replacing your cap with a screened model closes the main entry point for nesting. Options include siphon-style caps like the Lippert 360 Siphon, which includes a built-in bug screen and is designed to create a constant upward draw rather than allowing wind to push back down the pipe. A rotating or siphon-style vent cap can improve upward airflow and reduce wind-related odor pushback. Keep in mind, though, that it will not fix a pipe that is already blocked. It is a prevention upgrade, not a clearing tool.
Keep the black tank properly hydrated. A tank that runs too dry allows waste to harden near the bottom of the vent pipe opening inside the tank. Add a gallon or two of water after every dump, use enough water per flush (hold the pedal for 8 to 10 seconds), and keep the dump valve closed at all times except when actively emptying a full tank. After you clear the vent, a proper rinse routine helps keep residue from building up again. If your RV has a rinse port, follow our guide to using an RV black tank flush system safely without overfilling the tank.
Use an enzyme-based tank treatment consistently. Bacteria-based treatments keep waste broken down and mobile inside the tank, which reduces the chance of material hardening near the vent pipe opening. See the guide to the best RV toilet treatments for current options that work well for this.
Inspect the vent cap before and after each storage period. Remove the cap and shine a flashlight down the pipe at each inspection. A five-minute check each spring and fall catches most problems before they become an in-camp repair job.
During long-term storage, use a purpose-made insect screen or screened vent cap rather than blocking the vent. If you temporarily cover anything during storage, place a large, visible reminder tag on the toilet, the steering wheel, and the dashboard so it is removed before use or travel. A covered or blocked vent before the first trip of the season will cause immediate pressure problems. Do not drive or use the black tank with the vent blocked.
Conclusion
A clogged RV black tank vent is one of the most common causes of toilet gurgling and flush-triggered sewer smell. It is also one of the most fixable. A hose test from the roof confirms most roof-side blockages in minutes. A flexible brush clears nests and dried debris. Enzyme treatment handles hardened waste at the tank-side pipe opening. And a screened or siphon-style vent cap reduces the most common cause of recurrence.
If you have cleared the vent and the symptoms are still there, the vent may not be the root cause. A worn or dry flush ball seal produces nearly identical symptoms. So does a pyramid plug forming near the toilet opening. And odor that starts after dumping the tank is a different problem with different causes.
Check the vent first. Use the diagnosis table above to match your symptoms, run the hose test safely, and work through the fixes in order. That is the fastest way to get back to a system that works.
Frequently Asked Questions
What are the symptoms of a clogged RV black tank vent?
The four most common symptoms are: toilet bubbles or gurgles when flushed with a tank that is not near full, sewer smell rises when you open the flush valve, the black tank drains more slowly than usual at the dump station, and sewer odor gets noticeably worse while driving. If you are seeing one or more of these symptoms with a tank at a normal level, the vent is a likely culprit. Use the diagnosis table in this guide to narrow it down, then run the hose test from the roof to confirm before assuming the problem is something else.
Can I diagnose a clogged RV black tank vent without climbing on the roof?
You can suspect it from the symptoms, but you usually cannot fully confirm or clear a roof vent blockage without roof access. The garden hose test from the roof is the most reliable confirmation method available to most RV owners. If roof access is not safe or possible for you, a borescope camera lowered down from above can help in some cases, and an RV service technician can perform a full inspection. Do not start replacing parts based on symptoms alone without confirming the vent is actually the issue.
Can mud dauber wasps completely block an RV black tank vent pipe?
Yes. Mud daubers build dense mud tubes inside vent pipes, and a single nesting season can pack enough material to fully restrict airflow. The vent pipe provides everything mud daubers look for: warmth, shelter from weather, and an undisturbed space during storage. Many basic factory-style vent caps leave enough open space for insects to enter. Replacing the cap with a screened model is the most practical way to prevent this from happening again.
What happens if I ignore a clogged black tank vent for a long time?
A long-term blocked vent creates ongoing pressure problems inside the black tank every time you flush. That pressure pushes more gas up through the toilet and into the cabin with each use. Over time, the repeated pressure can stress the flush ball seal and other fittings in the system. In rare cases, sustained pressure may stress fittings, seals, or weak points in the tank system, especially if the vent stays blocked while the tank is repeatedly used. Beyond the mechanical risk, hydrogen sulfide gas from the Black tank gas can contain hydrogen sulfide, which is unpleasant at low levels and can be harmful at high concentrations. Ventilate the RV and fix the blockage instead of repeatedly using the toilet with sewer gas pushing back into the cabin.
How often should I inspect my RV black tank vent?
Inspect the vent cap from the roof at least twice a year: once in spring before your first trip, and once in fall before storage. Remove the cap and shine a flashlight down the pipe each time. If you store the RV for more than a few weeks at a stretch, add an inspection at the start and end of each storage period. During active nesting season (late spring through summer), a monthly visual check takes only a few minutes and catches problems early. A quick look now prevents a much harder fix at the campsite.