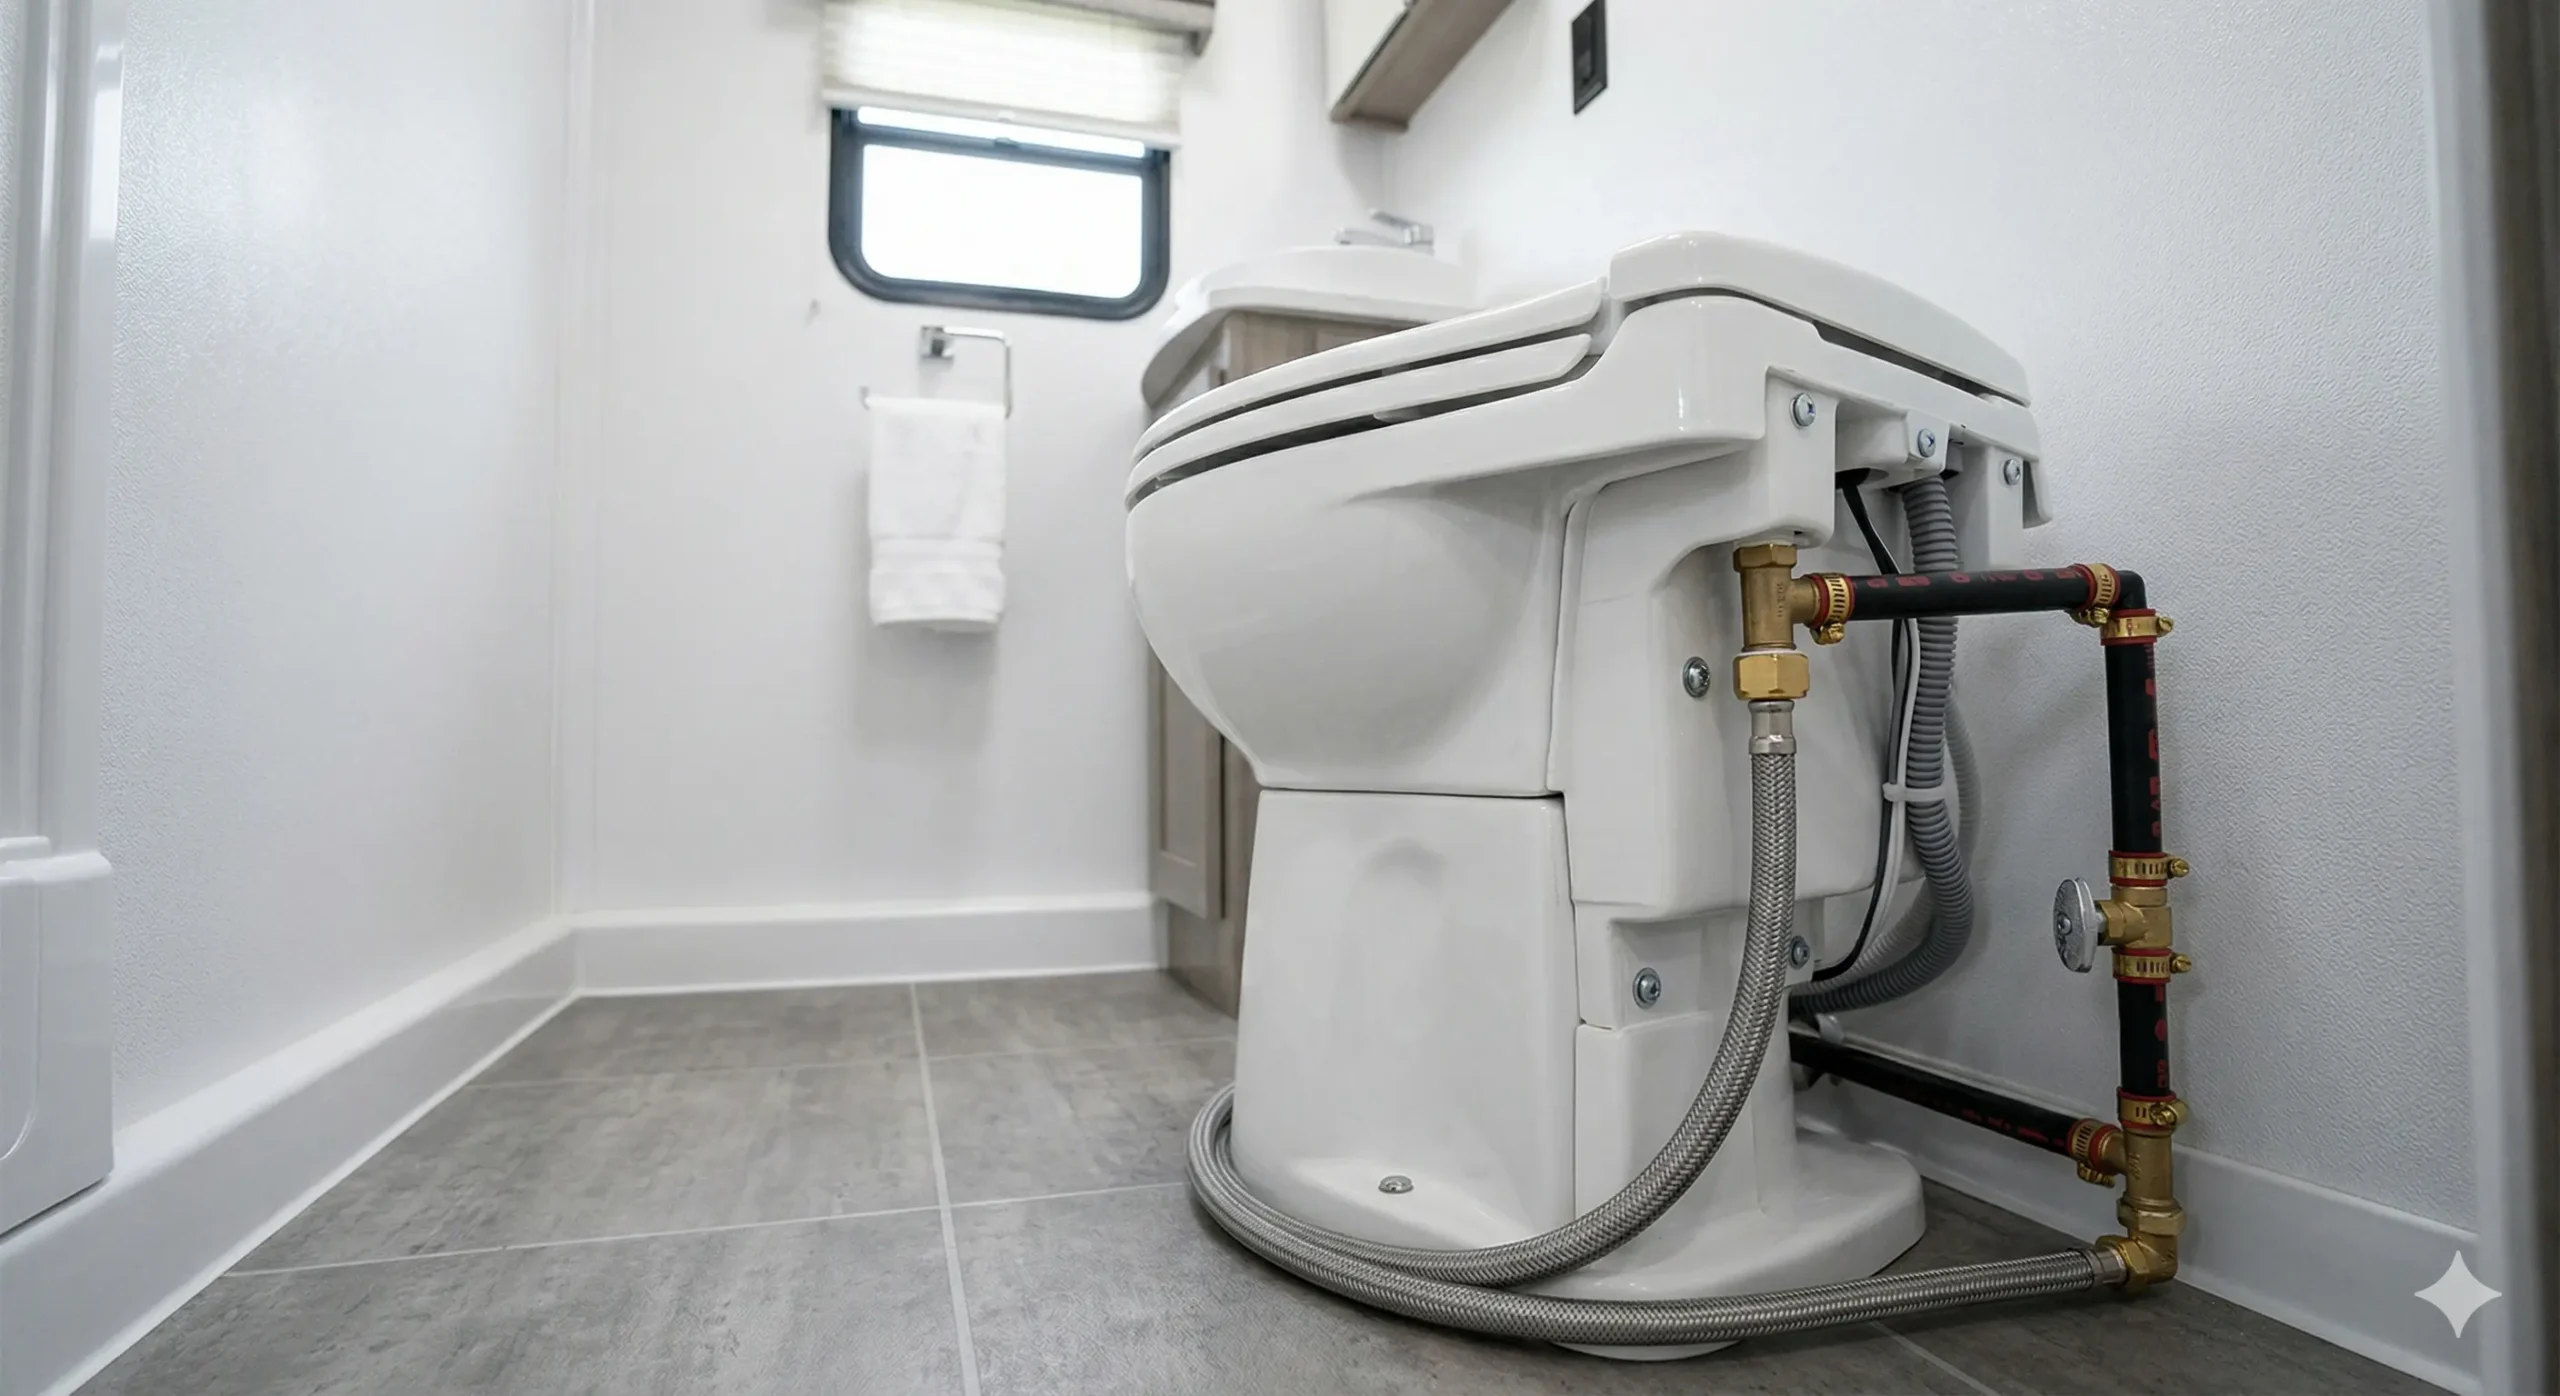
A faulty RV toilet water valve is one of the most common — and most annoying — problems RV owners deal with. Water keeps running into the bowl. The toilet won’t flush properly. You notice a puddle behind the toilet. Sound familiar?
The good news: replacing an RV toilet water valve is a beginner-friendly DIY repair. You don’t need plumbing experience. You don’t need to call a technician. With the right part and about 30–45 minutes, you can fix it yourself and save $100–$200 in service fees.
This guide walks you through exactly how to replace an RV toilet water valve — covering the most common brands including Dometic and Thetford — so you can get back on the road without the headache.
⚡ Quick Answer
To replace an RV toilet water valve: turn off the water supply → flush to release pressure → disconnect the water supply line → unscrew and remove the old valve → install the new valve → reconnect the water line → test the flush. Total time: 30–45 minutes. Replacement valves cost $15–$50 depending on your brand and model.
Signs Your RV Toilet Water Valve Needs Replacing
Before you start disassembling anything, make sure the water valve is actually the problem. Here are the clear signs it’s time for an RV toilet water valve replacement:
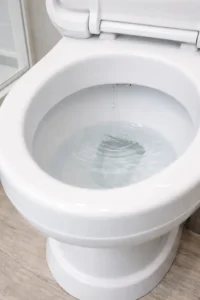
Water Keeps Running After You Release the Pedal
This is the number one sign. If water continues trickling into the bowl after you’ve let go of the flush pedal, the valve isn’t closing fully. The internal rubber seal has worn out or the valve housing is cracked. A constant drip also speeds up your freshwater tank drainage — a problem if you’re dry camping.
The Bowl Isn’t Filling Properly
Press the pedal and get barely any water? Or the water comes out in a weak dribble? The valve may be stuck partially closed due to mineral deposits or a broken spring. This is different from low water pressure — if your shower and sink work fine, the valve is the likely issue.
Visible Leak Behind the Toilet
Water pooling at the base of the toilet or near the back wall is a direct sign. The valve housing may be cracked, or the connection between the supply line and the valve is failing. Don’t ignore this — water damage in an RV spreads fast.
Weak or Inconsistent Flush
If the flush works sometimes but not others, or water flow varies randomly, the valve mechanism is degrading. This usually means the internal spring or diaphragm is worn and the valve can no longer regulate flow consistently.
Pedal Feels Mushy or Doesn’t Snap Back
The flush pedal should feel firm and spring back quickly. If it feels soft, sticks, or takes effort to release, the valve’s internal spring has likely failed. Left unfixed, this will eventually cause the valve to stay partially open — leading to constant running water.
Still not sure? Check out our complete RV toilet repair guide for a full diagnostic walkthrough.
Why RV Toilet Water Valves Fail
Understanding why your valve failed helps you prevent the next one from failing too soon. Here are the most common causes:
Hard Water Mineral Buildup
If you camp in areas with hard water (common in the US Southwest, Rocky Mountains, and parts of Europe), calcium and magnesium deposits accumulate inside the valve over time. Eventually they block the valve from closing fully or prevent it from opening completely. This is the leading cause of premature valve failure in RV toilets.
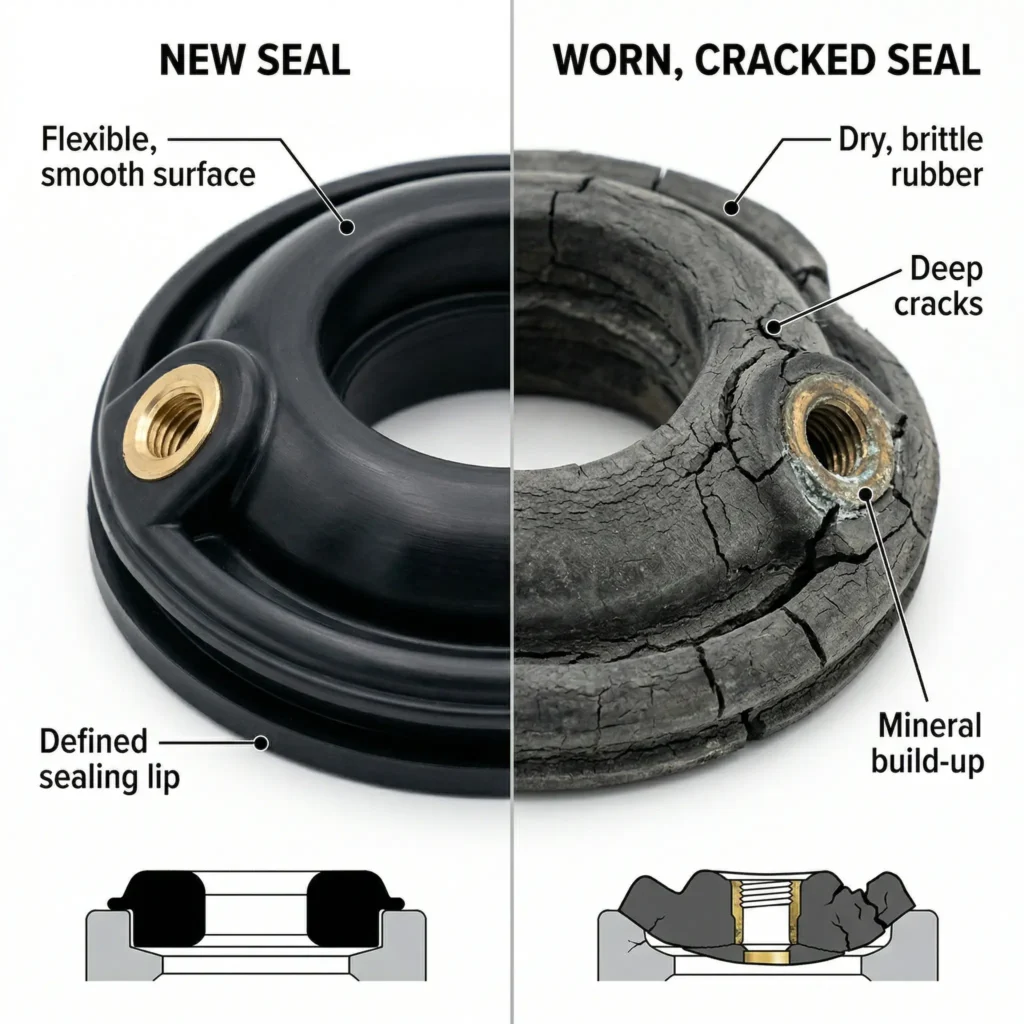
Rubber Seal Wear
The valve uses rubber seals and a diaphragm to control water flow. These components degrade naturally over 3–7 years, faster with heavy use or chemical toilet treatments that dry out rubber. Once the seal cracks or loses its shape, the valve can’t stop water from seeping through.
High Water Pressure
Connecting to campground water without a pressure regulator can send 70–100 PSI through your system. RV toilet valves are designed for 35–45 PSI. Consistent overpressure stresses the valve body and accelerates seal failure. Always use a water pressure regulator when on city water hookup.
Freezing Temperatures
Water left in the valve during freezing temperatures expands and cracks the plastic valve housing or damages the internal seals. Even a single hard freeze can permanently damage a valve. Always winterize your RV toilet system before cold weather — see our guide on RV toilet maintenance for more.
Age and Normal Use
No valve lasts forever. Full-timers using the toilet multiple times per day will go through valves faster than weekend campers. For high-use RVs, plan to inspect the valve annually and replace it every 2–3 years proactively.
Tools and Parts Needed
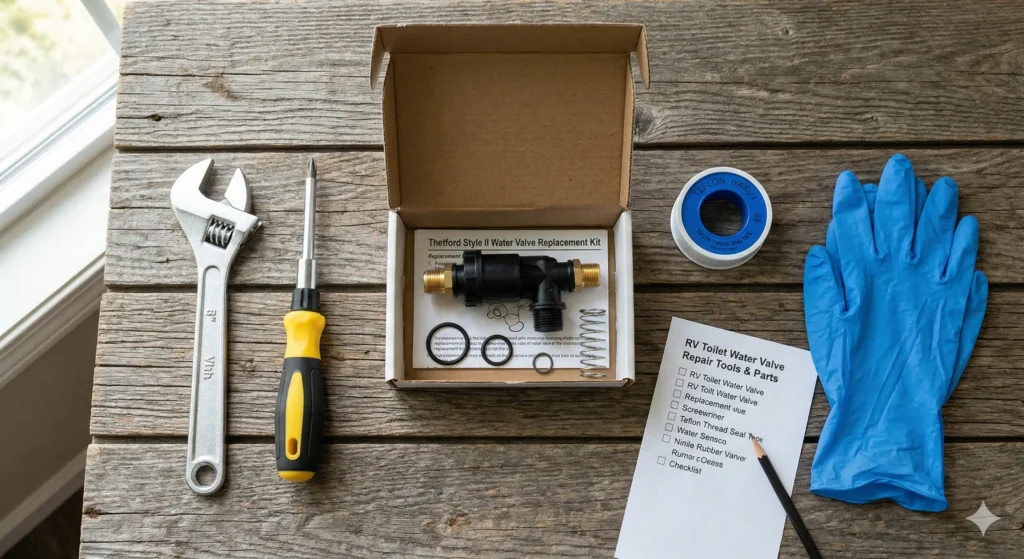
You don’t need a toolbox full of specialty equipment for this job. Here’s everything you’ll need:
Tools
- Adjustable wrench or channel-lock pliers
- Phillips head screwdriver (#2)
- Flathead screwdriver
- Teflon tape (plumber’s tape)
- Small bucket or old towels
- Rubber gloves (recommended)
- Smartphone (to photograph connections before disassembly)
Parts
- Replacement water valve — brand and model-specific (see next section)
- Replacement supply line (optional — good time to swap if yours is old or stiff)
Pro tip: Take a photo of the water connection, valve assembly, and pedal linkage before you remove anything. It takes 10 seconds and can save 20 minutes of confusion during reassembly.
Finding the Right Replacement Valve
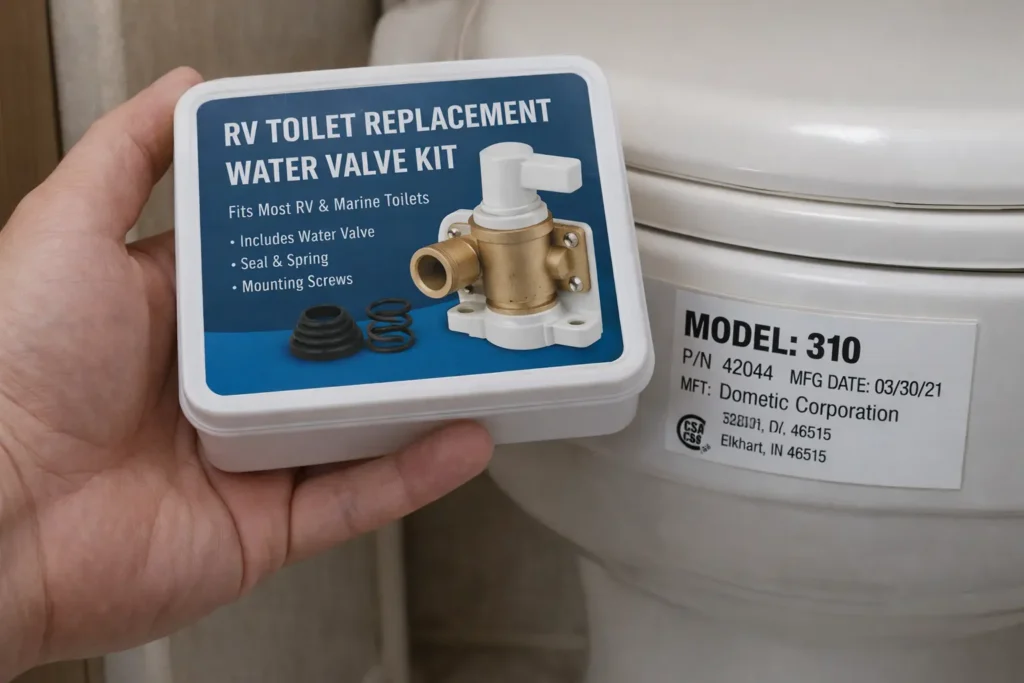
This is the most important step that many people rush — and then end up ordering the wrong part. RV toilet water valves are not universal. A Dometic valve will not fit a Thetford toilet, and different models within the same brand can require different parts.
Step 1: Find Your Toilet’s Model Number
Check inside the toilet bowl, under the rim, or on a label at the back of the unit. The model number is usually a 3–6 digit number. Write it down before searching for parts.
Step 2: Match to the Correct Valve
| Brand | Model | Valve Part Number | Approx. Cost |
|---|---|---|---|
| Dometic | 300, 301, 310 | 385311641 | $18–$28 |
| Dometic | 310, 320, Sealand 500 | 385316338 | $22–$35 |
| Thetford | Aqua-Magic V (Hi & Lo) | 31705 | $15–$25 |
| Thetford | Style II | 42049 | $18–$28 |
| Thetford | Bravura | 36453 / 36454 | $25–$45 |
When in doubt, use the parts lookup tools on Dometic’s official parts page or Thetford’s parts diagram page — enter your model number and it’ll show you exactly what fits.
Step-by-Step Guide: Replacing an RV Toilet Water Valve
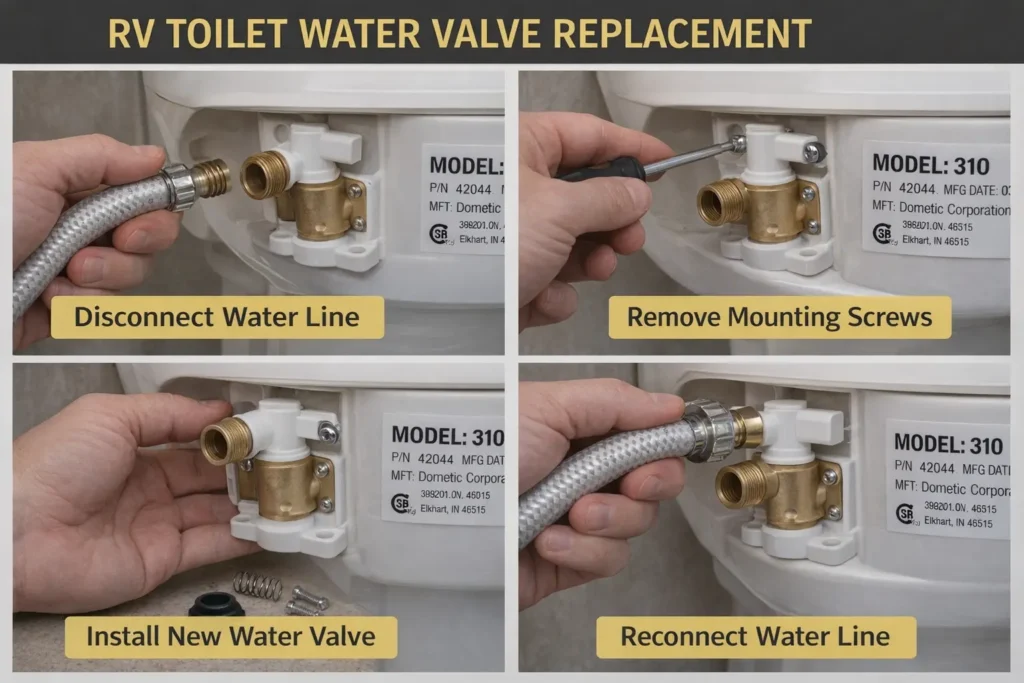
These steps apply to most RV toilets. Brand-specific differences for Dometic and Thetford are covered in the next two sections.
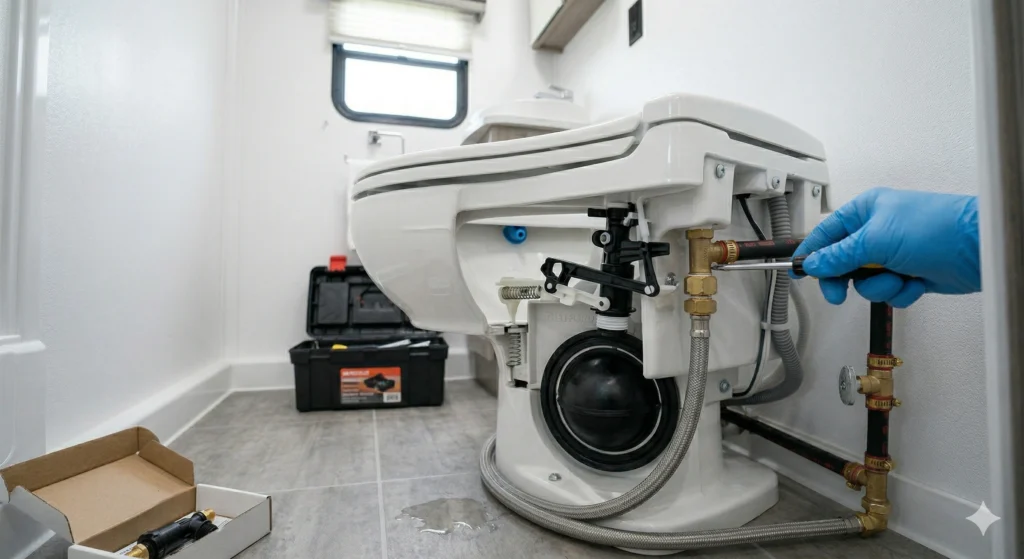
Step 1: Turn Off the Water Supply
Turn off your RV’s water pump at the control panel. If you’re on a city water hookup, disconnect or shut off the external supply at the spigot. Then press the flush pedal once or twice to relieve any remaining pressure in the line. This prevents water from spraying when you disconnect the supply line.
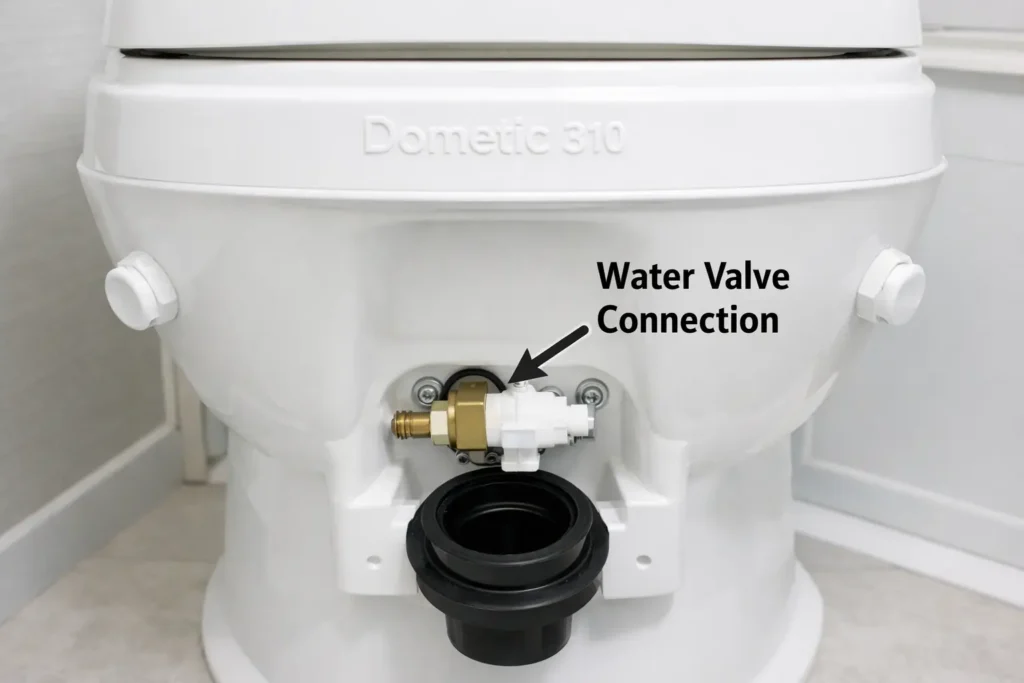
Step 2: Disconnect the Water Supply Line
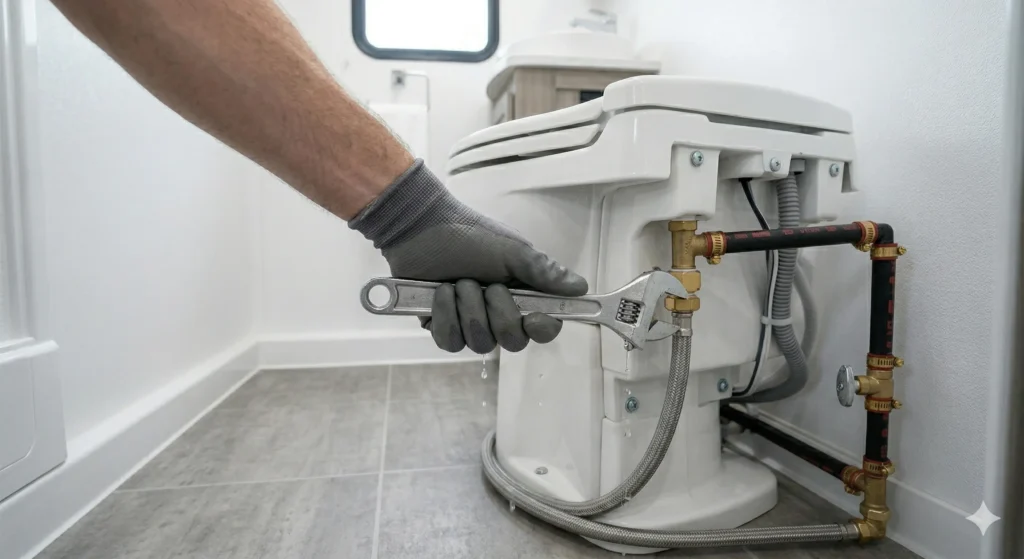
Locate the water supply line at the back or side of your toilet — it’s a small hose (usually 3/8″) connected to the valve inlet. Place a towel or small bucket underneath to catch the residual water. Use your adjustable wrench to loosen the connection nut by turning counterclockwise. Once loose, pull the line free by hand.
Note: A small amount of water will drain out — this is normal. It’s just what was sitting in the line.
Step 3: Remove the Old Valve
The valve is secured to the toilet housing with 2–3 screws. Remove them with your Phillips head screwdriver. Some models have a plastic retaining clip — use a flathead screwdriver to gently pop it open before pulling the valve out.
Before fully removing the valve, note how it connects to the flush pedal. This linkage is usually a spring pin, a small arm, or a hook mechanism. Take a photo now if you haven’t already. Disconnect the pedal linkage, then pull the valve free.
Step 4: Install the New Valve
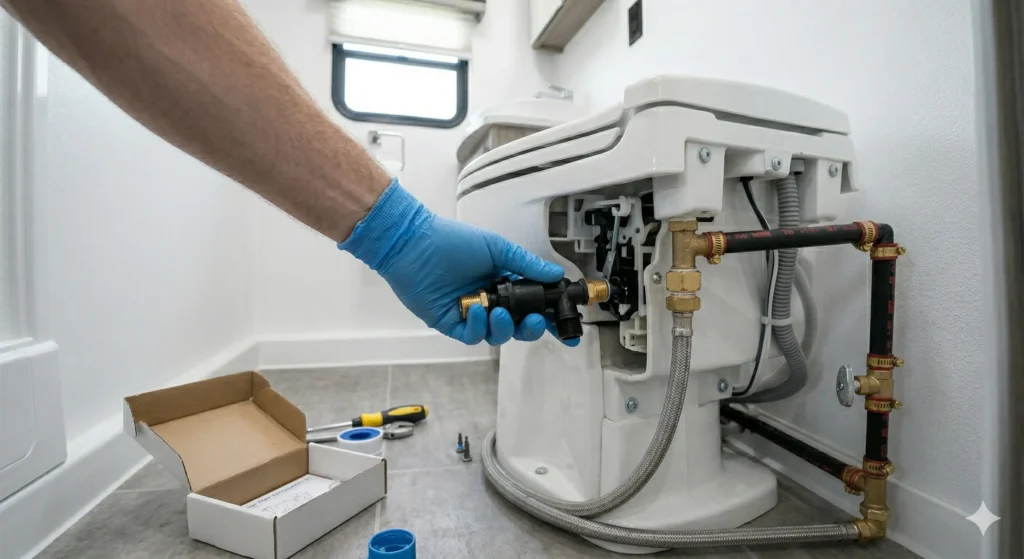
Connect the new valve to the pedal linkage first — this is easier to do before it’s fully seated in the housing. Refer to your photo from Step 3. Once the linkage is connected, press the valve firmly into the toilet housing until it seats correctly, then reinstall the screws.
Don’t overtighten. RV toilet components are often ABS plastic — too much torque will crack them. Snug is enough.
Step 5: Reconnect the Water Supply Line
Before reattaching the supply line, wrap the valve inlet threads with 2–3 layers of Teflon tape. Wind the tape clockwise as you look at the threads. This prevents slow drips at the connection joint. Reattach the supply line, hand-tighten first, then give it a quarter turn with your wrench — no more.
Step 6: Test the Flush
Slowly turn the water supply back on. Let pressure build for 30 seconds, then check all connection points for drips before touching the pedal. Once confirmed dry, press the flush pedal and observe:
- ✅ Water flows immediately when pedal is pressed
- ✅ Water stops completely when pedal is released
- ✅ Pedal snaps back firmly
- ✅ No drips at the supply line connection
If everything checks out, you’re done. If you run into issues, jump to the Troubleshooting section below.
Dometic RV Toilet Water Valve Replacement
Dometic (which includes legacy Sealand models) is the most popular RV toilet brand in North America. Here’s what you need to know for their most common models.
Dometic 300 and 301
These older but still widely used models use the 385311641 valve kit. The valve is located at the back of the toilet and connects to the foot pedal via a short plastic arm. When removing the old valve, gently flex the retaining tab — it’s brittle on older units and breaks easily if forced.
Dometic 310
The 310 is one of Dometic’s most common current models. It can use either the 385311641 or 385316338 depending on production year. Check the label on your unit or use Dometic’s parts lookup to confirm. The 310’s valve is easy to access — two Phillips screws and a pull-free design.
Dometic 320
The 320 uses the 385316338 valve. This model has a slightly different pedal linkage — the valve arm hooks into a bracket rather than a spring clip. Make sure the arm is fully seated in the bracket before securing the screws, or you’ll get a weak, inconsistent flush.
Common Dometic issue: If you’ve replaced the water valve but your Dometic toilet still isn’t holding water properly, the problem may be the flush ball seal, not the inlet valve. See our Dometic toilet not holding water guide for that specific fix.
Thetford RV Toilet Water Valve Replacement
Thetford toilets — particularly the Aqua-Magic V — are known for needing more frequent valve replacements. The valves are inexpensive and the process is straightforward, but the access point is different from Dometic models.
Thetford Aqua-Magic V
The most widely installed Thetford model in North America. Replacement valve part number: 31705 — this fits both the standard height and low-profile versions.
Key difference: the valve on the Aqua-Magic V is accessed from underneath the toilet, not the back. Remove the two screws under the toilet base to access the bottom housing cover, then reach the valve assembly inside. The pedal connects via a simple lever arm — easy to disconnect and reconnect.
Heads up: Aqua-Magic V valves can fail every 1–2 years under heavy use. If you’re a full-timer with this toilet, keep a spare valve in your parts kit.
Thetford Bravura
The Bravura comes in two versions: hand-flush and electric flush. For the hand-flush Bravura, use part number 36453 (right-hand water connection) or 36454 (left-hand). For the electric Bravura, the water valve and solenoid are sold as a combined assembly — replacement is more involved and costs $40–$70 for the assembly.
The Bravura’s access is similar to the Aqua-Magic V — remove the base panel to reach the valve. Thetford’s official parts diagrams are especially helpful for this model: Thetford parts diagrams.
Thetford Style II
The Style II uses part number 42049. Note that this model has a separate pedal return spring — if your pedal feels loose after the valve replacement, the spring likely needs replacing too (sold separately for around $4–$6).
Common Mistakes to Avoid
Most failed DIY valve replacements come down to a handful of avoidable errors:
- Buying the wrong part. Ordering by brand alone without checking the model number is the most common mistake. Always confirm the full part number against your specific toilet model.
- Skipping Teflon tape. Reconnecting the water supply line without Teflon tape almost guarantees a slow drip at the joint. Takes 30 seconds to apply, saves a callback to fix a leak.
- Overtightening plastic screws. RV toilet housings are ABS plastic. A cracked housing from overtightening means replacing the entire toilet, not just the valve.
- Forgetting to relieve water pressure first. Disconnecting the supply line with full pressure in the system results in a face full of water. Always flush the pedal after shutting off the supply to release residual pressure.
- Misaligning the pedal linkage. If the valve arm isn’t properly connected to the pedal bracket, the toilet will either flush weakly or the valve won’t close fully. Double-check this before reinstalling screws.
- Not testing before closing up. Always run 3–4 test flushes and wait 5 minutes with water pressure on before considering the job done. A slow drip won’t always be visible immediately.
Cost of Replacing an RV Toilet Water Valve
One of the best things about this repair is how affordable it is — both in parts and time.
| Option | Cost | Notes |
|---|---|---|
| DIY — Dometic valve | $18–$35 | Parts only |
| DIY — Thetford valve | $15–$45 | Parts only |
| RV dealer / technician | $150–$250 | Parts + 1–2 hrs labor at $75–$120/hr |
| Mobile RV tech | $180–$300 | Higher rate + travel fee |
Doing it yourself saves $120–$260 on what is genuinely a simple repair. The only scenario where paying a tech makes sense is if your toilet is under warranty (DIY may void it) or if the valve issue turns out to be a symptom of a larger plumbing problem.
Troubleshooting After Replacement
Installed the new valve but still having issues? Here’s how to diagnose the most common post-replacement problems.
Still Dripping After New Valve
First, verify where the drip is coming from. Dry the entire area with a paper towel, restore water pressure, and watch carefully. If the drip is at the supply line fitting, the Teflon tape application was insufficient — disconnect and redo. If the drip is from the valve body itself, the valve may not be fully seated or you may have installed an incompatible part.
Pedal Won’t Snap Back
The valve arm isn’t properly engaged with the pedal linkage. Shut off the water, remove the valve, and recheck the connection point. On Thetford models, also check whether the pedal return spring needs replacing — it’s separate from the valve.
Weak Water Flow
Usually a water pressure issue rather than a valve problem. Check that the supply line isn’t kinked, your pump is running at normal pressure, or your city water hookup has adequate flow. Ideal pressure for RV toilets is 35–45 PSI. Anything below 25 PSI will cause weak flushing regardless of valve condition.
Toilet Bowl Not Holding Water
If your bowl fills but then slowly drains down, the problem isn’t the water valve — it’s the flush ball seal or flapper. This is a separate repair. See our guide on Dometic RV toilet not holding water for that fix, or our general RV toilet repair guide for non-Dometic brands.
Increased Odor After the Repair
If you notice stronger than usual sewer smell after the repair, you may have disturbed the water seal in the bowl during the work. Keep the bowl topped up with a small amount of water. Persistent odor usually traces back to black tank issues — read our full guide on why RV toilets smell and how to fix it.
New Valve Leaks from the Body (Not the Fitting)
A brand-new valve leaking from its body is rare but indicates either a manufacturing defect or that the part was damaged during shipping. Return it and replace — don’t attempt to seal a cracked valve body with sealant.
Frequently Asked Questions
How long does an RV toilet water valve last?
Most valves last 3–7 years with typical seasonal use. Full-timers may need to replace them every 1–2 years, especially Thetford Aqua-Magic V models. Hard water significantly shortens valve lifespan — a water softener or pre-filter can help extend it.
Can I repair the valve instead of replacing it?
Some brands sell rebuild kits with replacement seals and springs. However, given that a full replacement valve costs $15–$45, most experienced RV owners skip the rebuild and go straight to replacement. It’s faster, more reliable, and the cost difference is minimal.
Do I need to remove the toilet to replace the water valve?
No. The water valve is part of the flush mechanism and is accessible without removing the toilet from its base. You don’t need to touch the wax seal, floor bolts, or black tank connection.
What water pressure should my RV toilet have?
RV plumbing systems — including toilet valves — are designed for 35–45 PSI. Always use a water pressure regulator when connected to a campground hookup. Some campground spigots deliver 80–100 PSI, which can damage valves, seals, and hose fittings.
Is replacing an RV toilet water valve safe for beginners?
Yes — this is one of the most beginner-friendly RV repairs you can do. There’s no black tank involvement, no electrical work on most models, and no certification required. The only risk is buying the wrong part or overtightening plastic components, both of which are easy to avoid.
How do I prevent my RV toilet water valve from failing early?
Four things help: use a water pressure regulator on city hookups, treat your water system with a pre-filter in hard water areas, winterize properly before freezing temperatures, and avoid harsh chemical toilet treatments that degrade rubber seals. A simple enzyme-based treatment is gentler and works just as well.
My RV toilet has a pyramid plug problem — is it related to the water valve?
Not directly. A pyramid plug is a solid waste buildup in the black tank, usually caused by not using enough water per flush. However, a faulty water valve that restricts flow can contribute to the problem by not delivering enough water during the flush cycle. See our guide on how to fix a pyramid plug in your RV black tank for the full fix.
Conclusion
Replacing an RV toilet water valve is a repair that pays for itself immediately — in saved technician fees, wasted water, and the peace of mind of having a properly functioning toilet on the road.
To recap: identify your toilet model, order the correct replacement valve, shut off the water, swap the valve, reconnect and test. That’s it. Most RV owners complete this repair in under an hour their first time — faster every time after that.
If your toilet issues go beyond the water valve — a cracked bowl, ongoing odor problems, or black tank issues — explore our full library of RV toilet repair guides for step-by-step solutions to every common problem.
Hi, I’m Daniel Brooks. I research and write about RV toilet repair, black tank maintenance, and sanitation troubleshooting. I create practical guides that help RV owners fix problems quickly and prevent costly damage.
2 thoughts on “How to Replace an RV Toilet Water Valve (Step-by-Step Guide)”