Your RV toilet foot pedal gets used dozens of times a trip. It handles a lot of wear, a lot of moisture, and the occasional overly enthusiastic stomp. So when it stops working — stuck down, won’t flush, wobbling loose, or outright broken — it becomes a problem you can’t ignore for long.
The good news? Most foot pedal issues are fixable in under an hour with basic tools and a little know-how. This guide walks through how the pedal works, the most common failures, a step-by-step repair process, the right replacement parts for the top brands, and how to keep the whole thing running smoothly for years to come.
Let’s get into it.
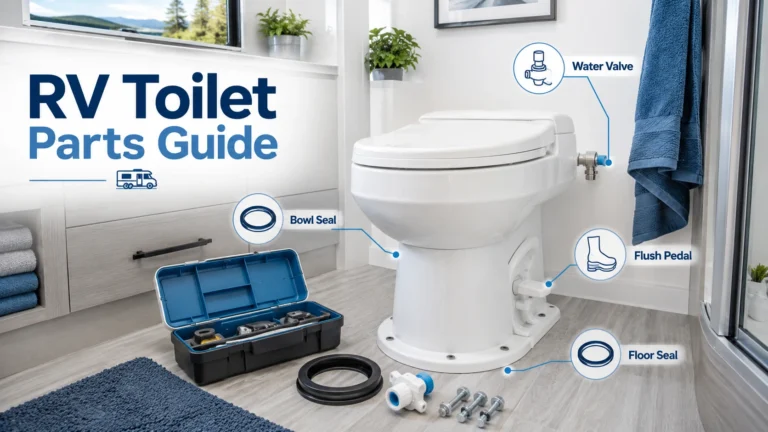
How Does an RV Toilet Foot Pedal Actually Work?
Unlike a home toilet with a handle and gravity-fill tank, most RV toilets use a foot pedal to control both water intake and flushing in a single mechanism.
Here’s the basic sequence:
- You press the pedal partway — this opens the water intake valve and fills the bowl.
- You press it fully — this triggers the flush valve (also called a blade, ball valve, or flapper), which opens at the base of the bowl and lets gravity pull everything down into the black water tank.
- You release the pedal — a spring mechanism pulls the valve closed and seals the bowl.
The pedal is connected to this sequence by a linkage arm or cable — a small but critical piece. If that arm breaks, bends, or disconnects, the pedal stops communicating with the valve entirely. Understanding how the foot pedal connects to the flushing mechanism is the foundation for any successful repair.
Brand Note: Pedal placement varies by brand. On the Dometic 300, 310, and 320 series, the pedal sits on the side. The Thetford Bravuraputs it at the front. Knowing which setup you have matters before you start any repair — it determines how you access the internals.
5 Common RV Toilet Foot Pedal Problems (And What Causes Them)
1. Pedal Won’t Flush / Blade Doesn’t Open
You press the pedal and water may enter the bowl, but nothing flushes out. This usually points to a disconnected or broken linkage arm — the part that translates the pedal’s movement into valve action. The blade might move fine when you push it manually, but the pedal has lost its connection to it.
2. Pedal Stuck Down and Won’t Return
The most common cause of a stuck pedal is debris and gunk building up around the mechanism, making it impossible for the spring to push the pedal back up. Cold weather is another culprit — water left in the valve area can freeze and lock the pedal in place during winter storage.
3. Pedal Is Loose or Wobbly
A pedal that rocks or doesn’t sit firmly usually means the mounting bolts have worked loose, or the plastic housing around the pedal assembly has cracked. This is more common on older units and on roads with significant vibration. Left untreated, a wobbly pedal can eventually snap off entirely.
4. Toilet Leaking at the Foot Pedal
The most common causes of leaking at the foot pedal are a damaged intake valve or a buildup of sediment around the pedal. Worn O-rings and dried-out rubber seals are also frequent culprits, especially in RVs that sit unused for extended periods. Water that appears at the base of the pedal during or after flushing is a clear sign the seal isn’t creating a proper barrier.
5. Pedal Physically Broke Off
This one’s usually the result of freeze damage, excessive force, or years of repeated stress fractures finally giving out. Gluing broken pieces back together rarely restores the structural integrity of the pedal — in most cases, a replacement is the right call.
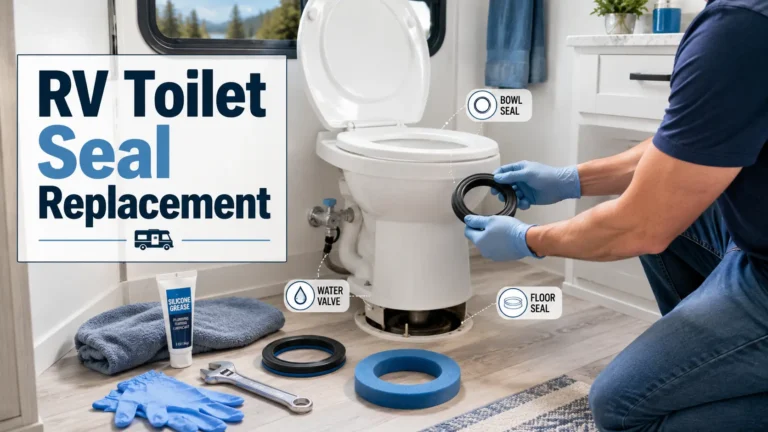
What You’ll Need Before You Start
Gather these before you begin. There’s nothing worse than having the toilet in pieces and realizing you’re missing a wrench.
- Phillips head and flathead screwdrivers
- Adjustable wrench or pliers
- Rubber gloves (non-negotiable)
- Old rags or paper towels
- A bucket or small container
- Silicone-based lubricant (more on this in the maintenance section)
- Replacement parts if needed (see the product section below)
- Your RV toilet’s owner’s manual (or your model number handy — found on the label at the base of the toilet)
Before You Touch Anything Turn off the water supply to your toilet first. Then flush to release any remaining pressure and empty the bowl. Skipping this step is how bathrooms get flooded.
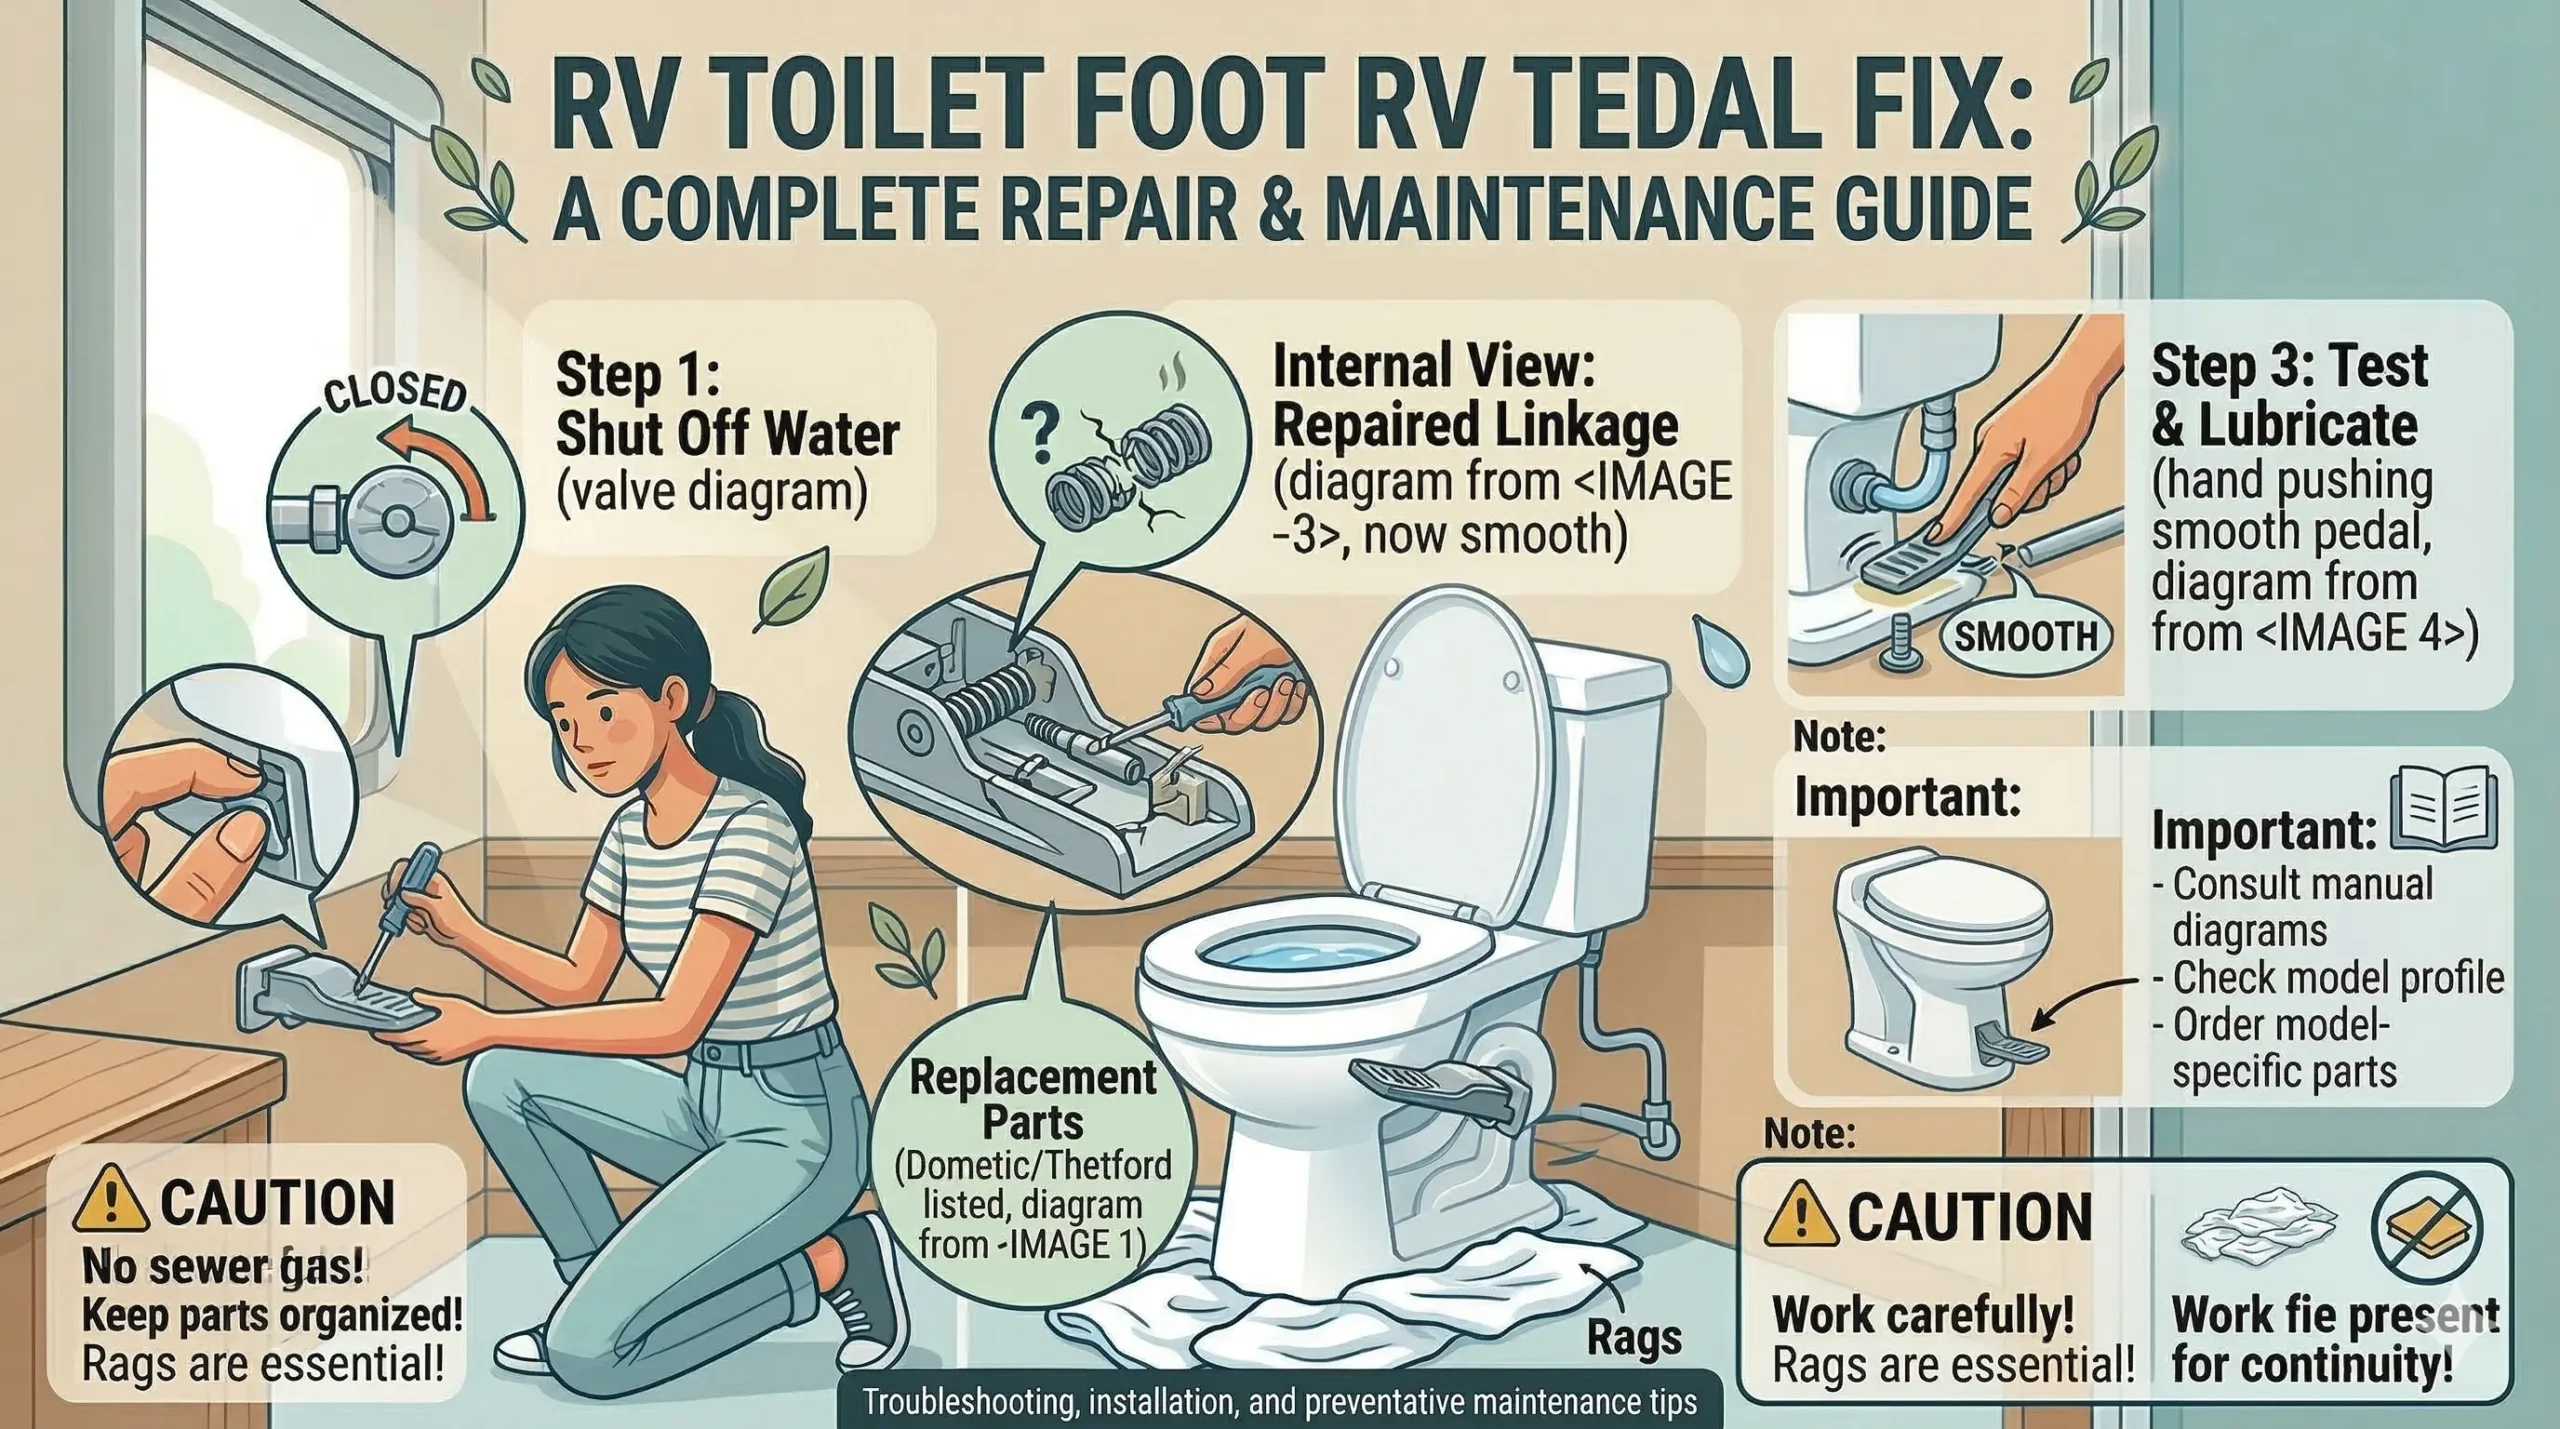
Step-by-Step: How to Fix an RV Toilet Foot Pedal
These steps apply to most gravity-flush RV toilets. For brand-specific nuances, cross-reference with your owner’s manual.
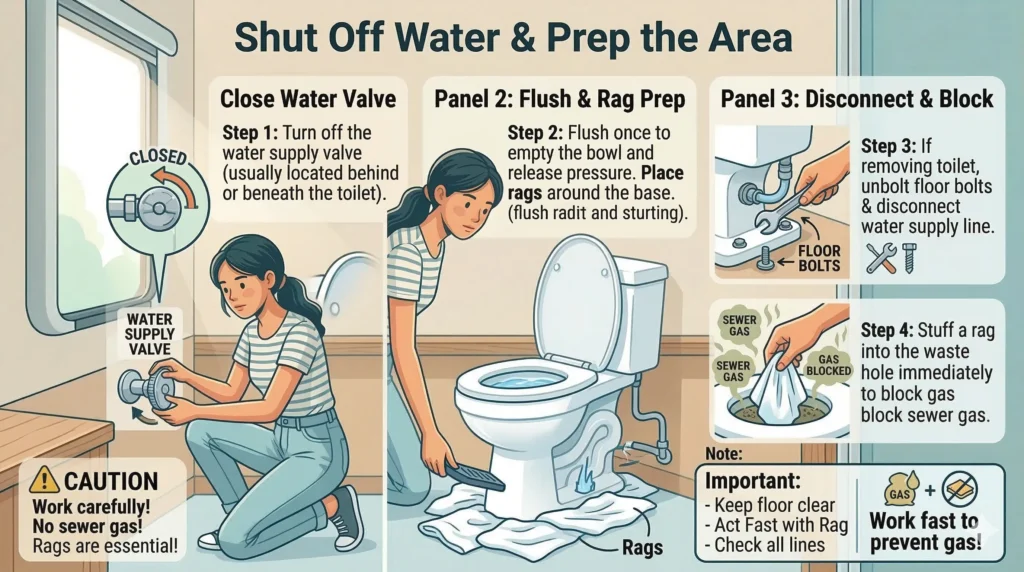
Shut Off Water & Prep the Area
Turn off the water supply valve (usually located behind or beneath the toilet). Flush once to empty the bowl and release pressure from the system. Place rags around the base to catch any residual water. If you need to remove the toilet entirely, unbolt the two floor bolts — one on each side — and disconnect the water supply line from the back. Stuff a rag into the waste hole immediately to block sewer gas from escaping into your RV.
Inspect the Pedal & Linkage
Remove the pedal cover (usually 1–3 screws, or a pinch-release clip depending on the model). Look for broken springs, rods, or plastic connectors. Try moving the blade or ball valve by hand — if it moves freely but the pedal doesn’t activate it, the linkage is your problem. Check the linkage for disconnection, broken rods, or worn pivot points and note exactly what’s damaged before ordering parts.

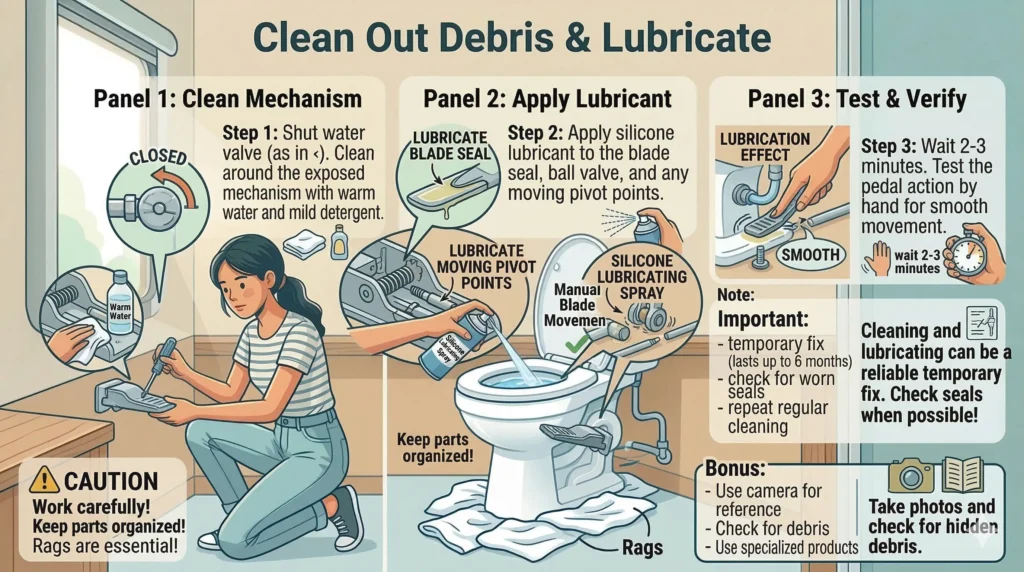
Clean Out Debris & Lubricate
If debris or mineral buildup is causing a sticky or stuck pedal, clean around the mechanism with warm water and a mild detergent. A blade that sticks to the seal can often be freed with silicone lubricating spray. Apply the lubricant to the blade, ball valve, and any moving pivot points. Let it sit for a few minutes, then test the pedal action by hand. Cleaning and lubricating can serve as a reliable temporary fix that lasts up to six months — but if the underlying seal is worn, you’ll want to replace it when you can.
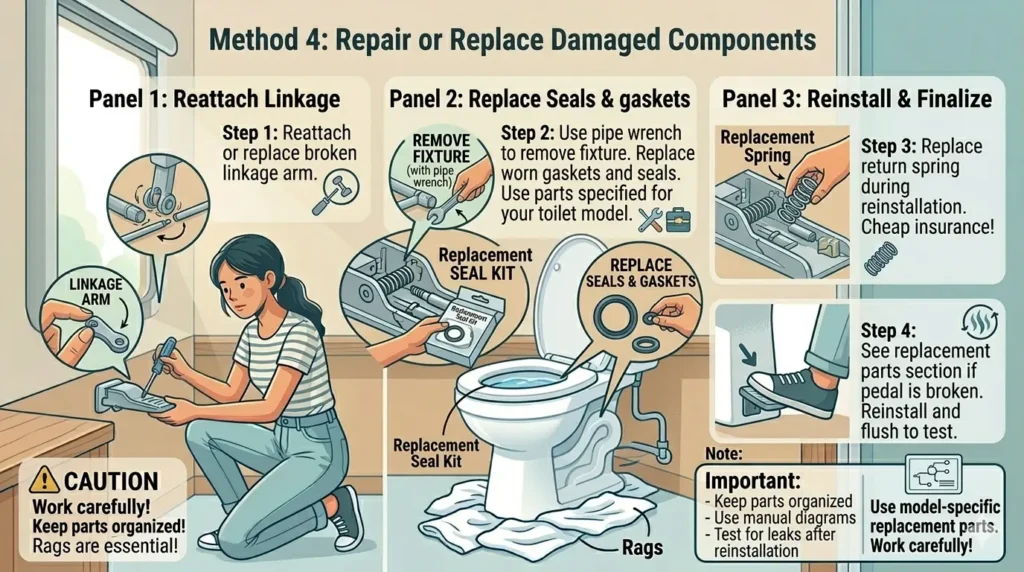
Repair or Replace Damaged Components
If the linkage arm is broken, reattach or replace it. If the O-ring or seal is leaking, use a pipe wrench to loosen the connections, remove the fixture, and replace worn gaskets and seals — make sure you’re using parts specified for your toilet model. If the pedal itself is cracked or broken, see the replacement parts section below. When reinstalling, replace the spring at the same time — it’s cheap insurance against leaving a weakened part behind.
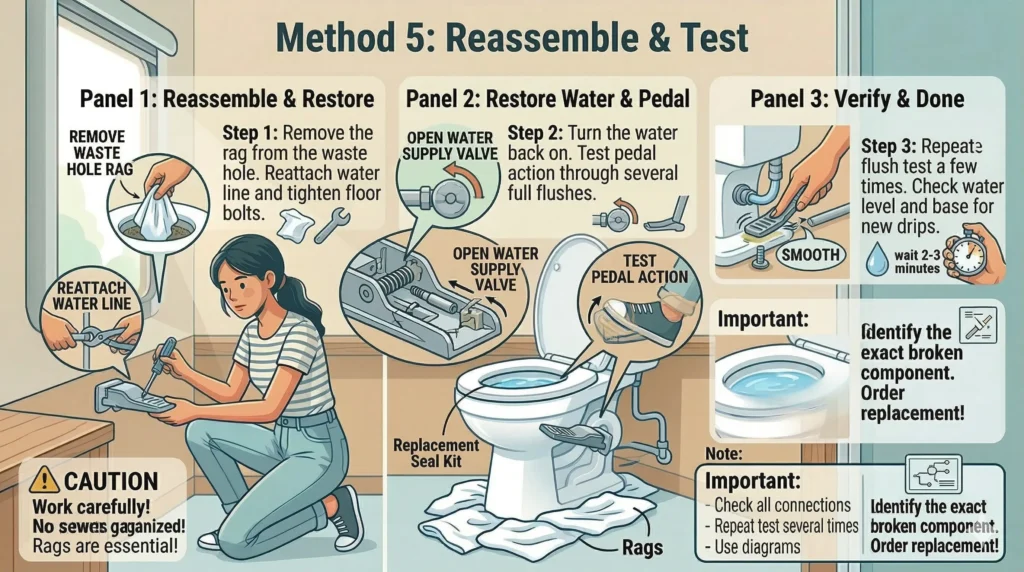
Reassemble & Test
Reverse your disassembly steps to reinstall — remove the rag from the waste hole before you do. Reattach the water supply line, tighten the floor bolts, and turn the water back on. Test the pedal action through several full flushes. Check the water level in the bowl after each flush — low levels suggest the valve isn’t sealing fully. Repeat the flush test a few times before calling it done. Check the base and supply line for any new drips.
Recommended Replacement Parts & Products
Picking the right part means matching your exact toilet model. The label on the base of your toilet has everything you need. Here’s a breakdown of the most common options across the two dominant brands.
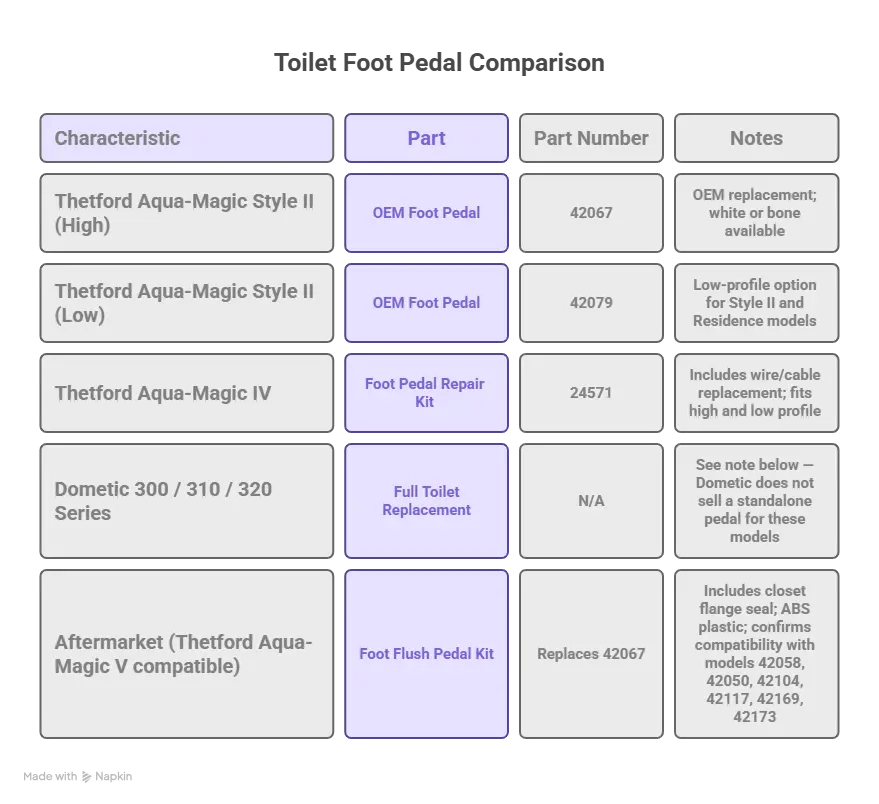
Dometic 300 / 310 / 320 Series — Important
Dometic does not manufacture a standalone replacement pedal for these models — their bowl-to-base assembly is factory sealed. If you’re under warranty, contact Dometic directly (1-800-366-3842) as they have been known to offer replacements or significant discounts. Out of warranty, you’re looking at replacing the toilet itself. Some adhesive fixes work temporarily but won’t restore full integrity — factor this in when deciding whether repair or replacement makes more financial sense.
Pro Tip: Always pull your model number from the label at the base of the toilet before ordering anything. Thetford alone has multiple sub-models that share the same name but take different parts. A clear photo of that label will save you a return trip to the parts store.
Prevention & Maintenance Tips to Avoid Future Problems
Most foot pedal failures aren’t sudden — they build up over time. A little routine care goes a long way.
Lubricate the Seal Regularly
Lubricating the toilet seal at least once a year is recommended, and ideally every six months for heavy-use units. Use a silicone-based lubricant — petroleum-based products like Vaseline or standard oil can damage the rubber seals and plastic components in modern RV toilets. Good options include Thetford Toilet Seal Lubricant & Conditioner, Dow Corning 111, or a quality silicone spray. Products like Dow Corning 111 work well on gaskets and slide valves to keep them supple and prevent sticking.
Winterize Properly Every Season
Before winter storage, pour one cup of pink RV antifreeze into the bowl and press the foot pedal halfway to coat the seals and the P-trap. This protects rubber from freeze damage and drying. Some experienced RVers also recommend propping the flush pedal slightly open during storage to allow any residual water to escape the valve if expansion occurs during a hard freeze. Never use automotive antifreeze — it’s toxic and will damage your system.
Use Enough Water When Flushing
Adding at least one-third to one-half bowl of water before flushing reduces the risk of solids getting caught in the flush mechanism and keeps the seal cleaner over time. Pre-filling the bowl with water before each use is recommended, especially for solid waste, to help everything move cleanly through the valve.
Do a Monthly Visual Check
A monthly maintenance reset that includes checking the water level in the bowl, lubricating the seal, and flushing an enzyme-based tank treatment keeps the whole system running smoothly. Look for low water levels in the bowl after filling — this signals a drying seal that needs attention before it worsens. Catch these things early and you avoid the bigger repairs.
Avoid Harsh Chemical Cleaners
Standard bathroom cleaners, bleach-heavy products, and anything containing alcohol can dry out and crack the rubber seals faster. Enzyme-based cleaners are the better choice — they break down waste without damaging plastic or rubber. Keep the pedal itself clean with biodegradable, alcohol-free wipes.
When to Call a Professional (Or Just Replace the Toilet)
DIY repair makes sense for most foot pedal issues. But there are situations where you’re better off stepping back.
Call a Professional If:
- The toilet base is cracked or the bowl-to-base seal is compromised — this isn’t a foot pedal issue anymore, and water damage to your RV floor can be expensive.
- You’ve replaced the pedal and seal but the toilet still leaks or won’t hold water — there may be an internal valve housing issue that requires disassembly beyond what’s practical for most DIYers.
- You’re not comfortable diagnosing the problem yourself — a certified RV technician can pinpoint the issue quickly and ensure the repair is done right the first time.
- You’re dealing with a Dometic 300/310/320 out of warranty — labor costs for a pedal workaround may exceed the cost of a new toilet.
Consider Full Toilet Replacement If:
- Your toilet is more than 10–15 years old and this is the second or third repair in two seasons.
- The internal valve housing is cracked or physically damaged beyond repair. In some cases the flap assembly is irreparably damaged and a new toilet is the right outcome.
- You want to upgrade to a higher-profile model with better flushing power — a new Thetford Bravura or Aqua-Magic Style II can be installed in an afternoon and costs $150–$350 depending on the model.
Bottom Line: Most foot pedal repairs cost under $30 in parts and take less than an hour. If you’re spending more time or money than that without a clear fix, it’s worth getting a second opinion from a certified RV tech — or pricing out a replacement toilet. Sometimes the smarter move is a clean start.
Frequently Asked Questions
Why is my RV toilet foot pedal stuck down and won’t come back up?
The most common reason a foot pedal stays stuck is a buildup of debris, gunk, or mineral deposits around the mechanism, which prevents the spring from pushing it back to its resting position. Cold-weather freezing of residual water is another frequent cause. Start by cleaning around the pedal and applying a silicone-based lubricant — this is often enough to free it. If the pedal keeps sticking after cleaning, the seal likely needs to be replaced.
Can I replace just the foot pedal on a Dometic toilet?
For the Dometic 300, 310, and 320 series, standalone pedal replacement is not possible — Dometic uses a factory-sealed bowl-to-base assembly. If your unit is under warranty, contact Dometic directly at 1-800-366-3842 for possible replacement assistance. Out of warranty, the practical fix for these models is replacing the entire toilet. Some Dometic models outside these series do have replaceable pedal components — check your owner’s manual or call Dometic to confirm for your specific model.
What causes an RV toilet foot pedal to leak?
The most common causes of leaking at the foot pedal are a damaged intake valve or sediment buildup around the pedal. Worn O-rings and dried-out rubber seals are also frequent culprits, particularly in RVs that sit unused for months at a time. Regular lubrication with a silicone-based product prevents seals from drying and cracking. If cleaning and lubricating doesn’t stop the leak, the intake valve or seal will need to be replaced.
How often should I lubricate my RV toilet foot pedal seal?
Lubricating the toilet seal at least once a year is the standard recommendation, and building this into your annual winterization routine is a smart habit since cold temperatures dry out rubber faster. For RVs used heavily or year-round, every six months is a better interval. Always use a silicone-based lubricant — petroleum-based products can damage the newer plastic and rubber materials used in modern RV toilets.
What’s the difference between the Thetford and Dometic foot pedal repair process?
Thetford and Dometic toilets share similar mechanics, so sealing, flushing, pedal, and valve fixes largely follow the same steps. The key difference is parts availability: Thetford sells replacement foot pedal parts for most of its Aqua-Magic series, while Dometic’s 300/310/320 models have factory-sealed assemblies that make standalone pedal replacement impossible. Always confirm your model number before purchasing parts — both brands have multiple sub-models with different part numbers. A clear photo of the label at the base of your toilet is the fastest way to get the right part on the first try.