Quick Answer
To fix a stuck RV black tank gate valve, start with silicone-based lubricant — never WD-40 — applied directly to the valve stem and gate. If the tank is empty, work the valve handle while applying lube. If the tank is full, use the drill-hole method as a last resort: drill into the valve housing above the handle, inject silicone lubricant, and plug the hole with a screw before trying to open it (always with your sewer hose connected first). If the pull handle feels loose with no resistance, the cable or rod has disconnected — that’s a mechanical fix, not a lubrication problem. When the valve is past saving, a Valterra Bladex replacement valve swaps in directly and runs about $20–$40.
You pull the black tank handle. Nothing happens.
You pull harder. Still nothing.
Now you’re standing at a dump station with a full black tank, a valve that won’t budge, and a growing sense of dread.
Sound familiar? You’re not alone. A stuck RV black tank gate valve is one of the most common complaints across RV forums — from IRV2 to DoItYourselfRV. It hits first-timers and full-timers the same way.
Here’s the thing: most stuck valves can be fixed without calling a mobile tech. But you need to diagnose before you start yanking — the fix depends entirely on what’s causing it.
This guide covers every scenario. Quick lubrication methods, mechanical fixes, cable reattachment, and full valve replacement — plus the right products for each situation.
Why RV Black Tank Gate Valves Get Stuck
Before you can fix the problem, you need to know what you’re dealing with. There are four main reasons a black tank gate valve seizes up, and each one points to a different solution.
- Waste and debris buildup. Solid waste, toilet paper, and grease accumulate around the valve over time — especially when the tank isn’t flushed with enough water. According to RV service experts at Daisy RV, this kind of buildup is one of the leading causes of valves that won’t open.
- Dried-out rubber seals. The internal seals inside the gate valve dry out, crack, or stiffen over time — particularly if the RV has been sitting unused. Once the seals go stiff, even a few pounds of pressure can make the valve nearly impossible to move.
- Disconnected or broken cable/rod. Many RVs use a cable or rod system to connect the pull handle to the gate valve body. If this connection breaks or detaches, the handle will feel loose — like it’s pulling air — while the valve itself stays shut. RV mechanics note that a disconnected Allen-head screw at the valve plunger is a frequent culprit.
- Ice and freezing temperatures. If you’re camping in cold weather without proper insulation, moisture trapped around the valve freezes and locks it in place. This one has its own fix — and it’s different from the others.
How to Diagnose Which Problem You Have
Don’t skip this step. Two minutes of diagnosis saves two hours of unnecessary work.
- Handle feels loose or pulls with no resistance? The cable or rod has likely disconnected from the valve. Jump to Fix #3.
- Handle is stiff and won’t move at all? You’ve got buildup or dried seals. Start with Fix #1, then move to Fix #2.
- RV has been in freezing temps recently? You’re dealing with a frozen valve. Use a heat gun or space heater near the valve housing before trying anything else. Insulate afterward with foam pipe wrap or heat tape.
- Handle moves but nothing drains? The valve may be opening, but there’s a clog on the tank side. Your valve isn’t the problem — check for a pyramid plug or solid blockage inside the tank.
Fix #1 — Lubricate the Valve First (Before Anything Else)
This is always your first move. It’s low effort, low risk, and it works more often than people expect.
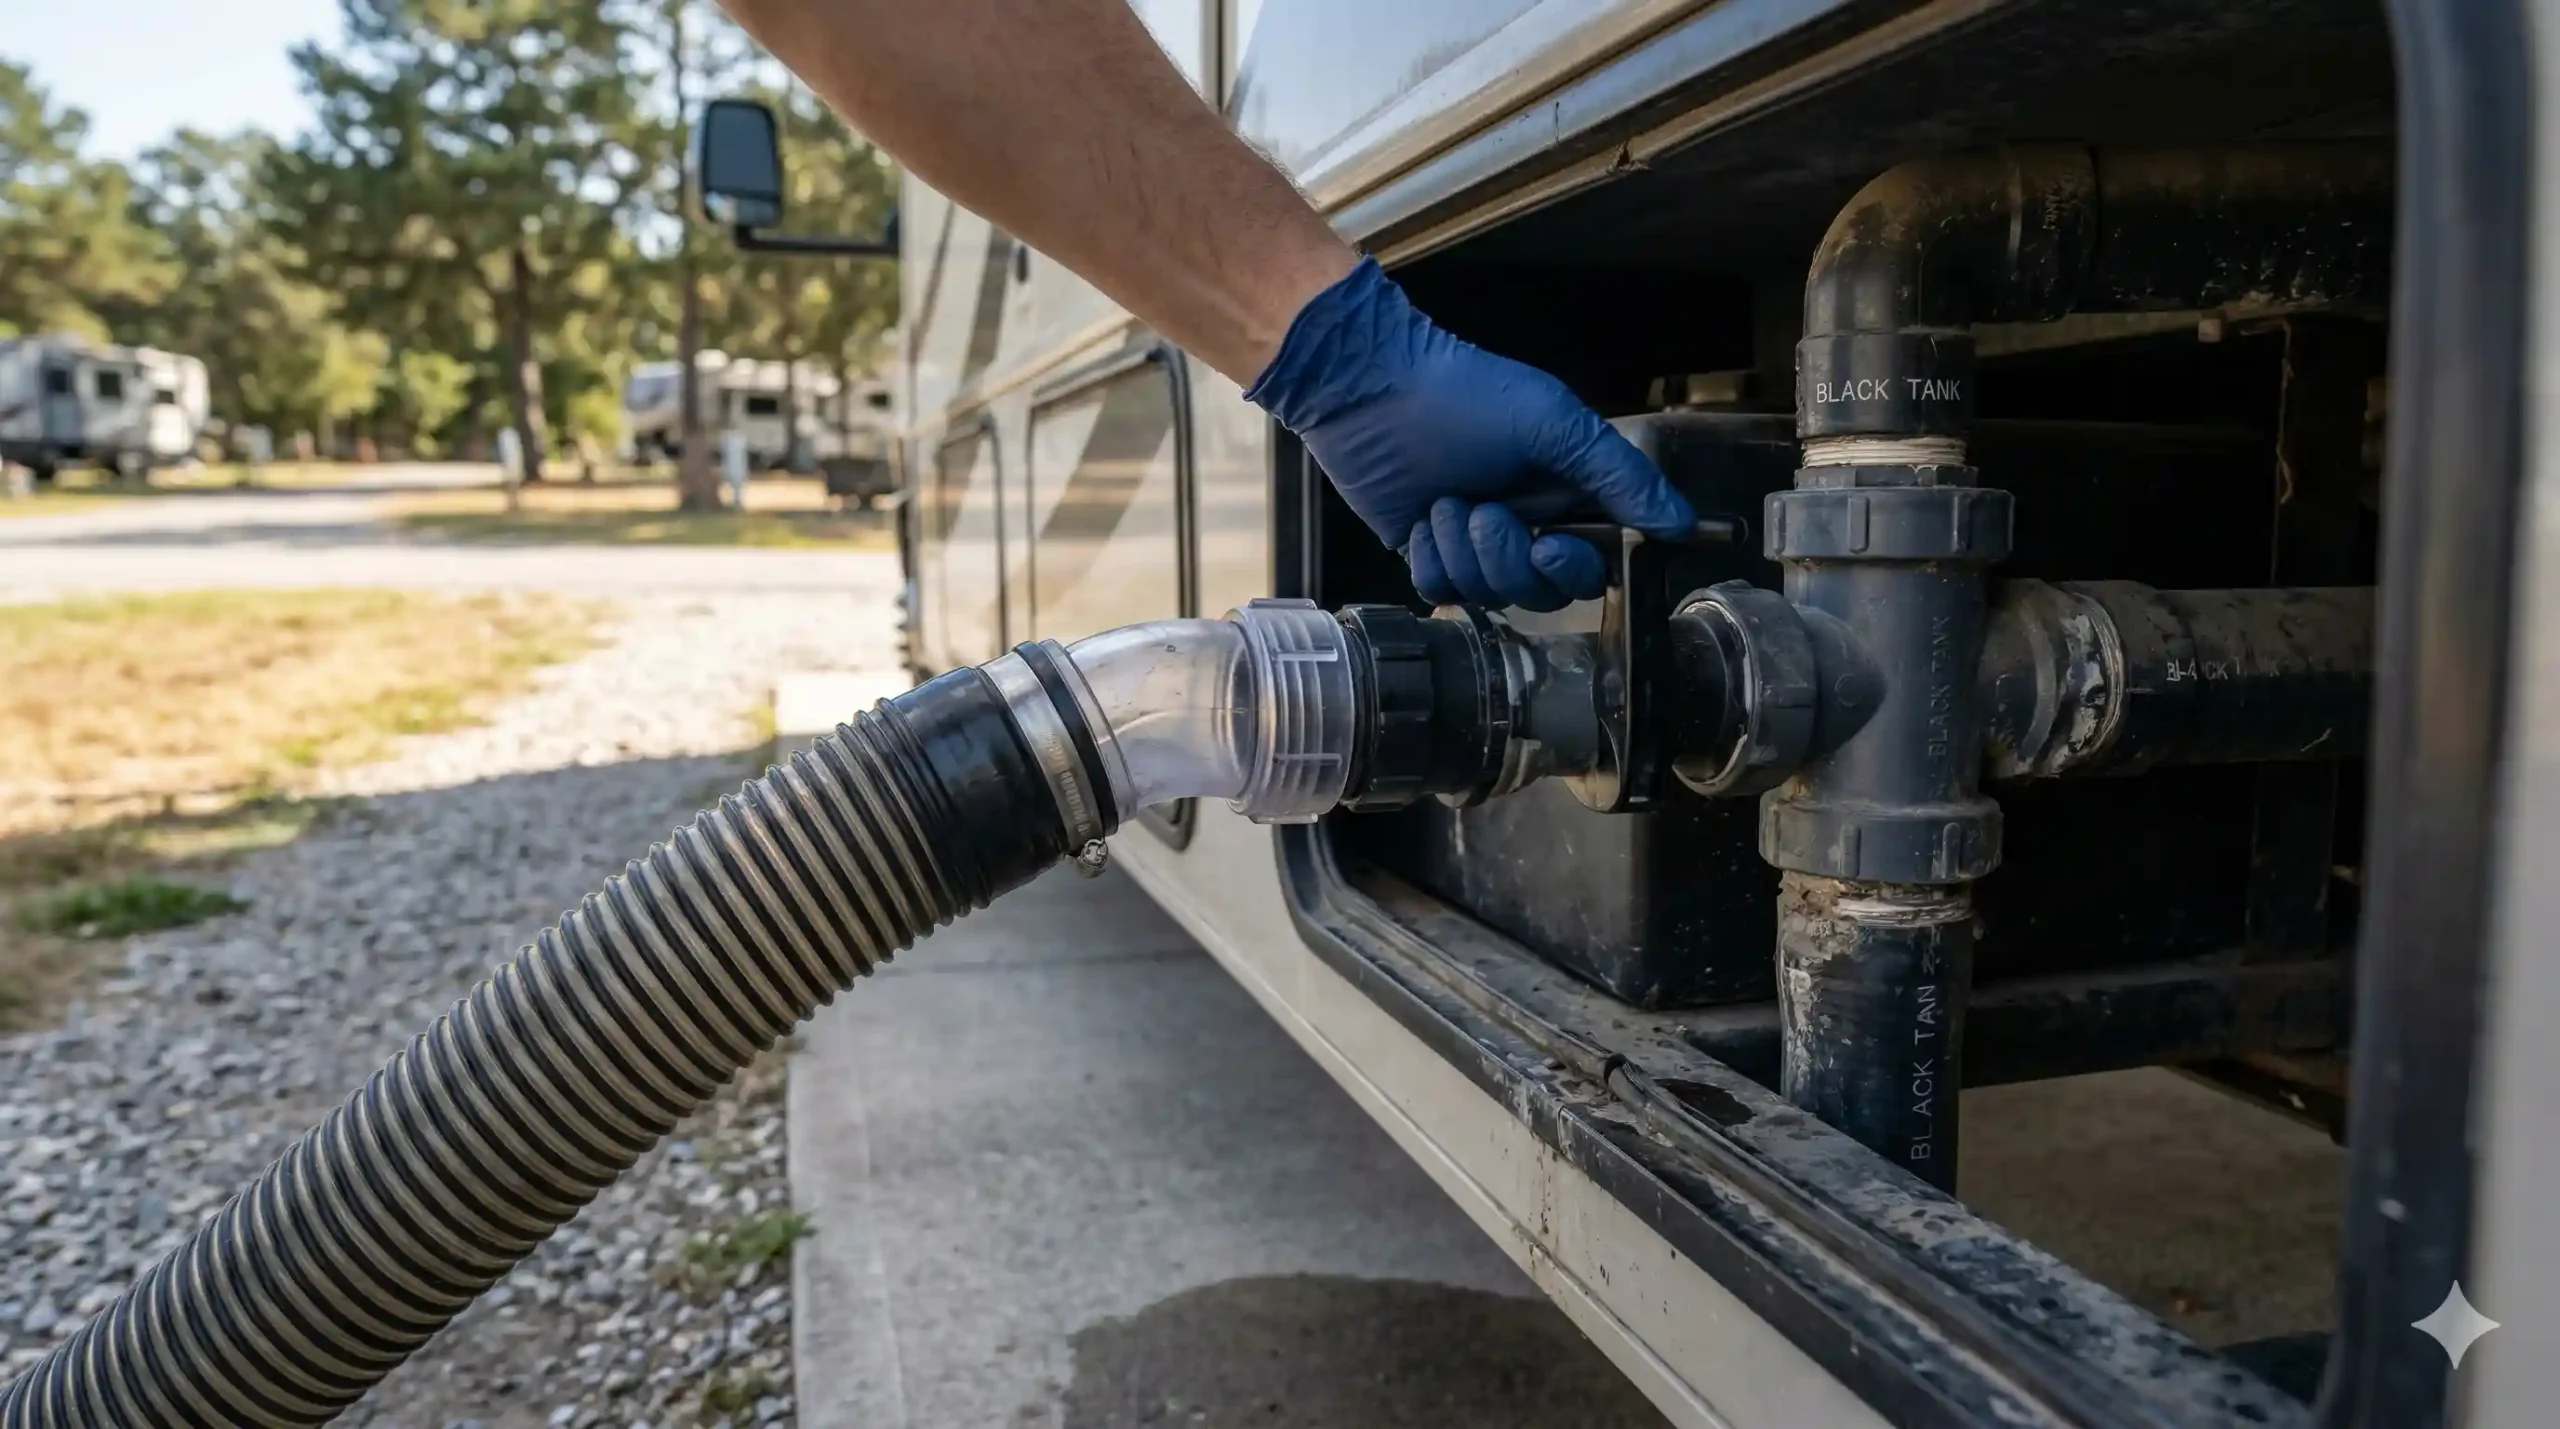
Before you do anything else: connect your sewer hose to the dump station. If the valve suddenly opens mid-fix, you want waste going into the sewer — not across the ground. And if the tank is full, never yank hard on the handle repeatedly. Forcing a stuck valve on a full black tank risks cracking the housing or snapping the rod. That turns a $30 problem into a mobile tech bill.
Method A: Dawn Soap Flush (Works Best on Partial Stucks or Partial Tank Loads)
Pour a full bottle of original Dawn dish soap directly into the toilet and let it sit for 20–30 minutes. The soap works as a degreaser and light lubricant, breaking up waste that’s binding the gate. Some RVers add 10–20 pounds of bagged ice and drive around to agitate the mixture — this works better on gray tanks or a partially full black tank where there’s room for the ice to move. On a completely full black tank, there’s no space for agitation to help much. In that case, flush in as much warm water as possible after the Dawn and let it sit. If your RV has a built-in black tank rinse system or flush wand, run it while the soap is in the tank — that spray agitation is more targeted and effective than ice for a full tank. When you’re ready, tap the valve handle a few times with a hammer to vibrate loose any residue, then try the handle again.
Method B: Silicone Lubricant — The Right Product, Applied the Right Way
Don’t use WD-40. Ever. The Getaway Couple are clear on this: WD-40 is a solvent, not a true lubricant, and it attacks rubber seals over time — the exact seals keeping waste inside your tank.
The right product is silicone-based, full stop. Silicone doesn’t swell or degrade rubber, it conditions the seals and keeps the gate sliding freely. Your three best options:
- Dow Corning 111 — The most recommended product across RV communities. Thick compound, excellent seal conditioning, long-lasting.
- Thetford RV Drain Valve Lubricant — Made specifically for RV gate valves. Heavier than water, so it sinks to the bottom of a tank and can reach the valve even when you can’t.
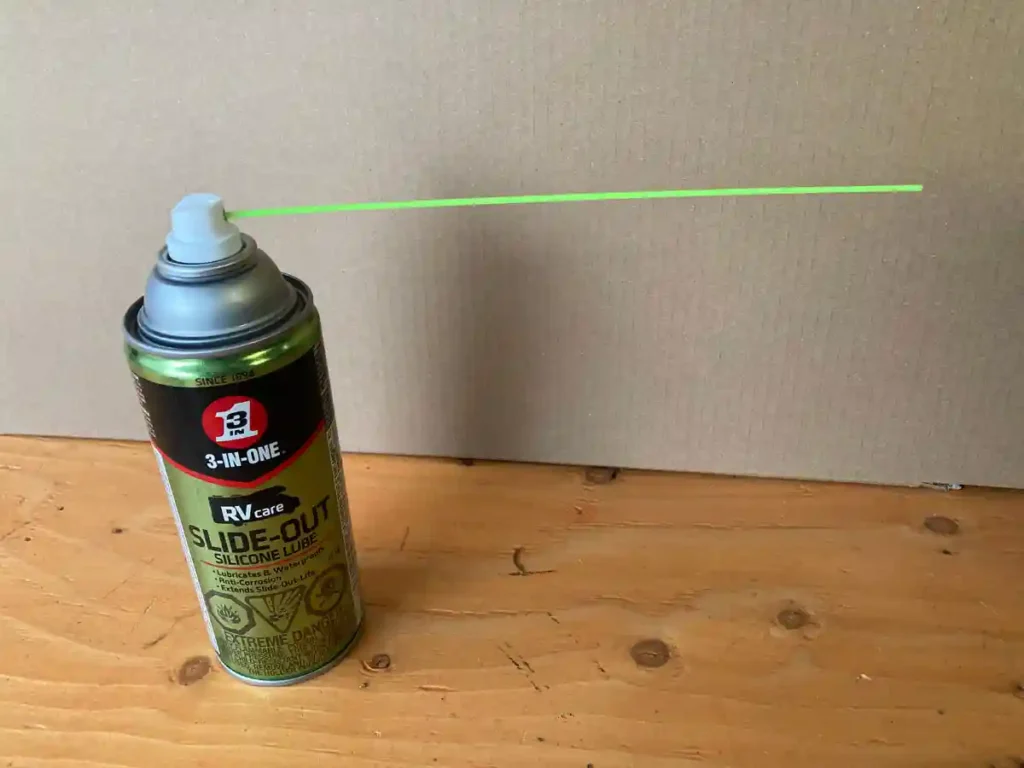
- Plain silicone spray — Available at any hardware store. Not as long-lasting as a compound, but it works in a pinch and is safe on rubber seals.
If the tank is empty: apply lubricant directly to the valve stem, gate, and rubber seals. Work the handle open and closed several times to distribute it. If the tank is full and you can’t access the valve directly, move on to Method C.
Method C: The Drill-Hole Technique (Last Resort for a Full, Stuck-Closed Tank)
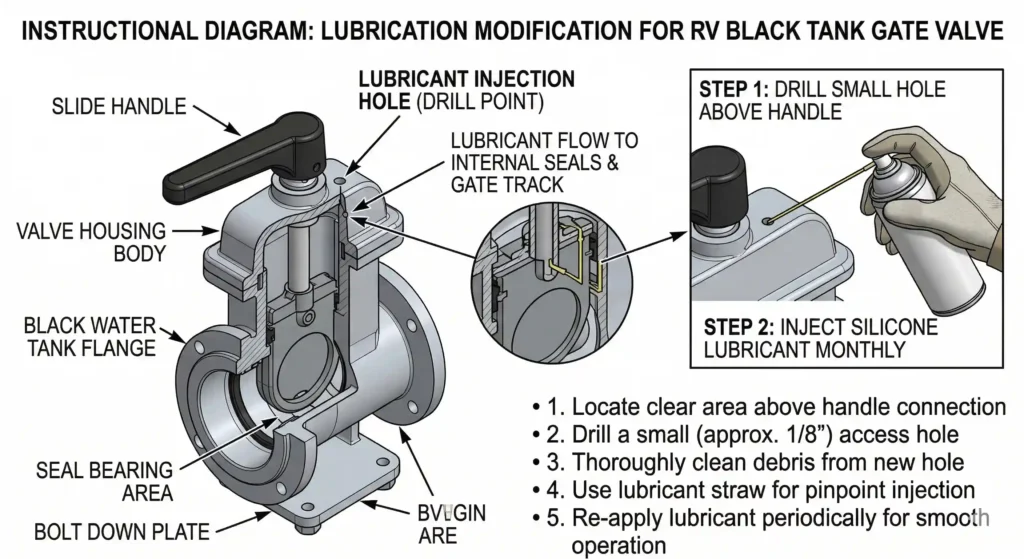
Use this method only when Methods A and B have failed and the tank is still full and stuck. It works — The Camping Nerd outlines the exact process — but it comes with real risks if done carelessly. Drilling into the wrong spot or at the wrong angle can crack the valve housing and create a leak you can’t plug. Follow this exactly:
- Connect your sewer hose to a dump station first. Non-negotiable. If the valve opens mid-drill, waste will flow.
- Locate the front face of the gate valve housing, just above the pull handle.
- Drill a small hole — 3/16 inch is the standard size — into the housing at that point.
- Insert the straw nozzle from your silicone lubricant can and fill the valve body with lubricant until it’s full.
- Plug the hole immediately with a small screw to prevent waste from leaking out when the valve opens.
- Let the lubricant sit for several minutes, then try the handle again — firmly, but without jerking.
Once open and drained: remove the screw, apply fresh lubricant with the valve in the open position, work the gate back and forth several times to coat the seals, and replace the screw. This valve will need full replacement soon — treat this as a get-home fix, not a permanent solution.
Fix #2 — Mechanical Force (When Lubrication Isn’t Enough)
If the lubricant didn’t do the job, it’s time to apply some controlled mechanical pressure. Controlled is the key word here. Too much force and you’ll crack the housing or snap the handle — which turns a fixable problem into an emergency replacement.
Tap the valve housing with a hammer. RV repair experts recommend tapping around the circumference of the valve — the vibration can break up the residue that’s binding the gate. Moderate taps only. Think firm, not furious.
Wiggle the handle with pliers. If the handle is stuck but still connected, wrap the jaws of your pliers with a rag to protect the plastic and gently rock it side to side. Don’t crank — work it slowly.
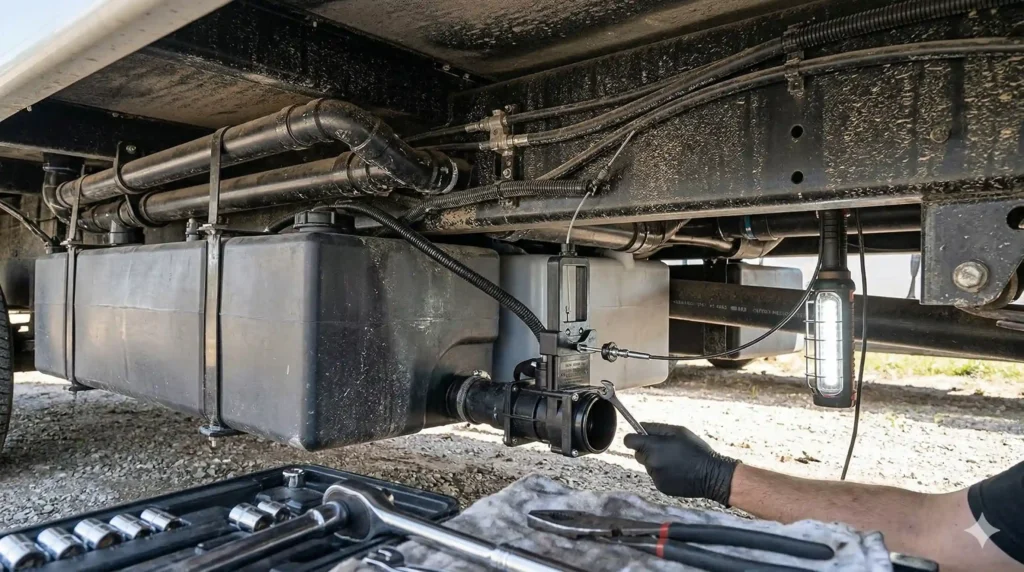
Manually move the gate plunger. If you can get underneath the RV and access the valve body, a flathead screwdriver or needle-nose pliers can be used to push or pull the gate plunger directly. This is especially useful when the rod has come loose but the gate itself is still functional.
One creative fix that’s made the rounds in RV communities: using a cordless drill with a thin 5-inch screw fed through the rod entrance hole, screwed directly into the gate slide, then pulled back by the screw head. Clean, quick, and mess-free when done right.
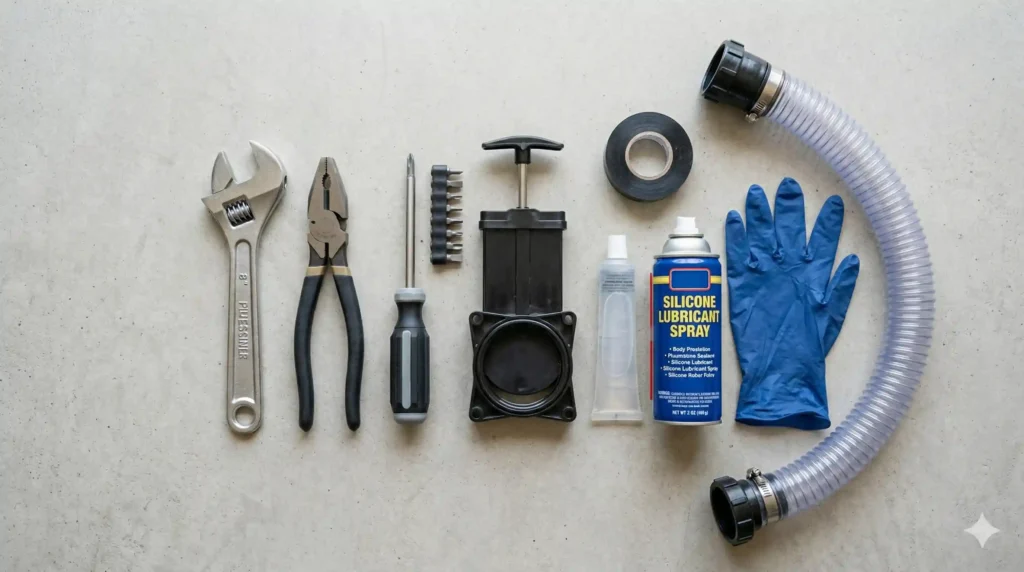
Gear you’ll want on hand:
- Rubber gloves (nitrile, heavy duty)
- Safety glasses
- Flathead screwdriver
- Needle-nose pliers
- Small hammer
- Bucket or plastic gutter section to catch any drips
Fix #3 — Disconnected Cable or Rod? Here’s How to Reattach It
If your pull handle feels hollow — like there’s nothing on the other end — the cable or rod has disconnected from the gate valve. This is a mechanical fix, not a lubrication problem.
Here’s what to do:
- Access the valve. You’ll need to get under the RV. Most black tank valves are located beneath the underbelly coroplast. As discussed extensively in Grand Design RV forums, you can either remove a full section of coroplast or cut a small access panel directly above the valve location. Cutting is faster if you know exactly where the valve is — it’s typically positioned above or near the center axle on the driver’s side.
- Locate the rod connection. The cable or rod connects to a plunger that runs through the side of the valve body, secured with an Allen head screw. Have a helper pull the interior handle while you watch — if the rod moves, the valve itself is functional and you just need to clear a blockage. If the rod doesn’t move, it’s disconnected.
- Reattach or replace the cable. Reconnect the rod using the Allen head screw. If the cable is kinked, rusted, or snapped, it needs to be replaced. The Valterra TC372 comes with a 72-inch flexible cable and complete hardware, making it one of the cleanest replacement options for cable-operated systems.
Can’t get under the RV yourself? A mobile RV technician is your best call here. Most carry valve hardware on their trucks and can handle the repair in under an hour on-site.
When to Replace the Gate Valve (Not Just Fix It)
There’s a point where fixing stops making sense. If your valve shows any of these signs, replacement is the smarter move:
- The gate is cracked or broken inside the housing
- The valve leaks waste even when closed
- The housing itself is cracked or warped
- You’ve fixed it twice already and it keeps sticking
Seasoned RVers recommend keeping a spare replacement valve on hand — they’re inexpensive, and having one already in the storage bay means you choose the time and place of the fix, not the dump station.
The DIY Replacement Process:
If the valve is stuck closed and the tank is full, you have one important option before attempting to remove the valve: call a pump-out service. Many RV parks and septic companies offer mobile waste pump-out — they extract the contents directly through the toilet or a clean-out port without needing the dump valve to open at all. It’s worth a phone call before you crawl under the rig with a wrench and a full black tank.
- Empty the black tank as much as possible before starting. If the valve won’t open, arrange a pump-out first (see above).
- Place a bucket or plastic gutter section underneath the valve — as a practical tip from RV Tip of the Day, a plastic house gutter works perfectly to redirect any drips toward the sewer.
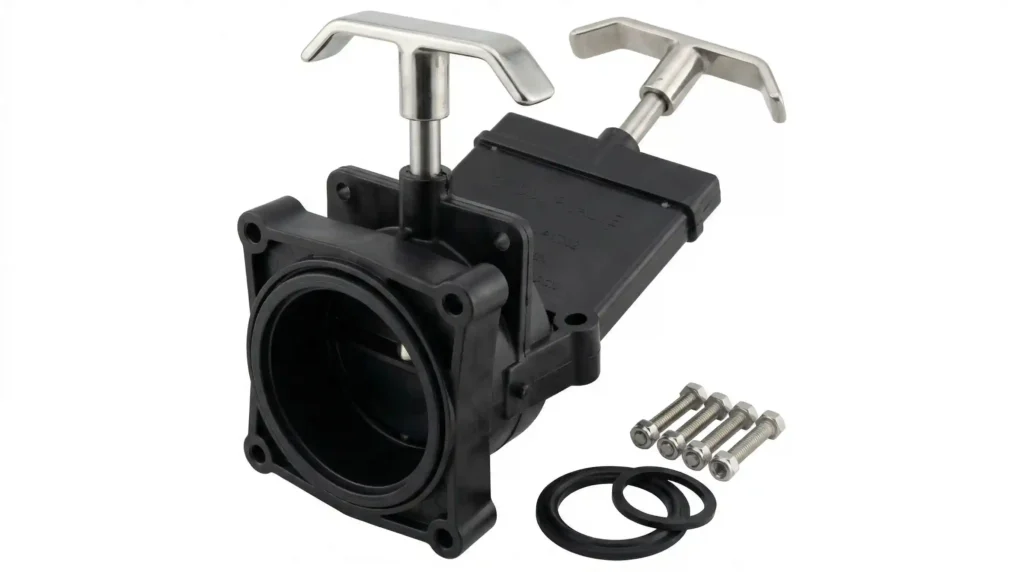
- Locate and remove the four bolts securing the valve to the tank flange. Use one wrench to hold the bolt and another to loosen the nut.
- Pull the old valve free. The Savvy Campers note that you’ll also find two flanges applying pressure on either side of the valve — remove those as well.
- Clean the sealing surfaces around the tank flange opening.
- Apply a light coat of silicone lubricant to the new valve seals before fitting.
- Seat the new valve, replace the flanges, and hand-tighten the bolts before finishing with a wrench. Don’t overtighten — you risk cracking the plastic flanges.
- Open and close the valve several times to confirm smooth operation.
Best Replacement Gate Valves to Buy
Not all replacement valves are equal. Here’s how the main options stack up:
| Product | Type | Best For | Key Feature |
|---|---|---|---|
| Valterra Bladex T1003VPM | Manual (aluminum handle) | Most standard RVs — universal fit | Compatible with Bladex, Bristol, and Anonda flanges. Includes seals, nuts, and bolts. |
| Valterra TC372 | Cable-operated (72″ cable) | Hard-to-reach valves, cable system replacements | Full kit includes valve body, cable, seals, and hardware. Cable is replaceable separately — unlike LaSalle Bristol alternatives. |
| Valterra EZ Valve E1003VP | Electric (switch-operated) | Upgrades, accessibility, full-time RVers | Opens with a flip of a switch. Indicator light confirms valve status. Wiring harness included. |
etrailer’s RV experts consistently recommend Valterra over LaSalle Bristol for one practical reason: Valterra valves allow you to replace individual components — including the cable — without replacing the entire valve body. That difference matters when you’re troubleshooting on the road.
How to Prevent This From Happening Again

The best stuck valve is the one that never happens. A few simple habits will keep your gate valve working smoothly season after season.
Lubricate every time you dump. After emptying the black tank, work the valve open and closed a few times and apply silicone lubricant to the gate and seals. This takes two minutes and eliminates the most common cause of sticking. Make it part of your routine when you spray your slide-outs — same trip under the rig, same time.
Use a black tank treatment after every dump. Enzyme-based treatments break down waste that accumulates near the valve and prevent odor-causing buildup. Check out our guide to the best RV black tank treatments for a breakdown of what actually works versus what’s just marketing.
Flush the tank completely — every time. After dumping, close the valve and refill the tank halfway with fresh water before dumping again. Never leave the valve cracked open at full hookup sites — that dries out the seals and creates the pyramid plug problem. For more on that, read our breakdown of why your RV toilet smells after dumping and how proper flushing habits solve most of it.
Switch to RV-safe toilet paper. Standard household toilet paper doesn’t break down well in holding tanks. It collects near the valve and contributes directly to blockages. Our RV toilet paper guide covers which brands dissolve fast enough to actually protect your system.
Winterize properly. If your RV is going into storage during cold months, winterize the entire waste system — not just the fresh water lines. Use RV antifreeze in the holding tanks and insulate exposed valve assemblies with foam pipe wrap. Our step-by-step RV toilet winterization guide walks through the full process.
Keep a spare valve in storage. Replacement valves cost between $15–$40 depending on the model. That’s cheap insurance compared to a $200+ mobile tech call at a campground. Buy one, throw it in the utility bay, and forget about it — until you need it.
Frequently Asked Questions
Can I open a stuck black tank valve without draining it first?
Yes — and sometimes you don’t have a choice. For a full black tank, the most reliable method is the drill-hole lubricant technique. The Camping Nerd’s drill method was specifically designed for situations where the tank can’t be emptied first. Dish soap helps, but ice agitation is more effective on gray tanks or partial loads where there’s room for movement — not on a full black tank. Always connect your sewer hose to a dump station before attempting anything. If the valve won’t open at all and your tank is completely full, a mobile pump-out service is the safest first call before you start drilling or wrenching.
Is WD-40 safe to use on RV gate valves?
No. WD-40 is a water displacer and light solvent — it’s not a long-term lubricant, and it degrades rubber seals over time. RV maintenance experts are consistent on this point: use silicone-based lubricant only. Products like Dow Corning 111 or Thetford’s RV drain valve lubricant are the right tools for this job. They protect seals instead of breaking them down.
How often should I lubricate my black tank gate valve?
Lubricate at the start of the camping season, at the midpoint, and at the end — at minimum. If you’re a frequent or full-time RVer, lubricate every time you dump the tank. Regular lubrication is the single most effective way to keep the valve opening and closing smoothly all season. Two minutes at every dump station beats two hours at the wrong one.
What’s the difference between a gate valve and a ball valve on an RV?
A gate valve uses a sliding flat plate (the gate) that moves in and out of the flow path when you pull or push the handle. A ball valve uses a rotating ball with a hole through it — turn it 90 degrees and it’s open, turn it back and it’s closed. Most stock RVs ship with gate valves because they’re cheaper to manufacture, but ball valves are more reliable long-term and less prone to the buildup issues that cause sticking. Some RVers upgrade to ball valves or electric valves like the Valterra EZ Valve when they replace a failed gate valve.
How do I know if my black tank cable is broken vs. the valve itself?
Pull the interior handle and pay attention to how it feels. If the handle pulls out with no resistance — almost like it’s not connected to anything — the cable or rod has disconnected from the valve. If the handle is hard and stiff and barely moves, the valve itself is the problem (buildup or seized seals). A confirmed way to check: have a helper pull the handle while you watch the valve plunger from underneath the RV. If the plunger doesn’t move at all, the connection is broken. If it moves but the tank still won’t drain, the gate itself is jammed or there’s a clog between the tank and the valve.
Hi, I’m Daniel Brooks. I research and write about RV toilet repair, black tank maintenance, and sanitation troubleshooting. I create practical guides that help RV owners fix problems quickly and prevent costly damage.